● HA작업) 초기구입 ESPhome esp32 ct-clamp 에너지미터 드라이브 설치 HAOS에 설치 설정하기
♨ 카랜더 일정 :
2023년08월26일
본문
● HA작업) ESPhome esp32 ct-clamp 에너지미터 HAOS에 설치 설정하기
ESP32 개발 보드, 와이파이 + 블루투스, 초저전력 소비, 듀얼 코어 ESP-32S ESP32-WROOM-32D/32U, ESP 32 확장 보드
•WiFi+Bluetooth Module: E5P32-WROOM-32
•Specifications. HW-395(GP2102)
•Pin: 38Pin
•lnterface: Type-C

구입제품
1) esp32 cp210x 윈도우 com port 연결용 드라이브 다운로드 연결작업
https://www.silabs.com/developers/usb-to-uart-bridge-vcp-drivers?tab=downloads

c:\Users\shimss\Downloads\CP210x_Universal_Windows_Driver (20230826_1900_32).zip

장치 관리자에 연결확인 > 케이블과 USB 에 연결 포트를 찾아 연결합니다

HAOS에서 esphome으로 이동 > newdivice >>

적당한 이름을 주고 >> 다음
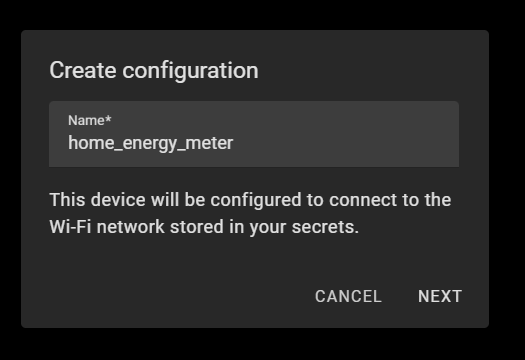
device 선택 > esp32


다운로드 준비

다운
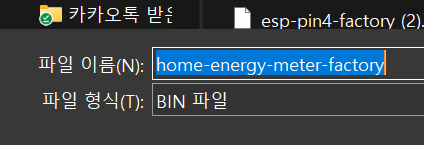


install > 다운로드한 파일 선택 install


boot를 누르고

install > 퍼센트표시 되면 boot 버튼을 떼고 기달립니다.


3점 메뉴에서 disconnect 하고 종료

ESPHome 화면에서 >> log 확인

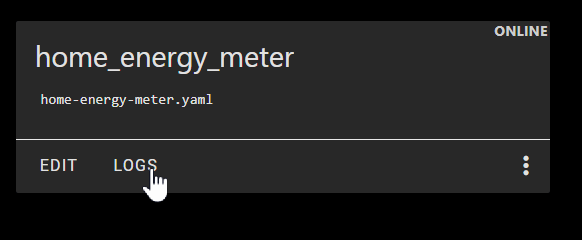

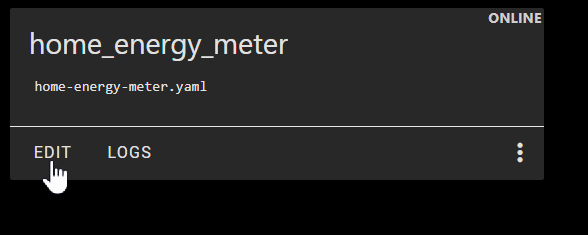
ESPHome 화면에서 >> edit > install 다시 wifi 조건으로 진행 합니다
기본적으로 기존에 wifi / password 설정을 1번째 설치시
/config/secrets.yaml 에 사전 설정해 놓아야 합니다,,,,저는 기본으로 1번이후 설치로 자동연결됨


IP Address : 192.168. 0.74
를 확인하여 edit 하여 고정ip로 변경 진행 합니다
기존

다음을
추가하자

edit 후에 다시 install 을 wifi 로 진행 합니다.

연결 성공 입니다
2단계로 esphome에 주변 기기를 연결 hardware 구성 합니다
- ct-clamp를 연결 진행 합니다
edit 하여
# captive_portal: 다음에 붙여넣습니다.
# ==========================================
time:
- platform: homeassistant
id: homeassistant_time
timezone: Asia/Seoul
sensor:
# ================================
# ct_clamp connection at esp32
# ================================
- platform: adc
pin: GPIO34
id: adc_sensor
accuracy_decimals: 4
attenuation: 11db
update_interval: 10s
- platform: ct_clamp
sensor: adc_sensor
name: "raw"
update_interval: 10s
accuracy_decimals: 4
- platform: ct_clamp
sensor: adc_sensor
sample_duration: 300ms
name: "Electricity usage_current(A)"
update_interval: 10s
accuracy_decimals: 4
filters:
- calibrate_linear:
- 0.0 -> 0.0
- 0.1146 -> 4.8
- platform: ct_clamp
sensor: adc_sensor
sample_duration: 300ms
name: "Electricity usage_Power(W)"
id: esp_watts
update_interval: 10s
accuracy_decimals: 0
filters:
- calibrate_linear:
- 0.0 -> 0.0
- 0.1146 -> 4.8
- lambda: return x * 218.4 / 1;
unit_of_measurement: "W"
- platform: total_daily_energy
name: "Total Daily Electricity"
unit_of_measurement: 'Wh'
power_id: esp_watts
accuracy_decimals: 0
filters:
device_class: energy
# sensor.voltage
# Homeassistant 통합구성요소에서 680검색
- platform: homeassistant
id: raw
entity_id: sensor.energymeterip67_raw
internal: true
- platform: homeassistant
id: current
entity_id: sensor.home_energy_meter_electricity_usage_currenta
internal: true
- platform: homeassistant
id: power
entity_id: sensor.home_energy_meter_electricity_usage_powerw_2
internal: true
- platform: homeassistant
id: daily_energy
entity_id: sensor.home_energy_meter_total_daily_electricity
internal: true
# https://esphome.io/components/display/lcd_display.html
# https://esphome.io/components/sensor/bme680.html?highlight=bme680
# https://docs.openenergymonitor.org/electricity-monitoring/ct-sensors/interface-with-arduino.html
# https://www.speaktothegeek.co.uk/2022/08/esphome-ct-clamp-power-and-energy-monitor/
# https://community.home-assistant.io/t/energy-tracking-with-esp32-ct-clamp-sensor-from-an-efergy-elite-1-0r/344002
# https://community.home-assistant.io/t/ct-clamp-sensor-interference-on-esp32-adc/450366/2
# 20230810_1322_51
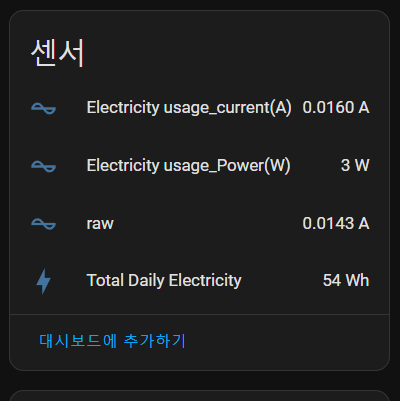
정상적으로 값을 읽고 있나 확인

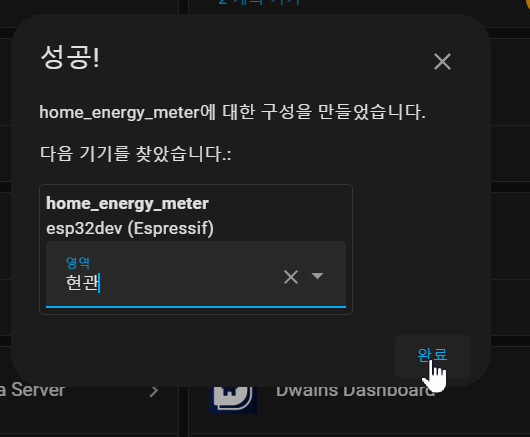
통합구성요소 추가

구성하기

성공
esphome으로 확인 합니다


이제 어덴가 표시를 위한 작업으로 구성요소id를 복사 메모합니다

sensor.home_energy_meter_electricity_usage_currenta
sensor.home_energy_meter_electricity_usage_powerw
sensor.home_energy_meter_raw
sensor.home_energy_meter_total_daily_electricity

# captive_portal: 다음에 붙여넣습니다.
  # ==========================================
time:
  - platform: homeassistant
    id: homeassistant_time
    timezone: Asia/Seoul

sensor:
# ================================
#  ct_clamp connection at esp32
# ================================
  - platform: adc
    pin: GPIO34
    id: adc_sensor
    accuracy_decimals: 4
    attenuation: 11db
    update_interval: 10s
  - platform: ct_clamp
    sensor: adc_sensor
    name: "raw"
    update_interval: 10s
    accuracy_decimals: 4

  - platform: ct_clamp
    sensor: adc_sensor
    sample_duration: 300ms
    name: "Electricity usage_current(A)"
    update_interval: 10s
    accuracy_decimals: 4
    filters:
      - calibrate_linear:
        - 0.0 -> 0.0
        - 0.1146 -> 0.1146
  - platform: ct_clamp
    sensor: adc_sensor
    sample_duration: 300ms
    name: "Electricity usage_Power(W)"
    id: esp_watts
    update_interval: 10s
    accuracy_decimals: 0
    filters:
      - calibrate_linear:
        - 0.0 -> 0.0
        - 0.1146 -> 4.8
      - lambda: return x * 218.4 / 1;
    unit_of_measurement: "W"
  - platform: total_daily_energy
    name: "Total Daily Electricity"
    unit_of_measurement: 'Wh'
    power_id: esp_watts
    accuracy_decimals: 0
    filters:
    device_class: energy
#=========================
#  디스플레이부분으로 설정하면 아래와 같이 구성 사례 입니다
#  여기는 모드 주석 처리합니다
# sensor.voltage
# Homeassistant 통합구성요소에서  esphome에서 검색
#=========================
  # - platform: homeassistant
  #   id: raw
  #   entity_id: sensor.home_energy_meter_raw
  #   internal: true
  # - platform: homeassistant
  #   id: current
  #   entity_id: sensor.home_energy_meter_electricity_usage_currenta
  #   internal: true

  # - platform: homeassistant
  #   id: power
  #   entity_id: sensor.home_energy_meter_electricity_usage_powerw
  #   internal: true

  # - platform: homeassistant
  #   id: daily_energy
  #   entity_id: sensor.home_energy_meter_total_daily_electricity
  #   internal: true
#=========================
#  디스플레이부분으로 설정하면 아래와 같이 구성 사례 입니다
#  여기는 모드 주석 처리합니다
# =================================== 20230826_2017_15
  # display:
  #   - platform: lcd_pcf8574
  #     dimensions: 20x4
  #     address: 0x27
  #     id: mydisplay
  #     user_characters:
  #       - position: 1
  #         data:
  #           - 0b00000
  #           - 0b00010
  #           - 0b00101
  #           - 0b00010
  #           - 0b00000
  #           - 0b00000
  #           - 0b00000
  #           - 0b00000
  #       - position: 2
  #         data:
  #           - 0b01000
  #           - 0b10101
  #           - 0b01011
  #           - 0b00110
  #           - 0b01100
  #           - 0b11010
  #           - 0b10101
  #           - 0b00110
  #     lambda: |-
  #       it.strftime(0, 0, "Time > %H:%M-%S %a", id(homeassistant_time).now());
  #       it.strftime(0, 1, "Date > %Y-%b-%d", id(homeassistant_time).now());
  #       it.printf(0, 2, "Power> %.0f W", id(power).state);
  #       it.printf(14, 2, "A>%.1f", id(current).state);
  #       it.printf(0, 3, "Temp1> %.1f C", id(temperature).state);
  #       it.printf(11, 3, "x01");
  #       it.printf(14, 3, "%.1f ", id(humidity).state);
  #       it.printf(18, 3, "x02");
# =================================== 20230826_2017_15
# https://esphome.io/components/display/lcd_display.html
# https://esphome.io/components/sensor/bme680.html?highlight=bme680
# https://docs.openenergymonitor.org/electricity-monitoring/ct-sensors/interface-with-arduino.html
# https://www.speaktothegeek.co.uk/2022/08/esphome-ct-clamp-power-and-energy-monitor/
# https://community.home-assistant.io/t/energy-tracking-with-esp32-ct-clamp-sensor-from-an-efergy-elite-1-0r/344002
# https://community.home-assistant.io/t/ct-clamp-sensor-interference-on-esp32-adc/450366/2
# 20230826_2021_14
# captive_portal: 다음에 붙여넣습니다.
# ==========================================
time:
- platform: homeassistant
id: homeassistant_time
timezone: Asia/Seoul
sensor:
# ================================
# ct_clamp connection at esp32
# ================================
- platform: adc
pin: GPIO34
id: adc_sensor
accuracy_decimals: 4
attenuation: 11db
update_interval: 10s
- platform: ct_clamp
sensor: adc_sensor
name: "raw"
update_interval: 10s
accuracy_decimals: 4
- platform: ct_clamp
sensor: adc_sensor
sample_duration: 300ms
name: "Electricity usage_current(A)"
update_interval: 10s
accuracy_decimals: 4
filters:
- calibrate_linear:
- 0.0 -> 0.0
- 0.1146 -> 0.1146
- platform: ct_clamp
sensor: adc_sensor
sample_duration: 300ms
name: "Electricity usage_Power(W)"
id: esp_watts
update_interval: 10s
accuracy_decimals: 0
filters:
- calibrate_linear:
- 0.0 -> 0.0
- 0.1146 -> 4.8
- lambda: return x * 218.4 / 1;
unit_of_measurement: "W"
- platform: total_daily_energy
name: "Total Daily Electricity"
unit_of_measurement: 'Wh'
power_id: esp_watts
accuracy_decimals: 0
filters:
device_class: energy
#=========================
# 디스플레이부분으로 설정하면 아래와 같이 구성 사례 입니다
# 여기는 모드 주석 처리합니다
# sensor.voltage
# Homeassistant 통합구성요소에서 esphome에서 검색
#=========================
# - platform: homeassistant
# id: raw
# entity_id: sensor.home_energy_meter_raw
# internal: true
# - platform: homeassistant
# id: current
# entity_id: sensor.home_energy_meter_electricity_usage_currenta
# internal: true
# - platform: homeassistant
# id: power
# entity_id: sensor.home_energy_meter_electricity_usage_powerw
# internal: true
# - platform: homeassistant
# id: daily_energy
# entity_id: sensor.home_energy_meter_total_daily_electricity
# internal: true
#=========================
# 디스플레이부분으로 설정하면 아래와 같이 구성 사례 입니다
# 여기는 모드 주석 처리합니다
# =================================== 20230826_2017_15
# display:
# - platform: lcd_pcf8574
# dimensions: 20x4
# address: 0x27
# id: mydisplay
# user_characters:
# - position: 1
# data:
# - 0b00000
# - 0b00010
# - 0b00101
# - 0b00010
# - 0b00000
# - 0b00000
# - 0b00000
# - 0b00000
# - position: 2
# data:
# - 0b01000
# - 0b10101
# - 0b01011
# - 0b00110
# - 0b01100
# - 0b11010
# - 0b10101
# - 0b00110
# lambda: |-
# it.strftime(0, 0, "Time > %H:%M-%S %a", id(homeassistant_time).now());
# it.strftime(0, 1, "Date > %Y-%b-%d", id(homeassistant_time).now());
# it.printf(0, 2, "Power> %.0f W", id(power).state);
# it.printf(14, 2, "A>%.1f", id(current).state);
# it.printf(0, 3, "Temp1> %.1f C", id(temperature).state);
# it.printf(11, 3, "x01");
# it.printf(14, 3, "%.1f ", id(humidity).state);
# it.printf(18, 3, "x02");
# =================================== 20230826_2017_15
# https://esphome.io/components/display/lcd_display.html
# https://esphome.io/components/sensor/bme680.html?highlight=bme680
# https://docs.openenergymonitor.org/electricity-monitoring/ct-sensors/interface-with-arduino.html
# https://www.speaktothegeek.co.uk/2022/08/esphome-ct-clamp-power-and-energy-monitor/
# https://community.home-assistant.io/t/energy-tracking-with-esp32-ct-clamp-sensor-from-an-efergy-elite-1-0r/344002
# https://community.home-assistant.io/t/ct-clamp-sensor-interference-on-esp32-adc/450366/2
# 20230826_2021_14
실제 측정치와 조정 합니다
- calibrate_linear:
- 0.0 -> 0.0
- 0.1146 -> 0.1146
일때
전체 로드 전류기준으로 실측치를 알아야 합니다
배전반에 전류 측정 장치를 물려 전류값을 측정 합니다
( 관리사무소에 연락 2~3번 측정하여 변경 하세요 )
높은 대역과 낮은 전류의 측정의 차이가 이있습니다
배전반에 전류 측정을 하여
- calibrate_linear:
- 0.0 -> 0.0
- 0.1146 -> 4.8
로 설정 사용중입니다
주) 선풍기의 소비전력 37W 낮은 전력사용은 현제의 ct-clamp의 규격에 맞지 않음
주) 낮은 전류의 값 반영이 상이합니다.

https://ko.aliexpress.com/item/1005004865997567.html
구성 방법은
https://11q.kr/www/bbs/board.php?bo_table=co3&wr_id=1201
ct-clamp 100a-50ma
windows driver
https://www.silabs.com/developers/usb-to-uart-bridge-vcp-drivers?tab=downloads
에제 참조
https://www.kincony.com/forum/showthread.php?tid=2829
참조 드립니다
☞ https://11q.kr 에 등록된 자료 입니다. ♠ 정보찾아 공유 드리며 출처는 링크 참조 바랍니다♠
뷰PDF 1,2
office view
관련자료
-
링크
-
첨부
-
이전
-
다음
댓글목록
등록된 댓글이 없습니다.