11.Nas_1


복구] [UNOFFICIAL] [9.0] Amlogic S922X 및 S905X2 용 TWRP 3.3.1


  • 링크

  • 첨부

  • 컨텐츠 정보


    본문

    복구] [UNOFFICIAL] [9.0] Amlogic S922X 및 S905X2 용 TWRP 3.3.1


    [RECOVERY][UNOFFICIAL][9.0] TWRP 3.3.1 for Amlogic S922X & S905X2

    https://forum.xda-developers.com/android-stick--console-computers/amlogic/recovery-twrp-3-3-1-amlogic-s922x-s905x3-t3974865/amp/

    MagendanzSENIOR MEMBER
    TWRP Banner

    Notes:
    • These are built with kernels from the latest Beelink GT-King (Amlogic S922X w/ w200 reference board) and Beelink GT1mini (Amlogic S905X2 w/ u212 reference board) firmware, but will probably work on any device based on the same reference boards.
    • The signed .ZIP files are suitable for installation with stock OEM recovery, but they use platform test keys and so might not work on builds requiring release keys.
    • If your device uses Android Verified Boot, there are additional measures you must take to successfully boot with a custom recovery partition.
    • This is unofficial and unsupported, so the usual caveats apply. Since we don't flash the bootloader, you should be able recover from any problems...but nothing is guaranteed.

    Not working:
    • MTP & ADB

    Downloads:
    S922X (Amlogic w400 reference board):S905X2 (Amlogic u212 reference board):
    Change Log:
    v3.3.1-0: (20191111)
    • Switched from KM9 to GT1mini kernel
    v3.2.3-0: (20190929)
    • Initial release

    Instructions:
    From OEM update app:
    • Copy .ZIP file to flash drive or microSD card
    • Open the UPDATE app and select Local Update
    • Select the .ZIP file and confirm
    • Note: No need to wipe data or cache
    From OEM stock firmware (with root):
    • Open terminal window (e.g. Terminal Emulator for Android by Jack Palevich)
    • Navigate to location of .IMG file
    • Type the following:
      Code:
      su
      dd if=twrp.img of=/dev/block/recovery
      reboot recovery
    From existing TWRP install:
    • Copy .IMG file to flash drive or microSD card
    • Click Install->Select Storage and pick the external drive
    • Click Install Image and select the .IMG file
    • Select Recovery partition and swipe to install
    • Reboot to Recovery

    Source:
    Donations:
    • Your support is always appreciated! Just click here.


    상기는 파일 다운로드 저장 내용 참조 합니다.

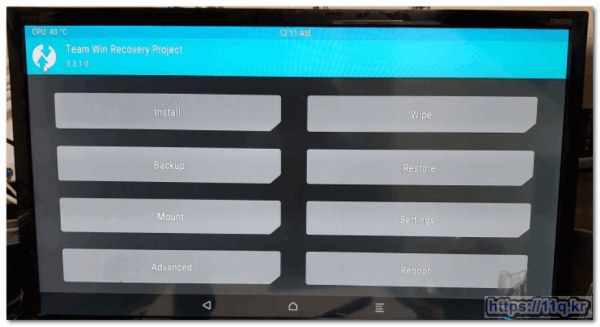
    sdcard로 부팅 백업용 twrp sdcard disk 만들기 입니다.

    먼저  microsd card를  rufus 다운로드 설치 실행 부팅디스크 만듭니다.

    추가적인 정보는  하기링크 참조 바랍니다

    https://m.cafe.naver.com/ArticleRead.nhn?clubid=25081608&menuid=70&articleid=26318&query=libreelec recovery

    부팅 화면

    3232235521_1576676756.6632.png

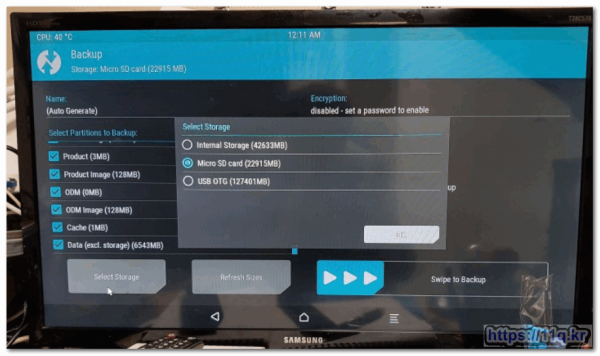
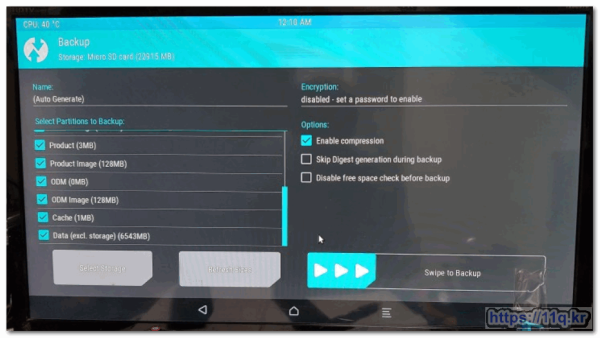
    백업설정

    3232235521_1576676726.1948.png

    3232235521_1576676692.1973.png

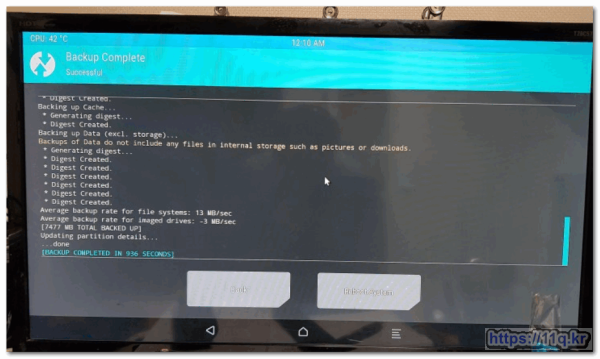
    백업 완료

    3232235521_1576676659.4656.png

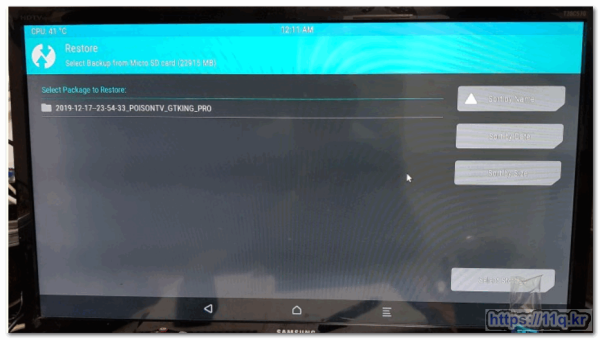
    저장된파일 /  restore 가능 합니다.

    3232235521_1576676792.9252.png

    주) 


    뷰PDF add1,add2


    관련자료

    댓글 2

    shimss@11q.kr님의 댓글


    전체 1,766 / 1 페이지
    게시물이 없습니다.(다음페이지로 이동 하세요)
    전체 1,766 / 1 페이지


    ♥간단_메모글♥


    최근글


    새댓글


    PHP 안에 HTML ☞ 홈페이지 화면갱신 시간은 ♨
    ▶ 2024-11-22 18:49:18

    오늘의 홈 현황


    • 현재 접속자♨ 620 명
    • 오늘 가입자※ 1 명
    • 어제 가입자※ 3 명
    • 주간 가입자※ 9 명
    • 오늘 방문자 3,010 명
    • 어제 방문자 3,272 명
    • 최대 방문자 13,042 명
    • 전체 방문자 4,802,166 명
    • 전체 게시물※ 8,855 개
    • 전체 댓글수※ 25,231 개
    • 전체 회원수 11,325 명

    QR코드


    ☞ QR코드 스캔은 kakao앱 자체 QR코드

    알림 0


    최신글↑