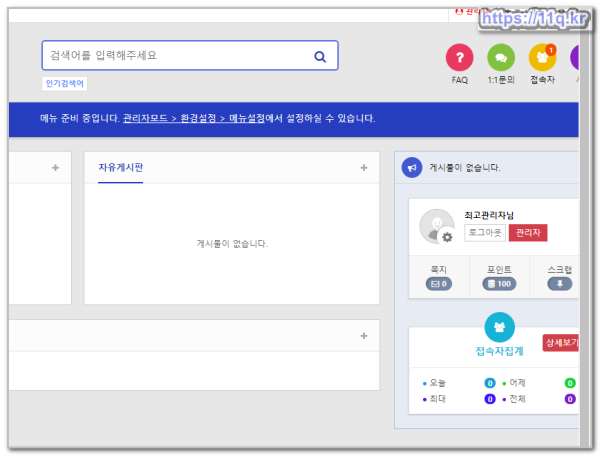
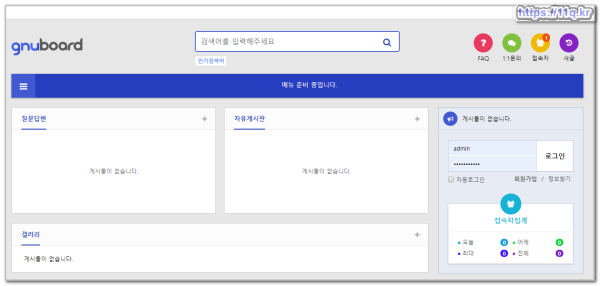
성공)U5mini 데비안9 Stretch 리눅스 업데이트 (베타)_2번째작업 초기화 펌웨어 재설치 처음부터 진행
♨ 카랜더 일정 :
본문
성공)U5mini 데비안9 Stretch 리눅스 업데이트 (베타)_2번째작업 초기화 펌웨어 재설치 처음부터 진행
(설치결과)
(설치사례)
조건: 전체 설치 초기화상태
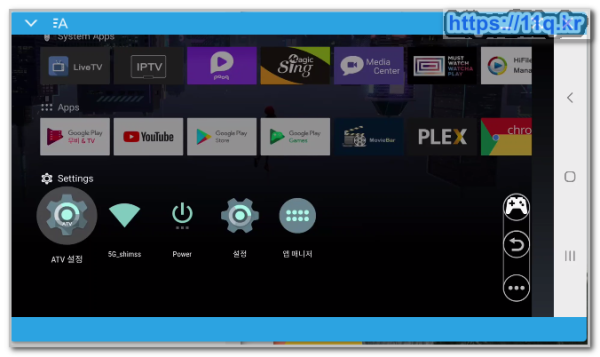
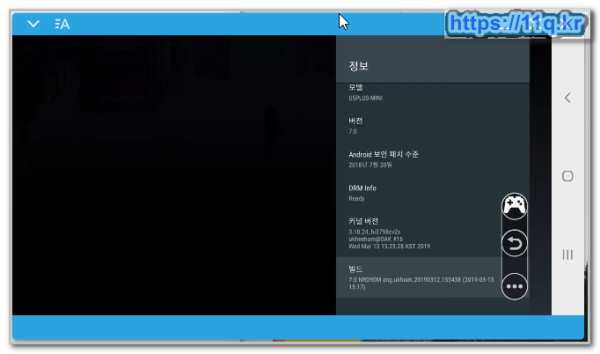
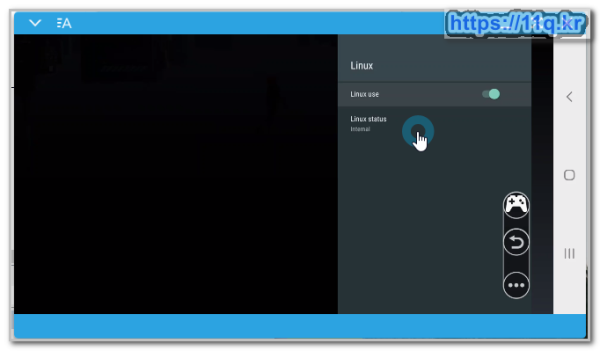
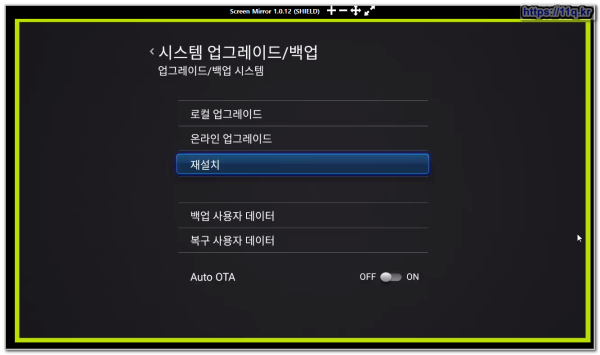
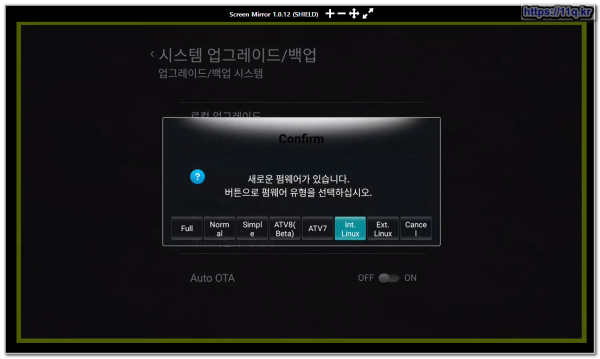
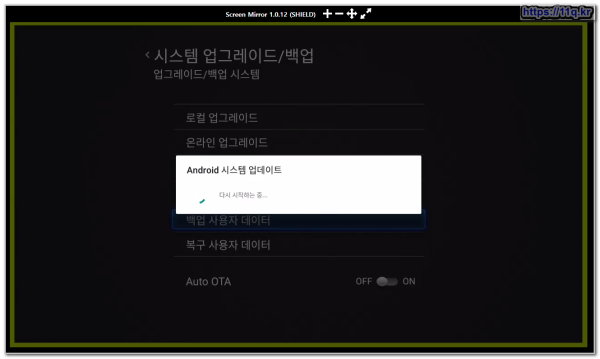
linux internal 재설치 상태에서 시작 합니다.
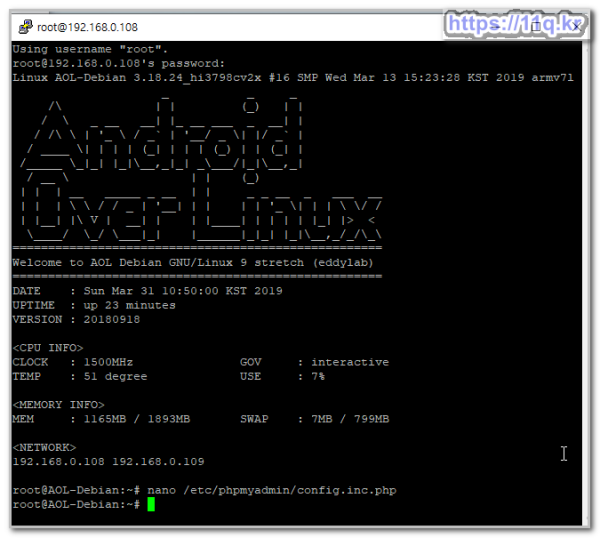
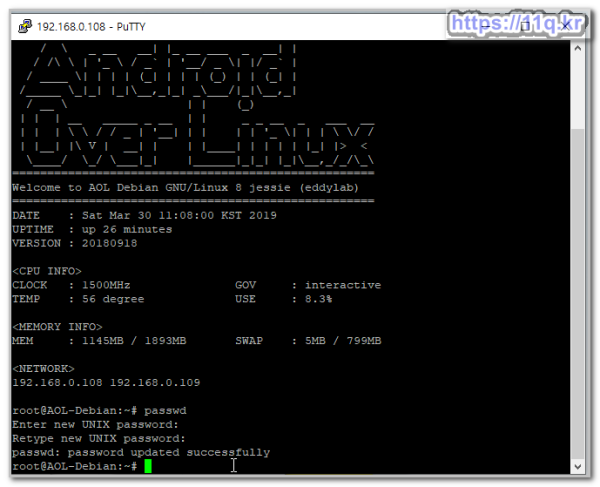
(초기접속 터미널)
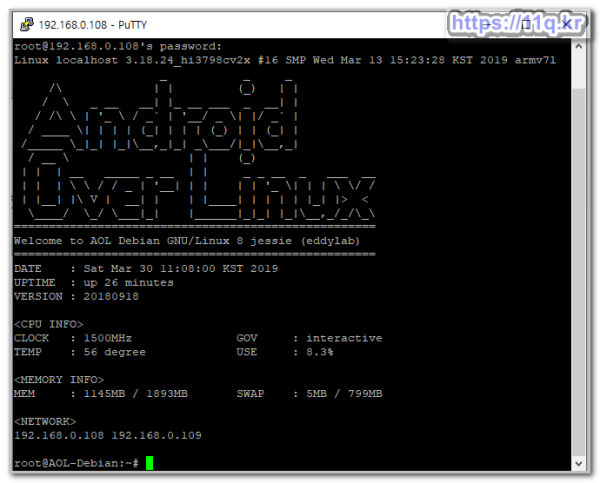
linux ssh 터미널 접속 putty 이용 합니다
초기 root /androidoverlinux

passwd
로 변경
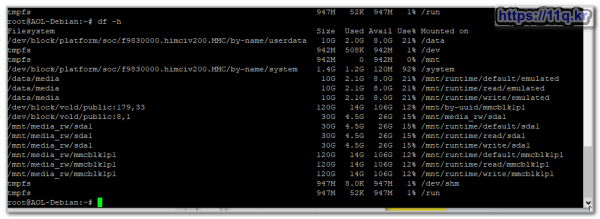
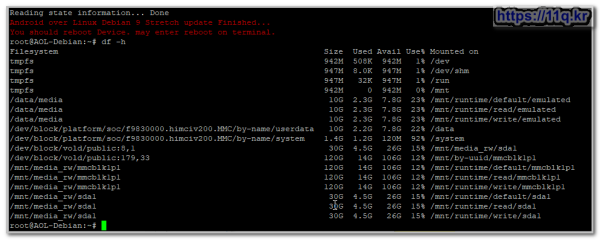
df- h
로 저장메모리 확인
(참조자료)
U5PVR / MINI 리눅스 펌웨어 데비안9 Stretch 업데이트 (베타)|03. U5셋탑 게시판
https://cafe.naver.com/mk802/30960
참조 설치 진행 합니다
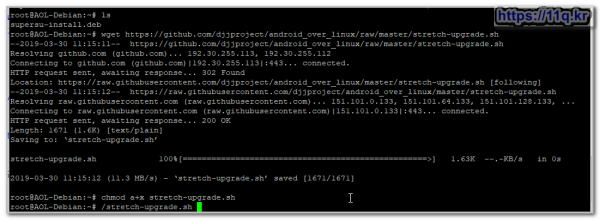
(명령어만 기록)
wget https://github.com/djjproject/android_over_linux/raw/master/stretch-upgrade.sh
chmod a+x stretch-upgrade.sh
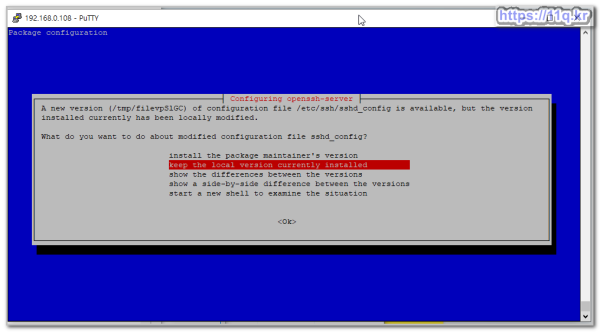
시작시간 11시 17분 ~ 종료 시간 11시11시26분에 ( 대략 10분후)
Keep the local version currently installed 를 선택
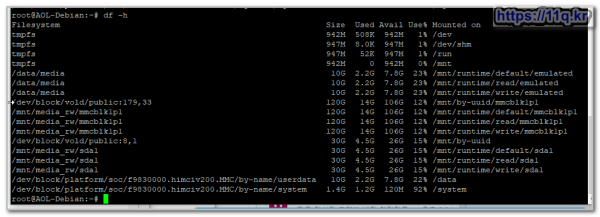
df -h
메모리 확인
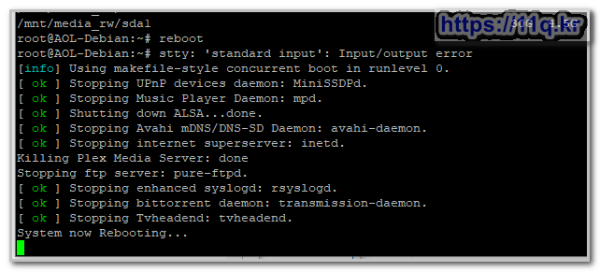
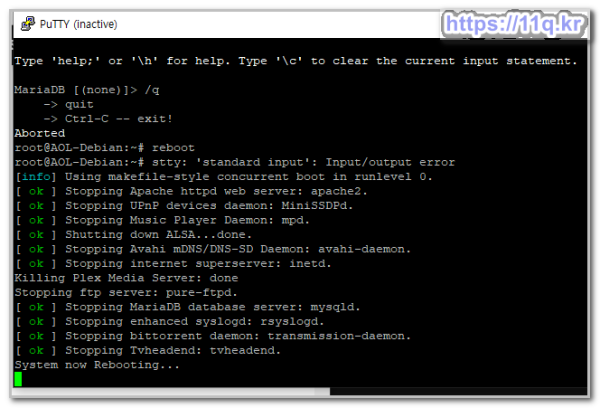
reboot
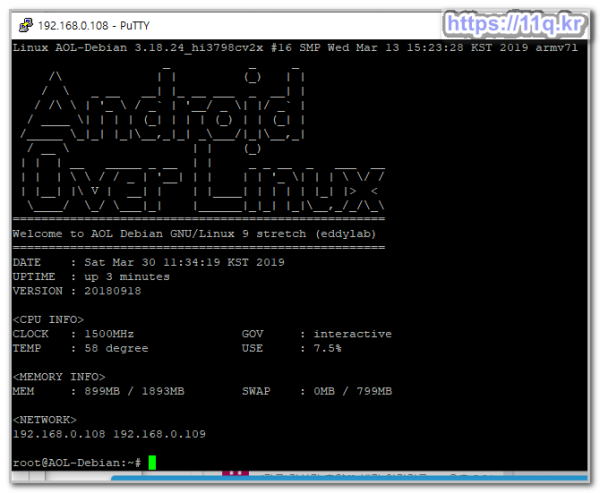
putty 접속
( web server 설치 )
| [U5PVR] | U5PVR APM 1편 : 설치하기 (apache2 + php5 + mys https://cafe.naver.com/mk802/20363
|
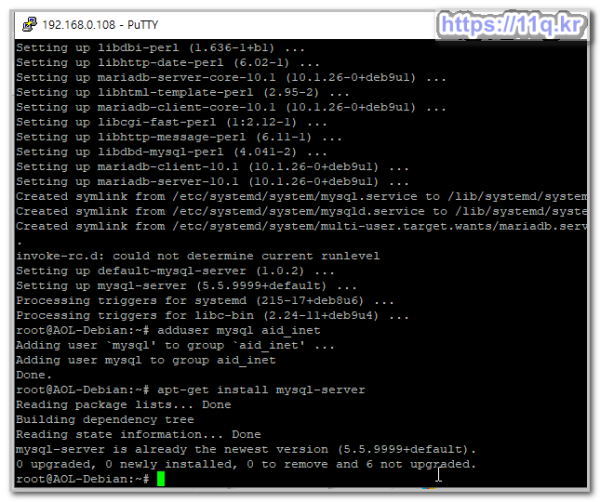
apt-get install mysql-server
y 로 진행
adduser mysql aid_inet
apt-get install mysql-server
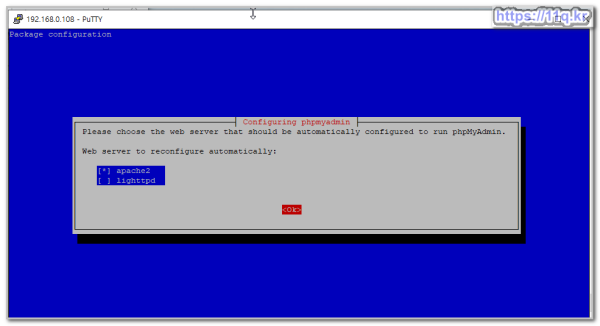
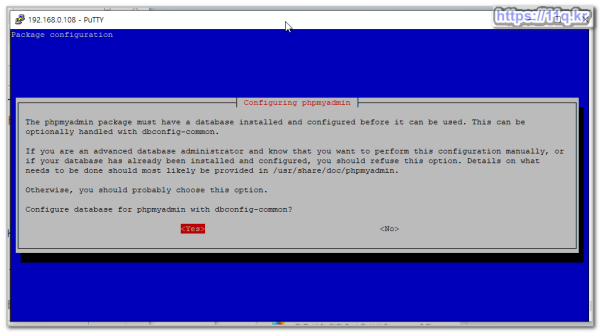
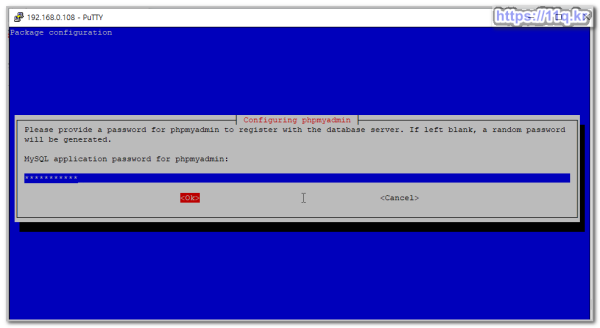
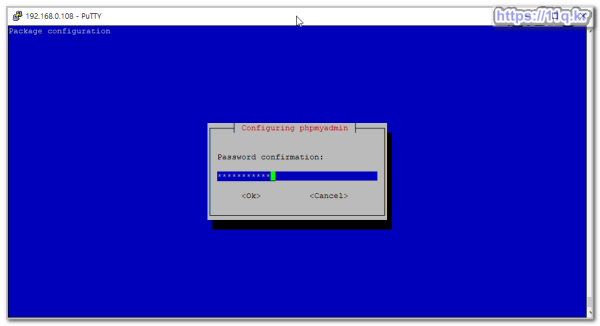
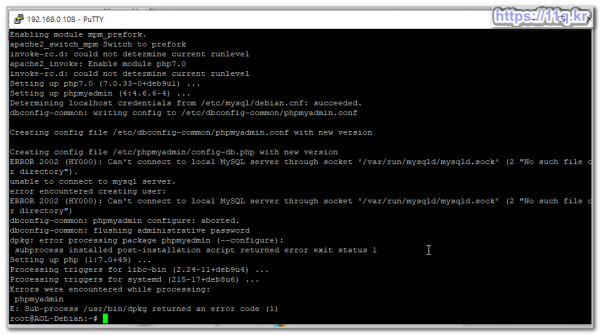
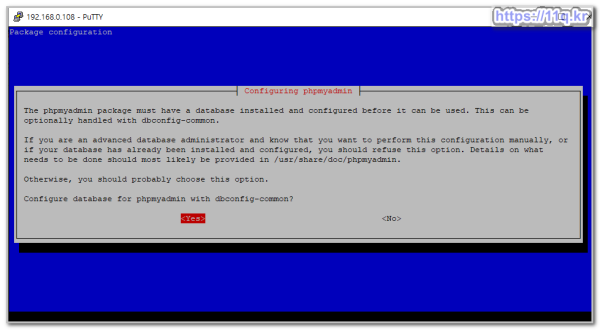
apt-get install phpmyadmin
y
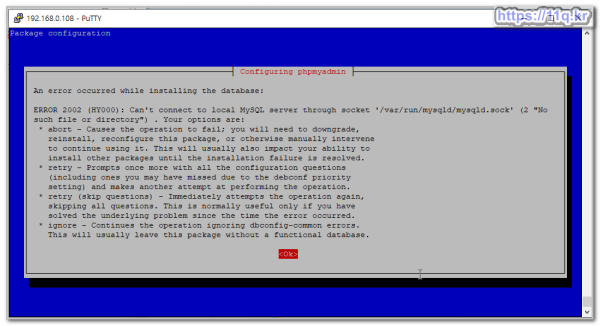
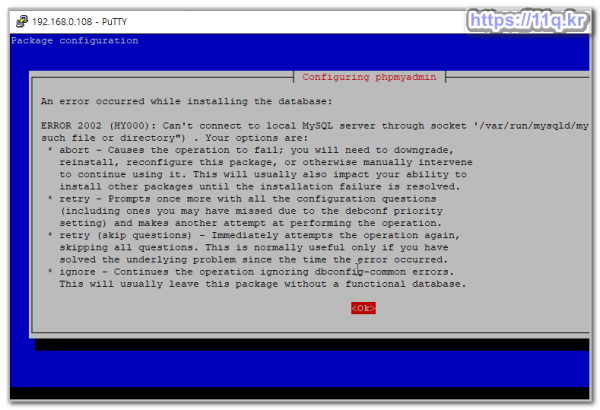
An error occurred while installing the database: │
│ │
│ ERROR 2002 (HY000): Can't connect to local MySQL server through socket '/var/run/mysqld/mysqld.sock' (2 "No │
│ such file or directory") . Your options are: │
│ * abort - Causes the operation to fail; you will need to downgrade, │
│ reinstall, reconfigure this package, or otherwise manually intervene │
│ to continue using it. This will usually also impact your ability to │
│ install other packages until the installation failure is resolved. │
│ * retry - Prompts once more with all the configuration questions │
│ (including ones you may have missed due to the debconf priority │
│ setting) and makes another attempt at performing the operation. │
│ * retry (skip questions) - Immediately attempts the operation again, │
│ skipping all questions. This is normally useful only if you have │
│ solved the underlying problem since the time the error occurred. │
│ * ignore - Continues the operation ignoring dbconfig-common errors. │
│ This will usually leave this package without a functional database.
데이터베이스를 설치하는 중 오류가 발생했습니다 : │
│ │
│ 오류 2002 (HY000) : '/var/run/mysqld/mysqld.sock'소켓을 통해 로컬 MySQL 서버에 연결할 수 없습니다 (2 "아니오 │
│ 그러한 파일 또는 디렉토리 "). 귀하의 옵션은 다음과 같습니다 : │
│ * 중단 - 작업이 실패하게합니다. 당신은 다운 그레이드해야합니다 │
│ 재설치,이 패키지 재구성 또는 수동으로 개입 │
│ 그것을 계속 사용하십시오. 이것은 보통 │ 능력에 영향을 미칩니다.
│ 설치 실패가 해결 될 때까지 다른 패키지를 설치하십시오. │
│ * 다시 시도 - 모든 구성 질문을 한 번 더 묻습니다 │
│ (debconf 우선 순위 때문에 빗나 갔을지도 모르는 것들을 포함) │
│ 설정)하고 조작을 다시 시도합니다. │
│ * 다시 시도 (질문 건너 뛰기) - 즉시 다시 시도 │
│ 모든 질문을 건너 뛰십시오. 이것은 일반적으로 │가있는 경우에만 유용합니다.
│ 오류가 발생한 이후의 기본 문제를 해결했습니다. │
│ * ignore - dbconfig-common 오류를 무시하고 작업을 계속합니다. │
│ 이것은 일반적으로 기능 데이터베이스없이이 패키지를 떠납니다.
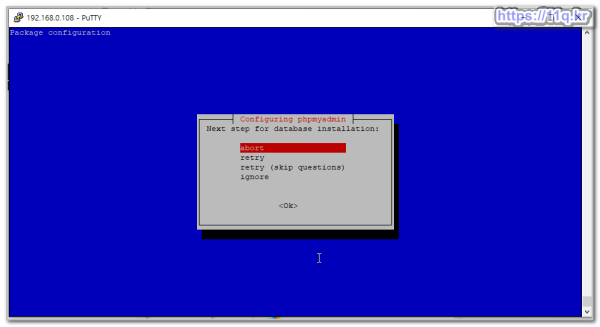
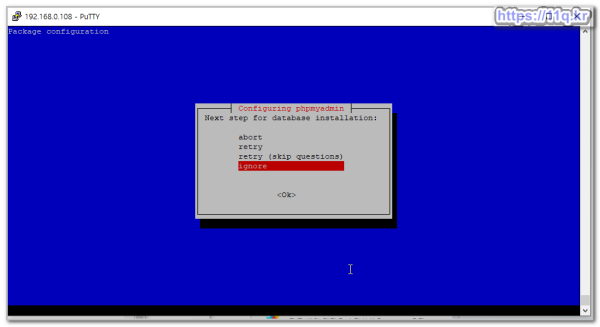
최종 ignore 로 진행
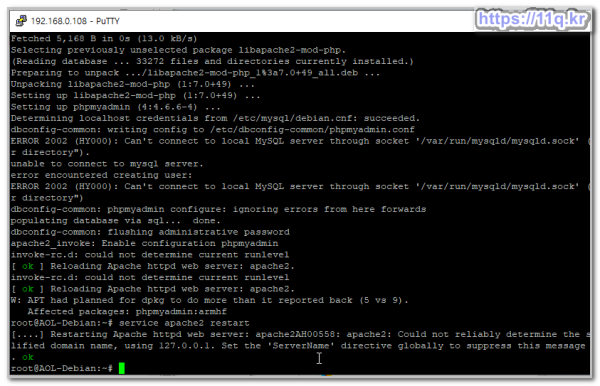
이상태에서 확인
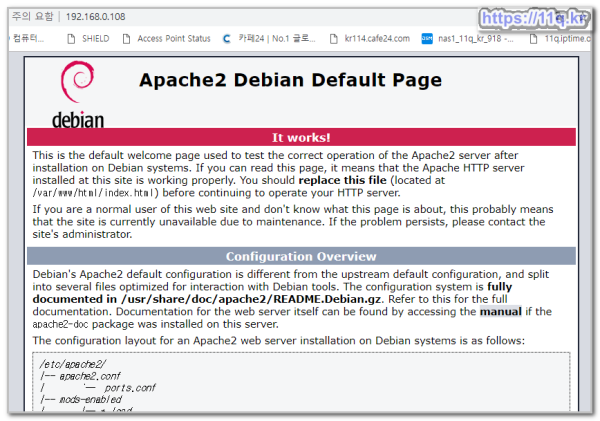
service apache2 restart
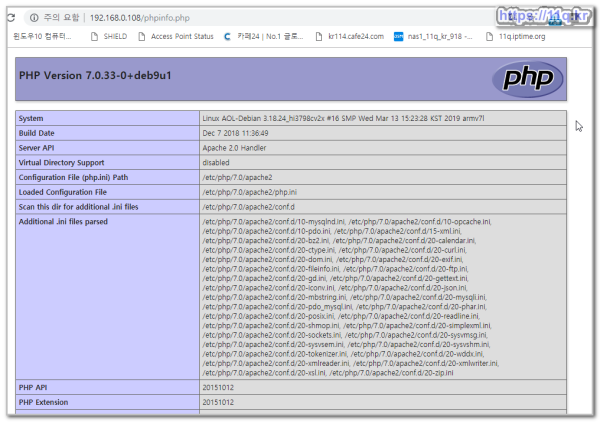
(웹접속 성공)
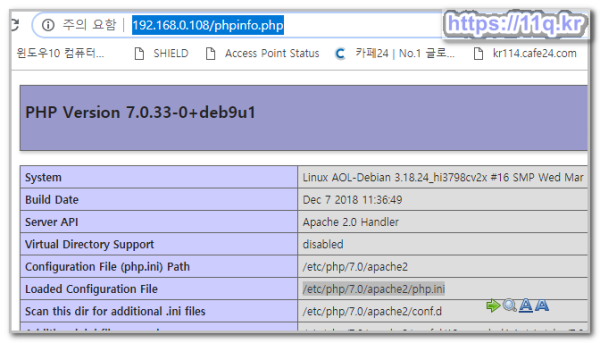
nano /var/www/html/phpinfo.php
<?php phpinfo(); ?>
저장 실행

chown www-data:www-data /var/www/html/phpinfo.php
http://192.168.0.108/phpinfo.php
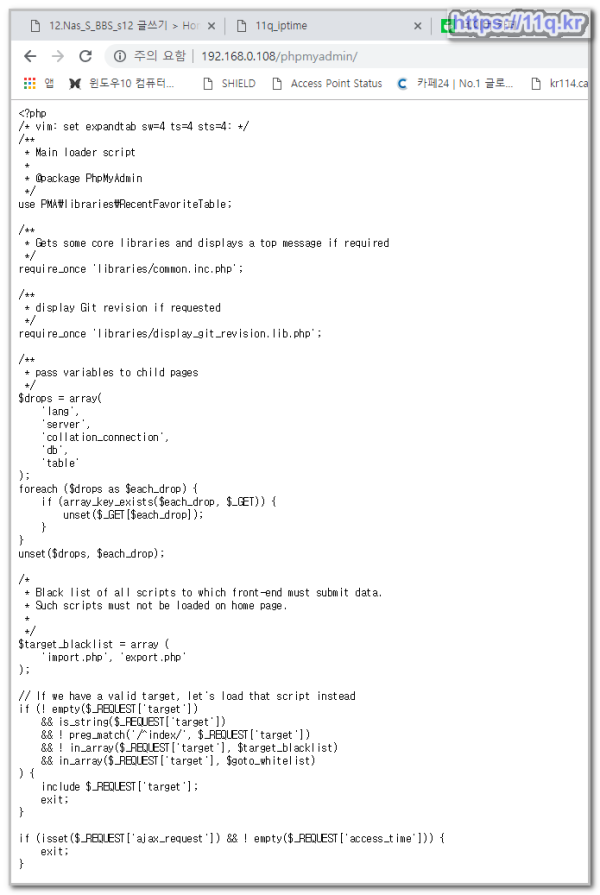
문제점
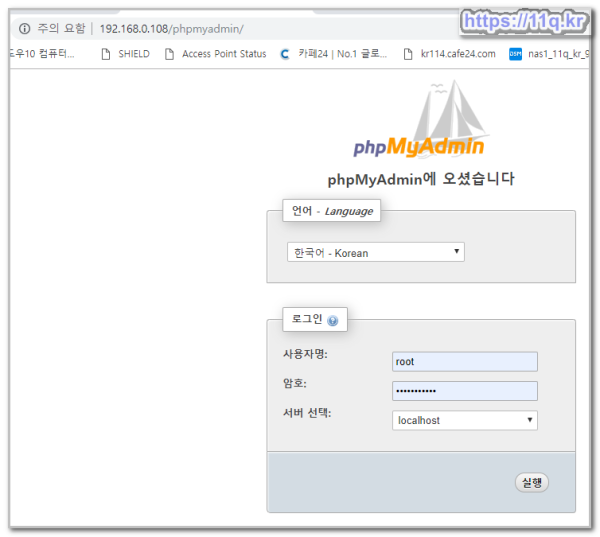
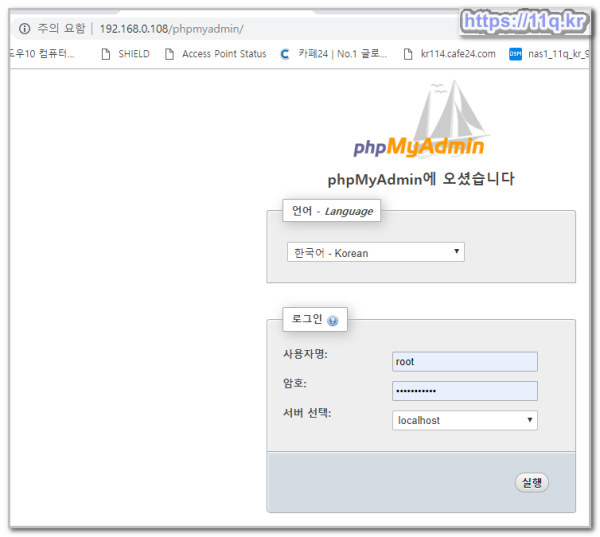
http://192.168.0.108/phpmyadmin/
는 에러 발생 합니다
apt install libapache2-mod-php
apt-get update
apt-get upgrade
service apache2 restart
http://192.168.0.108/phpmyadmin/
접속시 로그인 문제 발생
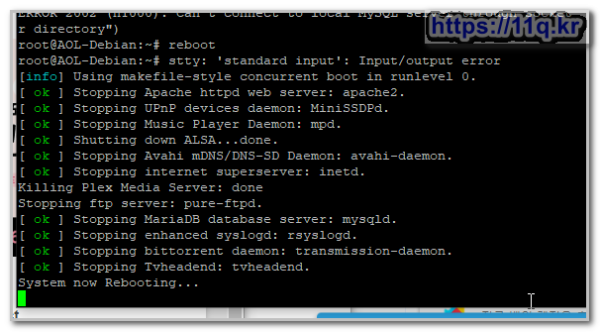
reboot
http://192.168.0.108/phpmyadmin/index.php
mysql
접속 되면 안되면 삭제후 재설치
cd /etc/phpmyadmin
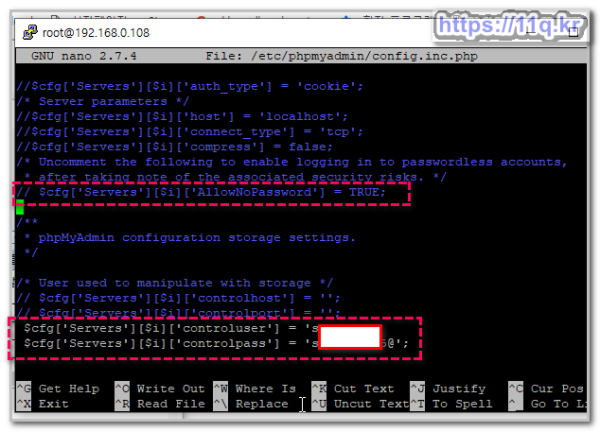
nano /etc/phpmyadmin/config.inc.php
F6 검색 AllowNoPassword
// $cfg['Servers'][$i]['AllowNoPassword'] = TRUE;
/**
* phpMyAdmin configuration storage settings.
*/
/* User used to manipulate with storage */
// $cfg['Servers'][$i]['controlhost'] = '';
// $cfg['Servers'][$i]['controlport'] = '';
$cfg['Servers'][$i]['controluser'] = '추가아이디';
$cfg['Servers'][$i]['controlpass'] = '추가아이디패스';
service apache2 restart
reboot
(정보)
ERROR 1045 (28000): Access denied for user 'root'@'localhost' (using password: YES)
자신의 환경에 맞게 새로운 유저 1개 추가
mysql -p -u root
CREATE USER 'newid'@'%' IDENTIFIED BY '12345';
GRANT ALL PRIVILEGES ON *.* TO '
GRANT ALL PRIVILEGES ON *.* TO 'newid'@'%' WITH GRANT OPTION;
nano /etc/phpmyadmin/config.inc.php
$cfg['Servers'][$i]['controluser'] = '
nano /etc/phpmyadmin/config.inc.php
$cfg['Servers'][$i]['controluser'] = 'newid';
$cfg['Servers'][$i]['controlpass'] = '
$cfg['Servers'][$i]['controlpass'] = '12345';
정상 접속 됩니다.
오늘의 영화 돈겟아웃 보아야 하는데....벌써 점심시간 입니다
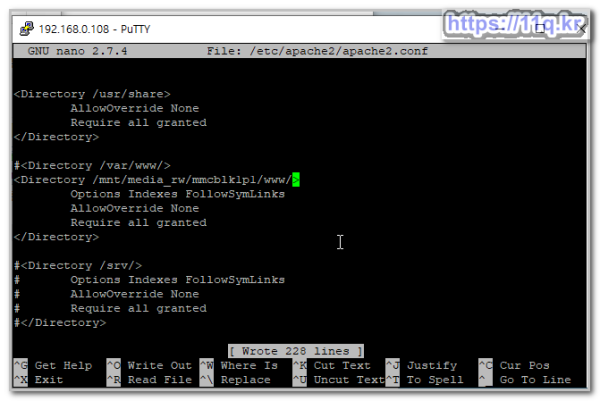
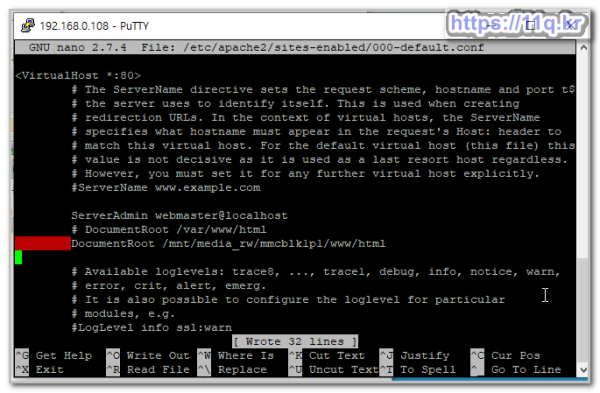
(웹폴더 웹루트 경로 옮기기/변경 하기)
/var/www/html
를
/mnt/media_rw/mmcblk1p1/www/html
외장 microsd 카드로 변경 합니다 (128g)
https://cafe.naver.com/mk802/20380
dpkg-reconfigure tzdata
nano /etc/apache2/apache2.conf
adduser www-data aid_media_rw
adduser www-data aid_sdcard_r
service apache2 restart
====================
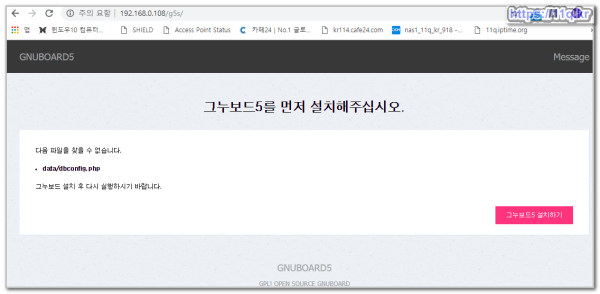
그누보드 설치
cd /mnt/media_rw/mmcblk1p1/www/html/g5s
wget https://github.com/gnuboard/gnuboard5/zipball/master
unzip master
cd ..
rm -rf g5s
mv /mnt/media_rw/mmcblk1p1/www/html/g5/gnuboard-gnuboard5-831219e /mnt/media_rw/mmcblk1p1/www/html/g5s
chmod uo+rwx data
그누보드 data 권한 수정이 안됩니다
cd /mnt/media_rw/mmcblk1p1/www/html/g5s
chown www-data:www-data -R /mnt/media_rw/mmcblk1p1/www/html/g5s
설치 문제점 대응 사례)
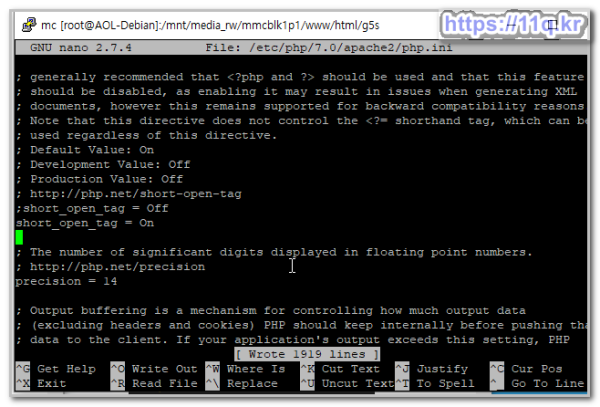
short_open_tag = Off 를 찾으셔서 short_open_tag = On 으로 바꾸시고
아파치 리스타트 후에 그누보드를 설치 해 보시기 바랍니다. (기본 시놀로지 on)
아니면 숏태그를 사용하지 않는 그누보드 dtd 버전을 설치 해 보세요....^^
시스템 설정 문제로 생각하고 원인을 찾고 있었는데
위 설정으로 하니 바로 적용이 되었습니다.
F6
short_open_tag = Off 를 찾으셔서 short_open_tag = On
cd /mnt/media_rw/mmcblk1p1/www/html/g5s
chown www-data:www-data -R /mnt/media_rw/mmcblk1p1/www/html/g5s
service apache2 restart
=================
그누보드 로그인 문제
chown www-data:www-data -R /mnt/media_rw/mmcblk1p1/www/html/g5s
한번 하면 로그인되고 / 다시 로그인 안됨
되고
다시 logout 후 login 안됨
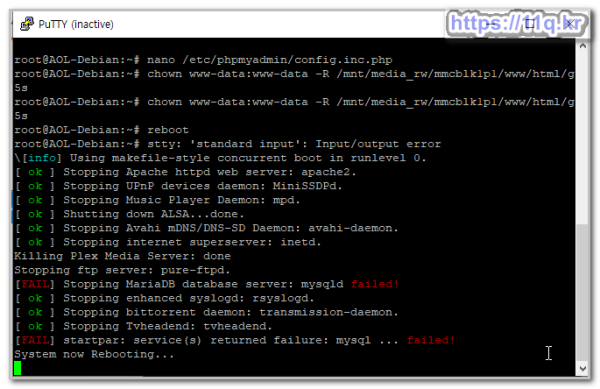
reboot 명령후 문제점
Stopping MySQL database server: mysqld failed
https://stackoverflow.com/questions/26378389/stopping-mysql-database-server-mysqld-failed
/etc/mysql/debian.cnf
에 암호 추가 합니다
nano /etc/mysql/debian.cnf


암호 추가 하니 phpmyadmin 접속화면 문제 발생

ERROR 2002 (HY000): Can't connect to local MySQL server through socket '/var/run/mysqld/mysqld.sock' (2)
To reset the password
Follow these steps (can be helpful if you really forget your password and you can try it anytime, even if you're not in the situation at the moment):
Stop mysql
sudo /etc/init.d/mysql stop
Or for other distribution versions:
sudo /etc/init.d/mysqld stop
Start MySQL in safe mode
sudo mysqld_safe --skip-grant-tables &
Log into MySQL using root
mysql -uroot
Select the MySQL database to use
use mysql;
Reset the password
update user set password=PASSWORD("mynewpassword") where User='root';
update user set password=PASSWORD("12345678") where User='root';
Flush the privileges
flush privileges;
Restart the server
quit
Stop and start the server again
Ubuntu and Debian:
sudo /etc/init.d/mysql stop
...
sudo /etc/init.d/mysql start
On CentOS, Fedora, and RHEL:
sudo /etc/init.d/mysqld stop
...
sudo /etc/init.d/mysqld start
Login with a new password
mysql -u root -p
Type the new password and enjoy your server again like nothing happened
This was taken from Reset a MySQL root password.
service apache2 restart
또는
============= end뷰PDF 1,2
office view
관련자료
댓글목록

shimss@11q.kr님의 댓글
gtmini-에 apm 설치하자
http://cafe.naver.com/mk802/31295

shimss@11q.kr님의 댓글
GT-mini-a AOL 데비안9 apm 설치
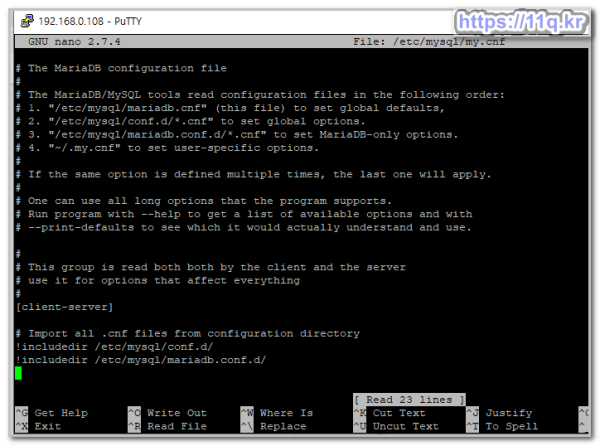
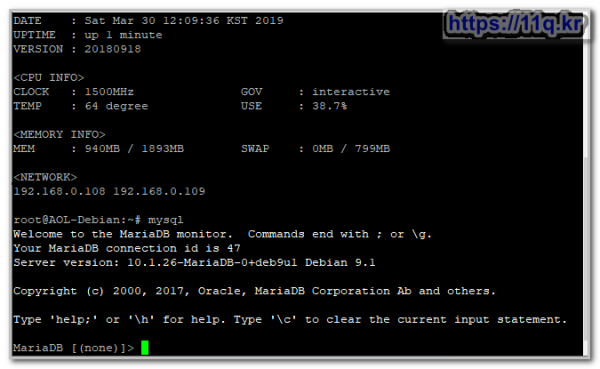
apt install mariadb-server mariadb-client
adduser mysql aid_inet
service mysql start
apt install phpmyadmin
nano /etc/apache2/apache2.conf
----------- 아래내용 입력 --------
# phpmyadmin
Include /etc/phpmyadmin/apache.conf
------------
service apache2 restart
nano /etc/apache2/apache2.conf
----------- 아래내용 입력 --------
# server name
ServerName localhost
------------
root@AOL-Debian:~# service apache2 restart
[....] Restarting Apache httpd web server: apache2[Tue Oct 29 18:02:33.582920 2019] [alias:warn] [pid 13091] AH00671: The Alias directive in /etc/phpmyadmin/apache.conf at line 3 will probably never match because it overlaps an earlier Alias.
. ok
===============
http://192.168.0.125/
성공
nano /var/www/html/phpinfo.php
----------- 아래내용 입력 --------
<?php phpinfo(); ?>
----------- 아래내용 입력 --------
chown www-data:www-data /var/www/html/phpinfo.php
http://192.168.0.125/phpinfo.php
성공
================
http://192.168.0.125/phpmyadmin/index.php
에러 발생
===========
login as: root
root@192.168.0.125's password:
Access denied
root@192.168.0.125's password:
Linux AOL-Debian 4.9.76 #2 SMP PREEMPT Mon Apr 1 12:16:22 CST 2019 armv8l
_ _ _
/\ | | (_) | |
/ \ _ __ __| |_ __ ___ _ __| |
/ /\ \ | '_ \ / _` | '__/ _ \| |/ _` |
/ ____ \| | | | (_| | | | (_) | | (_| |
/_____ \_|_| |_|\__,_|_| _\___/|_|\__,_|
/ __ \ | | (_)
| | | __ _____ _ __ | | _ _ __ _ ___ __
| | | \ \ / / _ | '__| | | | | '_ \| | | \ \/ /
| |__| |\ V | __| | | |____| | | | | |_| |> <
\____/ \_/ \___|_| |______|_|_| |_|\__,_/_/\_\
====================================================
Welcome to AOL Debian GNU/Linux 9 stretch (eddylab)
====================================================
DATE : Tue Oct 29 18:16:27 KST 2019
UPTIME : up 4 minutes
VERSION : 20191027
<CPU INFO>
CLOCK : 1800MHz GOV : interactive
TEMP : 50°C USE : 16.2%
<MEMORY INFO>
MEM : 998MB / 1988MB SWAP : 0MB / 499MB
<NETWORK>
192.168.0.125 192.168.0.126
root@AOL-Debian:~# mysql -u root -p
Enter password:
Welcome to the MariaDB monitor. Commands end with ; or \g.
Your MariaDB connection id is 34
Server version: 10.1.41-MariaDB-0+deb9u1 Debian 9.9
Copyright (c) 2000, 2018, Oracle, MariaDB Corporation Ab and others.
Type 'help;' or '\h' for help. Type '\c' to clear the current input statement.
MariaDB [(none)]> use mysql
Reading table information for completion of table and column names
You can turn off this feature to get a quicker startup with -A
Database changed
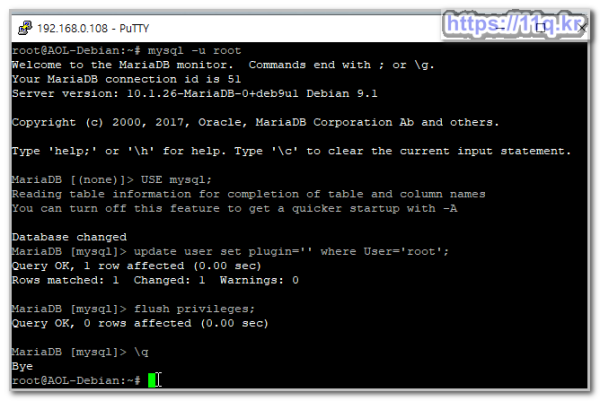
MariaDB [mysql]> update user set plugin='' where user='root';
Query OK, 1 row affected (0.00 sec)
Rows matched: 1 Changed: 1 Warnings: 0
MariaDB [mysql]> update user set password=PASSWORD('12345') where user='root';
Query OK, 1 row affected (0.01 sec)
Rows matched: 1 Changed: 1 Warnings: 0
MariaDB [mysql]> flush privileges;
Query OK, 0 rows affected (0.04 sec)
MariaDB [mysql]> exit
Bye
root@AOL-Debian:~#
-
일간 조회수
-
주간 조회수
-
월간 조회수
-
-
 ● 시놀로지 SynoIogy 역방향 Reverse 주소 설정 방법 강좌 정보및 나의인증서 _조회수_댓글수(
16074
)
-
 작업중● 구글 도메인 구입 등록 변경 벙법 및 사이트 11q.kr 에서 123q.me 사이트 도메인… _조회수_댓글수(
15900
8 )
-
 ● nslookup을 사용하면 도메인네임, IP주소, 기타 DNS레코드를 알 수 있다. _조회수_댓글수(
15295
)
-
 ● 시놀로지와 pc의 파일 복사 속도 높이기 SMB 멀티 채널을 사용하여 나스 속도를 증가시키는 방… _조회수_댓글수(
8111
)
-
 ● 시놀로지 액티브 백업, 매번 윈도우 재설치 & 세팅이 필요없는 이유 (신나따 Ep.03) _조회수_댓글수(
7969
)
-
-
♥간단_메모글♥
-
등록일 04.15가입 인사드립니다.댓글 2
-
등록일 04.09가입인사.댓글 2
-
등록일 03.03안녕하세여댓글 1
-
등록일 02.13
최근글
-
등록일 12:46
-
등록일 06.01
-
등록일 06.01
새댓글
-
등록자 11qkr 등록일 14:07
-
등록자 쉰짜장 등록일 12:51
-
등록자 닉스 등록일 06.01
-
등록자 클라디으 등록일 06.01
-
등록자 Mingu 등록일 05.31
오늘의 홈 현황
QR코드
☞ QR코드 스캔은 kakao앱 자체 QR코드

