u5pvr 리눅스 펌웨어 진행 준비 webdav tvheadend 백업후 복원까지 정상화 하기 20180215
♨ 카랜더 일정 :
링크
첨부
본문
u5pvr 리눅스 펌웨어 진행 준비 webdav tvheadend 백업후 복원까지 정상화 하기 20180215
#백업하기
#/home/hts/.hts/tvheadend/ 백업 /home/hts/.hts/tvheadend/ /mnt/media_rw/sda5/tv006_u5pvr/tvheaded_backup/tvheadend/
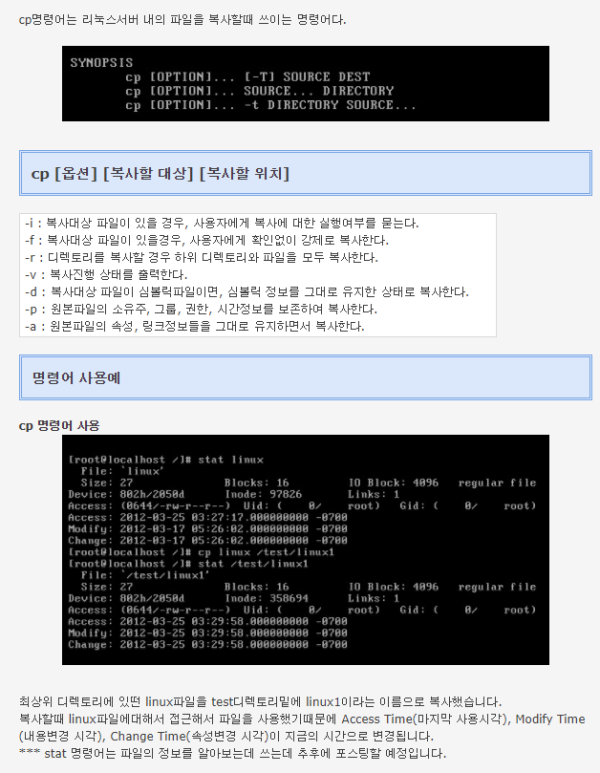
cp -r -v -f -p -a /home/hts/.hts/tvheadend /mnt/media_rw/sda5/tv006_u5pvr/tvheaded_backup
----------------------------
#nano /etc/apache2/sites-available/webdav.conf
cp -v -f -p -a /etc/apache2/sites-available/webdav.conf /mnt/media_rw/sda5/tv006_u5pvr/tvheaded_backup/tvheadend/webdav_config_file/webdav.conf
#nano /etc/apache2/mods-enabled/dav_fs.conf
cp -v -f -p -a /etc/apache2/mods-enabled/dav_fs.conf /mnt/media_rw/sda5/tv006_u5pvr/tvheaded_backup/tvheadend/webdav_config_file/dav_fs.conf
#nano /etc/apache2/sites-available/listing.conf
cp -v -f -p -a /etc/apache2/sites-available/listing.conf /mnt/media_rw/sda5/tv006_u5pvr/tvheaded_backup/tvheadend/webdav_config_file/listing.conf
#nano /etc/apache2/ports.conf
cp -v -f -p -a /etc/apache2/ports.conf /mnt/media_rw/sda5/tv006_u5pvr/tvheaded_backup/tvheadend/webdav_config_file/ports.conf
#nano /etc/apache2/sites-available/webdav_basic.conf
cp -v -f -p -a /etc/apache2/sites-available/webdav_basic.conf /mnt/media_rw/sda5/tv006_u5pvr/tvheaded_backup/tvheadend/webdav_config_file/webdav_basic.conf
$nano /etc/apache2/ports.conf
cp -v -f -p -a /etc/apache2/ports.conf /mnt/media_rw/sda5/tv006_u5pvr/tvheaded_backup/tvheadend/webdav_config_file/ports.conf
==============
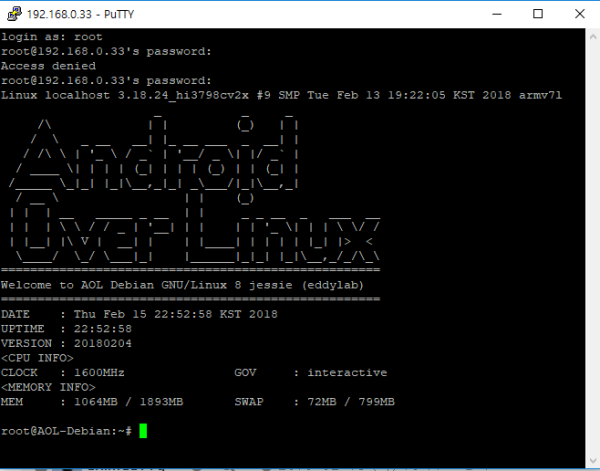
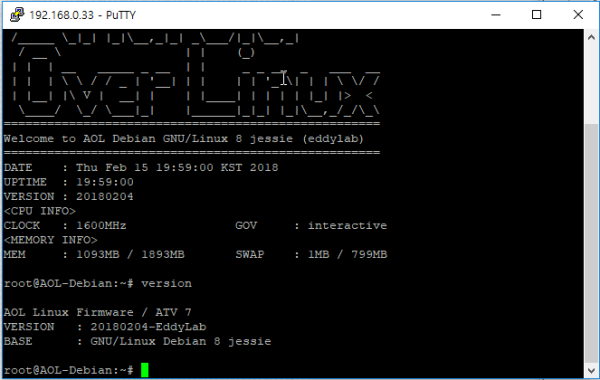
linux 신규 펌웨어로 업데이트 진행
root 접속
#root passwd 변경
passwd
#/home/hts/.hts/tvheadend/ 복원 /home/hts/.hts/tvheadend/ /mnt/media_rw/sda5/tv006_u5pvr/tvheaded_backup/tvheadend/
cp -r -v -f -p -a /mnt/media_rw/sda5/tv006_u5pvr/tvheaded_backup/tvheadend /home/hts/.hts
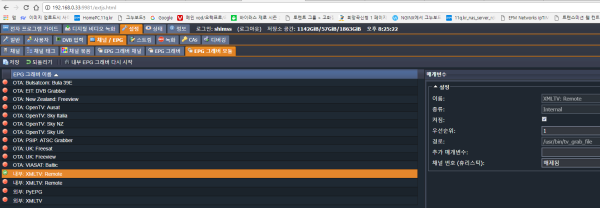
주) /home/hts/.hts/tvheadend/remote_usr_bin_copy_file/tv_grab_file
에 파일저장 되었습니다.
권한은 한번 해 놓으면 유지 및 /usr/bin 폴더에 복사
cd /home/hts/.hts/tvheadend/remote_usr_bin_copy_file
cp -v -f -p -a tv_grab_file6 /usr/bin
cp -v -f -p -a tv_grab_file33 /usr/bin
cp -v -f -p -a tv_grab_file /usr/bin
# TVH 를 재시작합니다. http://192.168.0.33/9981
service tvheadend restart
정상적으로
webdav 설치후


#U5pvr 리눅스 업데이트 진행전 tvheadend 와 webdav 설정 백업 복원 하기 20180215
#백업하기
#/home/hts/.hts/tvheadend/ 백업 /home/hts/.hts/tvheadend/ /mnt/media_rw/sda5/tv006_u5pvr/tvheaded_backup/tvheadend/
cp -r -v -f -p -a /home/hts/.hts/tvheadend /mnt/media_rw/sda5/tv006_u5pvr/tvheaded_backup
----------------------------
#nano /etc/apache2/sites-available/webdav.conf
cp -v -f -p -a /etc/apache2/sites-available/webdav.conf /mnt/media_rw/sda5/tv006_u5pvr/tvheaded_backup/tvheadend/webdav_config_file/webdav.conf
#nano /etc/apache2/mods-enabled/dav_fs.conf
cp -v -f -p -a /etc/apache2/mods-enabled/dav_fs.conf /mnt/media_rw/sda5/tv006_u5pvr/tvheaded_backup/tvheadend/webdav_config_file/dav_fs.conf
#nano /etc/apache2/sites-available/listing.conf
cp -v -f -p -a /etc/apache2/sites-available/listing.conf /mnt/media_rw/sda5/tv006_u5pvr/tvheaded_backup/tvheadend/webdav_config_file/listing.conf
#nano /etc/apache2/ports.conf
cp -v -f -p -a /etc/apache2/ports.conf /mnt/media_rw/sda5/tv006_u5pvr/tvheaded_backup/tvheadend/webdav_config_file/ports.conf
#nano /etc/apache2/sites-available/webdav_basic.conf
cp -v -f -p -a /etc/apache2/sites-available/webdav_basic.conf /mnt/media_rw/sda5/tv006_u5pvr/tvheaded_backup/tvheadend/webdav_config_file/webdav_basic.conf
$nano /etc/apache2/ports.conf
cp -v -f -p -a /etc/apache2/ports.conf /mnt/media_rw/sda5/tv006_u5pvr/tvheaded_backup/tvheadend/webdav_config_file/ports.conf
# 리눅스 업데이트 진행후 복원하기
#******************************************************************
# 리눅스 업데이트 진행후 복원하기 ********************************************
#******************************************************************
# 초기설치후 암호 root androidoverlinux
#root passwd 변경
passwd
#1).tvheadend 복원
#1.복사 /home/hts/.hts/tvheadend/ 복원 /home/hts/.hts/tvheadend/ /mnt/media_rw/sda5/tv006_u5pvr/tvheaded_backup/tvheadend/
cp -r -v -f -p -a /mnt/media_rw/sda5/tv006_u5pvr/tvheaded_backup/tvheadend /home/hts/.hts
#2.권한및 /usr/bin 폴더에 복사
#/mnt/media_rw/sda5/tv006_u5pvr/tvheaded_backup/tvheadend/remote_usr_bin_copy_file/tv_grab_file6
cd /home/hts/.hts/tvheadend/remote_usr_bin_copy_file
#chmod +x tv_grab_file6
#chmod +x tv_grab_file33
#chmod +x tv_grab_file
#상기 명령은 한번 하면 유지
cp -v -f -p -a tv_grab_file6 /usr/bin
cp -v -f -p -a tv_grab_file33 /usr/bin
cp -v -f -p -a tv_grab_file /usr/bin
#3. TVH 를 재시작합니다. http://192.168.0.33/9981
service tvheadend restart
#2).WEBDAV 구동하기 http://cafe.naver.com/mk802/20251
#리눅스 업데이트 후 설정 복원 발벙
#1. apache2 설치 및 WebDAV 에 연결하기 http://192.168.0.33/ 설정하기
apt-get install apache2
a2enmod dav dav_fs auth_digest
a2dissite 000-default
# WebDAV 에 연결하기 http://192.168.0.33/
# nano /etc/apache2/sites-available/webdav.conf
# cp -v -f -p -a /etc/apache2/sites-available/webdav.conf /mnt/media_rw/sda5/tv006_u5pvr/tvheaded_backup/tvheadend/webdav_config_file/webdav.conf
cp -v -f -p -a /mnt/media_rw/sda5/tv006_u5pvr/tvheaded_backup/tvheadend/webdav_config_file/webdav.conf /etc/apache2/sites-available/webdav.conf
a2ensite webdav.conf
#2.다음으로 패스워드 파일을 생성합니다.
htdigest -c /etc/apache2/passwd.dav WebDAV shimss
****
****
service apache2 restart
adduser www-data aid_sdcard_r
adduser www-data aid_media_rw
#3. WebDAV 에 연결하기 http://192.168.0.33/
# WebDAV 에 연결하기 http://192.168.0.33/
# 쓰기가 안되시는 분들 참고 부탁드립니다
# nano /etc/apache2/mods-enabled/dav_fs.conf
# cp -v -f -p -a /etc/apache2/mods-enabled/dav_fs.conf /mnt/media_rw/sda5/tv006_u5pvr/tvheaded_backup/tvheadend/webdav_config_file/dav_fs.conf
cp -v -f -p -a /mnt/media_rw/sda5/tv006_u5pvr/tvheaded_backup/tvheadend/webdav_config_file/dav_fs.conf /etc/apache2/mods-enabled/dav_fs.conf
mkdir /etc/apache2/lock
chown www-data /etc/apache2/lock
========================
# WebDAV 에 연결하기 no_password http://192.168.0.33:8000
# 디랙토리지정
# nano /etc/apache2/sites-available/listing.conf
# cp -v -f -p -a /etc/apache2/sites-available/listing.conf /mnt/media_rw/sda5/tv006_u5pvr/tvheaded_backup/tvheadend/webdav_config_file/listing.conf
cp -v -f -p -a /mnt/media_rw/sda5/tv006_u5pvr/tvheaded_backup/tvheadend/webdav_config_file/listing.conf /etc/apache2/sites-available/listing.conf
# WebDAV 에 연결하기 no_password http://192.168.0.33:8000
# 포트지정
# nano /etc/apache2/ports.conf
# cp -v -f -p -a /etc/apache2/ports.conf /mnt/media_rw/sda5/tv006_u5pvr/tvheaded_backup/tvheadend/webdav_config_file/ports.conf
cp -v -f -p -a /mnt/media_rw/sda5/tv006_u5pvr/tvheaded_backup/tvheadend/webdav_config_file/ports.conf /etc/apache2/ports.conf
#추가적으로 설정파일을 활성화하고 서버를 reload 합니다.
a2ensite listing.conf
service apache2 reload
#3. WebDAV 8000에 연결하기 http://192.168.0.33/8000
====================
# WebDAV Basic 인증 설정하기 (포트 7000)
# nano /etc/apache2/sites-available/webdav_basic.conf
# cp -v -f -p -a /etc/apache2/sites-available/webdav_basic.conf /mnt/media_rw/sda5/tv006_u5pvr/tvheaded_backup/tvheadend/webdav_config_file/webdav_basic.conf
cp -v -f -p -a /mnt/media_rw/sda5/tv006_u5pvr/tvheaded_backup/tvheadend/webdav_config_file/webdav_basic.conf /etc/apache2/sites-available/webdav_basic.conf
# WebDAV Basic 인증 설정하기 (포트 7000)
# nano /etc/apache2/ports.conf
# cp -v -f -p -a /etc/apache2/ports.conf /mnt/media_rw/sda5/tv006_u5pvr/tvheaded_backup/tvheadend/webdav_config_file/ports.conf
cp -v -f -p -a /mnt/media_rw/sda5/tv006_u5pvr/tvheaded_backup/tvheadend/webdav_config_file/ports.conf /etc/apache2/ports.conf
a2ensite webdav_basic.conf
service apache2 reload
#다음으로 패스워드 파일을 생성합니다.
htpasswd -c /etc/apache2/passwd_basic.dav shimss
****
****
#4. WebDAV 7000에 연결하기 http://192.168.0.33/7000
----------------
파일 수정 내용
===============
# WebDAV 에 연결하기 http://192.168.0.33/
# nano /etc/apache2/sites-available/webdav.conf
# cp -v -f -p -a /etc/apache2/sites-available/webdav.conf /mnt/media_rw/sda5/tv006_u5pvr/tvheaded_backup/tvheadend/webdav_config_file/webdav.conf
# cp -v -f -p -a /mnt/media_rw/sda5/tv006_u5pvr/tvheaded_backup/tvheadend/webdav_config_file/webdav.conf /etc/apache2/sites-available/webdav.conf
<VirtualHost *:80>
DocumentRoot /mnt
<Directory /mnt>
Options Indexes MultiViews FollowSymLinks
AllowOverride none
Require all granted
</Directory>
<Location />
DAV On
AuthType Digest
AuthName "WebDAV"
AuthDigestDomain /
AuthDigestProvider file
AuthUserFile /etc/apache2/passwd.dav
Require valid-user
</Location>
</VirtualHost>
======================
# WebDAV 에 연결하기 http://192.168.0.33/
# 쓰기가 안되시는 분들 참고
# nano /etc/apache2/mods-enabled/dav_fs.conf
# cp -v -f -p -a /etc/apache2/mods-enabled/dav_fs.conf /mnt/media_rw/sda5/tv006_u5pvr/tvheaded_backup/tvheadend/webdav_config_file/dav_fs.conf
# cp -v -f -p -a /mnt/media_rw/sda5/tv006_u5pvr/tvheaded_backup/tvheadend/webdav_config_file/dav_fs.conf /etc/apache2/mods-enabled/dav_fs.conf
# DAVLockDB ${APACHE_LOCK_DIR}/DAVLock
DAVLockDB /etc/apache2/lock/DAVLock
# vim: syntax=apache ts=4 sw=4 sts=4 sr noet
====================
====================
# WebDAV 에 연결하기 no_password http://192.168.0.33:8000
# 디랙토리지정
# nano /etc/apache2/sites-available/listing.conf
# cp -v -f -p -a /etc/apache2/sites-available/listing.conf /mnt/media_rw/sda5/tv006_u5pvr/tvheaded_backup/tvheadend/webdav_config_file/listing.conf
# cp -v -f -p -a /mnt/media_rw/sda5/tv006_u5pvr/tvheaded_backup/tvheadend/webdav_config_file/listing.conf /etc/apache2/sites-available/listing.conf
<VirtualHost *:8000>
# 포트를 여기다 기입합니다.
DocumentRoot /mnt/media_rw/sda5/11q
# 경로를 기입합니다.
<Directory /mnt/media_rw/sda5>
# 해당 경로에 대한 옵션입니다.
Options Indexes MultiViews FollowSymLinks
# 여기서 Indexes 가 파일 $
AllowOverride none
Require all granted
</Directory>
</VirtualHost>
============================
# WebDAV 에 연결하기 no_password http://192.168.0.33:8000
# 포트지정
# nano /etc/apache2/ports.conf
# cp -v -f -p -a /etc/apache2/ports.conf /mnt/media_rw/sda5/tv006_u5pvr/tvheaded_backup/tvheadend/webdav_config_file/ports.conf
# cp -v -f -p -a /mnt/media_rw/sda5/tv006_u5pvr/tvheaded_backup/tvheadend/webdav_config_file/ports.conf /etc/apache2/ports.conf
# If you just change the port or add more ports here, you will likely also
# have to change the VirtualHost statement in
# /etc/apache2/sites-enabled/000-default.conf
Listen 80
Listen 8000
#8000번추가
Listen 7000
#7000 추가
<IfModule ssl_module>
Listen 443
</IfModule>
<IfModule mod_gnutls.c>
Listen 443
</IfModule>
# vim: syntax=apache ts=4 sw=4 sts=4 sr noet
===========================
============================
# WebDAV Basic 인증 설정하기 (포트 7000)
# nano /etc/apache2/sites-available/webdav_basic.conf
# cp -v -f -p -a /etc/apache2/sites-available/webdav_basic.conf /mnt/media_rw/sda5/tv006_u5pvr/tvheaded_backup/tvheadend/webdav_config_file/webdav_basic.conf
# cp -v -f -p -a /mnt/media_rw/sda5/tv006_u5pvr/tvheaded_backup/tvheadend/webdav_config_file/webdav_basic.conf /etc/apache2/sites-available/webdav_basic.conf
<VirtualHost *:7000>
# 포트 번호 : 7000
DocumentRoot /mnt/media_rw/sda5
# document root 지정
<Directory /mnt>
# 상위 폴더를 지정하여 옵션을 주면 하위폴더도 자동 적용됨
Options Indexes MultiViews FollowSymLinks
AllowOverride none
Require all granted
</Directory>
<Location />
DAV On
AuthType Basic
AuthName "WebDAV"
# <-- realm 값입니다.
AuthUserFile /etc/apache2/passwd_basic.dav
# <-- 패스워드 파일 위치
Require valid-user
</Location>
</VirtualHost>
============================
# WebDAV 에 연결하기 password http://192.168.0.33:7000
# 포트지정
# nano /etc/apache2/ports.conf
# cp -v -f -p -a /etc/apache2/ports.conf /mnt/media_rw/sda5/tv006_u5pvr/tvheaded_backup/tvheadend/webdav_config_file/ports.conf
# cp -v -f -p -a /mnt/media_rw/sda5/tv006_u5pvr/tvheaded_backup/tvheadend/webdav_config_file/ports.conf /etc/apache2/ports.conf
#
# WebDAV Basic 인증 설정하기 (포트 7000)
# nano /etc/apache2/ports.conf
# cp -v -f -p -a /etc/apache2/ports.conf /mnt/media_rw/sda5/tv006_u5pvr/tvheaded_backup/tvheadend/webdav_config_file/ports.conf
# cp -v -f -p -a /mnt/media_rw/sda5/tv006_u5pvr/tvheaded_backup/tvheadend/webdav_config_file/ports.conf /etc/apache2/ports.conf
#
# If you just change the port or add more ports here, you will likely also
# have to change the VirtualHost statement in
# /etc/apache2/sites-enabled/000-default.conf
Listen 80
Listen 8000
#8000번추가
Listen 7000
#7000 추가
<IfModule ssl_module>
Listen 443
</IfModule>
<IfModule mod_gnutls.c>
Listen 443
</IfModule>
# vim: syntax=apache ts=4 sw=4 sts=4 sr noet
================================
뷰PDF 1,2
office view
관련자료
-
첨부
댓글목록

shimss11q님의 댓글
tvheadend 백업한것 복원하기
cp -r -v -f -p -a /mnt/media_rw/sda5/tv006_u5pvr/tvheaded_backup/tvheadend /home/hts/.hts
cd /home/hts/.hts/tvheadend/remote_usr_bin_copy_file
cp -v -f -p -a tv_grab_file6 /usr/bin
cp -v -f -p -a tv_grab_file33 /usr/bin
cp -v -f -p -a tv_grab_file /usr/bin

♥간단_메모글♥
-
등록일 06.18
-
등록일 05.20
-
등록일 03.12가입인사 드립니다댓글 3
-
등록일 04.15가입 인사드립니다.댓글 8
-
등록일 04.09가입인사.댓글 4
최근글
-
등록일 07.01
새댓글
-
등록자 기남 등록일 07.12
-
등록자 카카로트 등록일 07.12
-
등록자 포맷장인 등록일 07.11
-
등록자 부자아빠 등록일 07.11
-
등록자 ㅇㅇㄹ 등록일 07.07
오늘의 홈 현황
QR코드
☞ QR코드 스캔은 kakao앱 자체 QR코드


