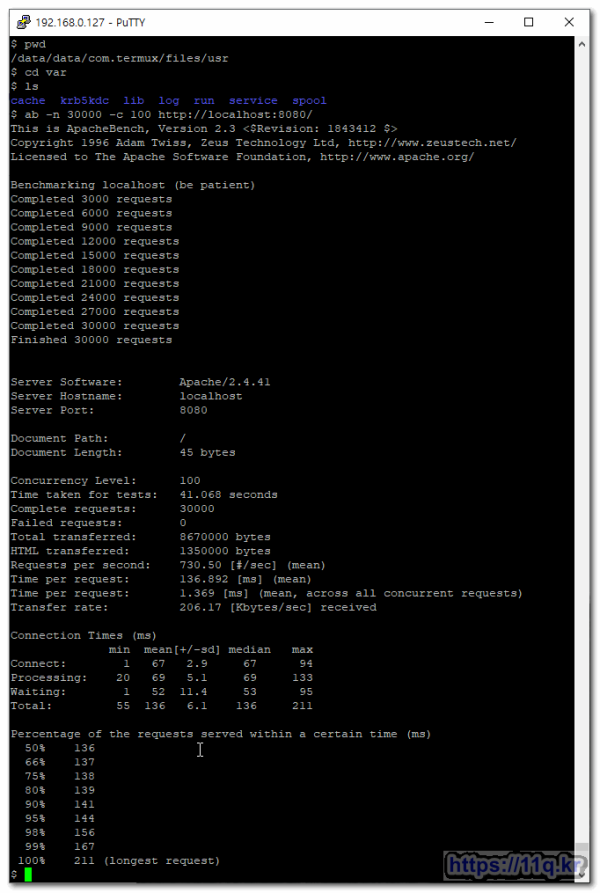
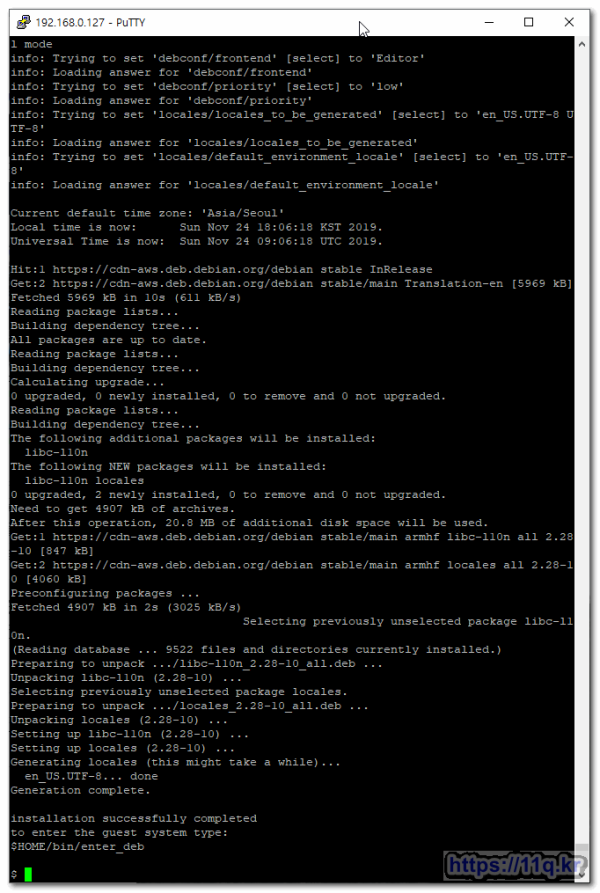
gt-king-pro_2)Apache2 설치 및 AB(Apache Benchmark tool) 샐행 및 debian-on-termux 설치
♨ 카랜더 일정 :
본문
# https://m.blog.naver.com/PostView.nhn?blogId=nettrail&logNo=221588044681&proxyReferer=https://www.google.com/ 내용 참조하여 . Apache2 설치 및 AB(Apache Benchmark tool) 샐행 |

5. Debian배포판 설치(AnLinux 스크립트 사용)
(1) AnLinux 를 설치한다.
AnLinux를 설치한다.
https://apkpure.com/kr/anlinux-run-linux-on-android-without-root-access/exa.lnx.a
$ cd ~
$ ls
UnixBench UnixBench5.1.3.tgz kali-armhf kalinethunter
$ cd ..
$ ls
home usr
$ find ./ -name start*.*
./home/kali-armhf/usr/bin/start-msf.sh
./home/kali-armhf/usr/bin/start-nat-transproxy-lollipop.sh
./home/kali-armhf/usr/bin/start-update.sh
./home/kali-armhf/usr/share/man/man8/start-stop-daemon.8.gz
./home/kali-armhf/usr/share/man/fr/man8/start-stop-daemon.8.gz
./home/kali-armhf/usr/share/man/nl/man8/start-stop-daemon.8.gz
./home/kali-armhf/usr/share/man/de/man8/start-stop-daemon.8.gz
./home/kali-armhf/usr/share/mana-toolkit/run-mana/start-nat-simple-bdf-lollipop.sh
./home/kali-armhf/usr/share/mana-toolkit/run-mana/start-nat-simple-bdf-kitkat.sh
./home/kali-armhf/usr/share/mana-toolkit/run-mana/start-nat-full-lollipop.sh
./home/kali-armhf/usr/share/mana-toolkit/run-mana/start-nat-simple-lollipop.sh
./home/kali-armhf/usr/share/mana-toolkit/run-mana/start-nat-simple-kitkat.sh
./home/kali-armhf/usr/share/mana-toolkit/run-mana/start-nat-full-kitkat.sh
./usr/share/scan-view/startfile.py
./usr/share/man/man3/start_color.3ncurses.gz
./usr/share/man/man3/start_color_sp.3ncurses.gz
./usr/share/vim/vim81/doc/starting.txt
$ cd
debian-on-termux
what is it
- a shell script to install Debian 9 (stretch) via debootstrap in a Termux environment
- supported Debian versions include: stable (stretch), testing (buster), unstable
- supported architectures include: armel, armhf, arm64, i386, amd64
how to use it
install Termux
download
debian_on_termux.shfrom debian-on-termux into your termux home directorycd /data/data/com.termux/files/home apt update apt install wget hash -r wget https://raw.githubusercontent.com/sp4rkie/debian-on-termux/master/debian_on_termux.shoptionaly check the configuration lines near the top of the script.
execute the script
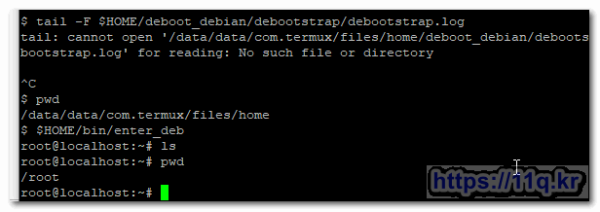
sh debian_on_termux.shto watch the installation process type
tail -F $HOME/deboot_debian/debootstrap/debootstrap.logif all went well (takes about 30min on the hardware below) a script is created to enter the debian guest system
  $HOME/bin/enter_deb

  Usage: enter_deb [options] [command]
  enter_deb: enter the installed debian guest system

    -0 - mimic root (default)
    -n - prefer regular termux uid (termux-uid)
sample usage: debian shell (stay in chrooted debian)
  bash-4.4$ enter_deb
  root@localhost:~#
sample usage: debian one-shot command (execute in chrooted debian and return to the host environment)
  bash-4.4$ enter_deb -n id\; hostname\; pwd\; cat /etc/debian_\*
  uid=10228(u0_a228) gid=10228(u0_a228) groups=10228(u0_a228),3003,9997,50228
  localhost
  /home/u0_a228
  9.1
  bash-4.4$
for suggestions or in the unlikely event of a problem just raise an issue here:-)
alternatives
reference
How to install Debian 9.2 chroot termux? #1645
Issues
Without a pull request are not likely to be addressed.
===========
sh debian_on_termux.sh$HOME/bin/enter_deb
<데비안 버전 확인>
debian version checking
apt-get install lsb-release
lsb_release -da
cat /etc/os-release

root@localhost:/etc# lsb_release -da
No LSB modules are available.
Distributor ID: Debian
Description: Debian GNU/Linux 10 (buster)
Release: 10
Codename: buster
root@localhost:/etc# cat /etc/os-release
PRETTY_NAME="Debian GNU/Linux 10 (buster)"
NAME="Debian GNU/Linux"
VERSION_ID="10"
VERSION="10 (buster)"
VERSION_CODENAME=buster
ID=debian
HOME_URL="https://www.debian.org/"
SUPPORT_URL="https://www.debian.org/support"
BUG_REPORT_URL="https://bugs.debian.org/"
root@localhost:/etc#
■ ▶ ☞ ♠ 정보찾아 공유 드리며 출처는 링크 참조 바랍니다. https://11q.kr ♠뷰PDF 1,2
office view
관련자료
댓글목록

shimss@11q.kr님의 댓글
데비안 버전 확인
Check what Debian version you are running on your Linux system
https://linuxconfig.org/check-what-debian-version-you-are-running-on-your-linux-system

shimss@11q.kr님의 댓글
debian version checking
apt-get install lsb-release
root@localhost:/etc# lsb_release -da
No LSB modules are available.
Distributor ID: Debian
Description: Debian GNU/Linux 10 (buster)
Release: 10
Codename: buster
root@localhost:/etc# cat /etc/os-release
PRETTY_NAME="Debian GNU/Linux 10 (buster)"
NAME="Debian GNU/Linux"
VERSION_ID="10"
VERSION="10 (buster)"
VERSION_CODENAME=buster
ID=debian
HOME_URL="https://www.debian.org/"
SUPPORT_URL="https://www.debian.org/support"
BUG_REPORT_URL="https://bugs.debian.org/"
root@localhost:/etc#

shimss@11q.kr님의 댓글
apt-get install debootstrap
===================
https://wiki.debian.org/Debootstrap
main # mkdir /stable-chroot
main # debootstrap stable /stable-chroot http://deb.debian.org/debian/
♥간단_메모글♥
-
등록일 06.18
-
등록일 05.20
-
등록일 03.12가입인사 드립니다댓글 3
-
등록일 04.15가입 인사드립니다.댓글 8
-
등록일 04.09가입인사.댓글 4
최근글
-
등록일 07.01
-
등록일 07.01
새댓글
-
등록자 부자아빠 등록일 10:11
-
등록자 ㅇㅇㄹ 등록일 07.07
-
등록자 이모템 등록일 07.05
-
등록자 이모템 등록일 07.04
-
등록자 이모템 등록일 07.04
오늘의 홈 현황
QR코드
☞ QR코드 스캔은 kakao앱 자체 QR코드


