★★★★★성공) u5pvr linux 완전초기화 설치및 mysql apache2 + php5 phpmyadmin 설치하기 APM1 재설치 하기 입니다
♨ 카랜더 일정 :
본문
성공) u5pvr linux 완전초기화 설치및 mysql apache2 + php5 phpmyadmin 설치하기 APM1 재설치 하기 입니다
u5pvr 신규 버전으로 linux 설치 작업
펌웨어 업데이트 방법 http://cafe.naver.com/mk802/21578
동영상 참조 자료 http://cafe.naver.com/mk802/20788
작업 진행 순서 http://cafe.naver.com/mk802/20363
=============
최신 linux 재설치로 업그래이드 하세요
또는
첨부 linux 버전을 usb에 update.zip으로 복사후
u5pvr에서 오른 쪽 설정에서 펌웨어 업데이트 합니다


을 usb root에 복사 하세요(340m)

> 삭제 하지 않아도 완전 초기화 된다고 합니다
초기접속은
root
아이디입력
androidoverlinux
암호입력 접속
passwd
변경
df -h

====== 여기서 부터시작 ==============
1. mysql 설치하기
제거는
apt-get purge mysql-server
apt-get install mysql-server
에러 발생
171015 12:50:02 [Warning] Using unique option prefix key_buffer instead of key_buffer_size is deprecated and will be removed in a future release. Please use the full name instead.
171015 12:50:02 [Note] Ignoring --secure-file-priv value as server is running with --bootstrap.
171015 12:50:02 [Note] /usr/sbin/mysqld (mysqld 5.5.55-0+deb8u1) starting as process 9913 ...
[....] Starting MySQL database server: mysqld . . . . . . . . . . . . . . . . . [FAIL . . . . . . . . . . failed!
invoke-rc.d: initscript mysql, action "start" failed.
dpkg: error processing package mysql-server-5.5 (--configure):
subprocess installed post-installation script returned error exit status 1
Setting up libhtml-template-perl (2.95-1) ...
dpkg: dependency problems prevent configuration of mysql-server:
mysql-server depends on mysql-server-5.5; however:
Package mysql-server-5.5 is not configured yet.
dpkg: error processing package mysql-server (--configure):
dependency problems - leaving unconfigured
Processing triggers for libc-bin (2.19-18+deb8u7) ...
Processing triggers for systemd (215-17+deb8u6) ...
Errors were encountered while processing:
mysql-server-5.5
mysql-server
E: Sub-process /usr/bin/dpkg returned an error code (1)
root@u5pvr-debian:~#
====
7/3일자 펌웨어 에러
----
[ ok ] Stopping MySQL database server: mysqld.
180705 19:32:13 [Warning] Using unique option prefix key_buffer instead of key_buffer_size is deprecated and will be removed in a future release. Please use the full name instead.
180705 19:32:13 [Note] Ignoring --secure-file-priv value as server is running with --bootstrap.
180705 19:32:13 [Note] /usr/sbin/mysqld (mysqld 5.5.60-0+deb8u1) starting as process 17517 ...
[....] Starting MySQL database server: mysqld . . . . . . . . . . . . . . . . . . . . . . . . . . . [FAIL failed!
invoke-rc.d: initscript mysql, action "start" failed.
dpkg: error processing package mysql-server-5.5 (--configure):
subprocess installed post-installation script returned error exit status 1
Setting up libhtml-template-perl (2.95-1) ...
dpkg: dependency problems prevent configuration of mysql-server:
mysql-server depends on mysql-server-5.5; however:
Package mysql-server-5.5 is not configured yet.
dpkg: error processing package mysql-server (--configure):
dependency problems - leaving unconfigured
Processing triggers for libc-bin (2.19-18+deb8u10) ...
Processing triggers for systemd (215-17+deb8u6) ...
Errors were encountered while processing:
mysql-server-5.5
mysql-server
E: Sub-process /usr/bin/dpkg returned an error code (1)
root@AOL-Debian:~#
에러 발생 정상 수정 해야합니다
adduser mysql aid_inet
root@AOL-Debian:/mnt/media_rw/sda5/www/html# adduser mysql aid_inet
Adding user `mysql' to group `aid_inet' ...
Adding user mysql to group aid_inet
Done.
root@AOL-Debian:/mnt/media_rw/sda5/www/html#
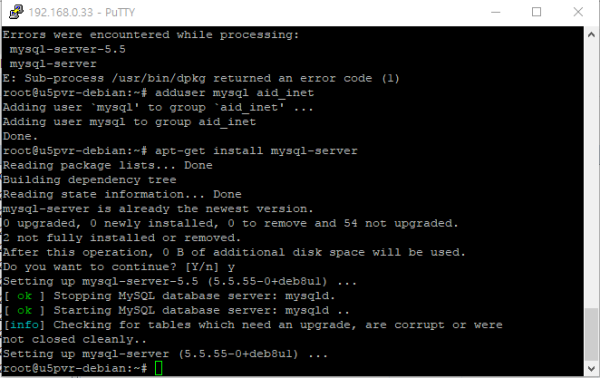
> mysql 재설치
apt-get install mysql-server
성공
root@AOL-Debian:~# apt-get install mysql-server
Reading package lists... Done
Building dependency tree
Reading state information... Done
mysql-server is already the newest version.
0 upgraded, 0 newly installed, 0 to remove and 3 not upgraded.
2 not fully installed or removed.
After this operation, 0 B of additional disk space will be used.
Do you want to continue? [Y/n] y
Setting up mysql-server-5.5 (5.5.60-0+deb8u1) ...
[ ok ] Stopping MySQL database server: mysqld.
[ ok ] Starting MySQL database server: mysqld ..
[info] Checking for tables which need an upgrade, are corrupt or were
not closed cleanly..
Setting up mysql-server (5.5.60-0+deb8u1) ...
root@AOL-Debian:~#

linux 업데이트
http://cafe.naver.com/mk802/23353
> mysql 재설치
apt-get install mysql-server
2.수정

nano /etc/mysql/my.cnf
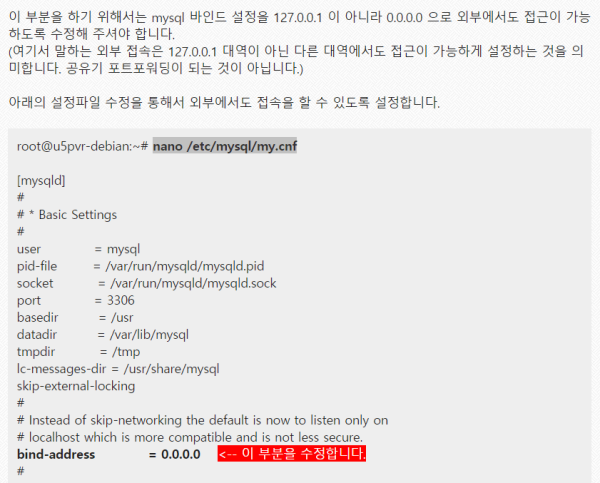

#bind-address = 127.0.0.1
bind-address = 0.0.0.0
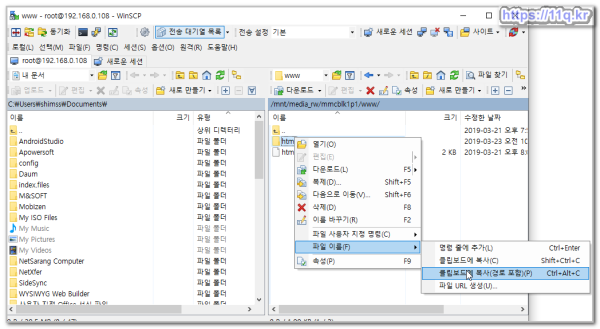
참조 winscp로 edit 하여 수정 하는 방법


nano /etc/mysql/my.cnf
#bind-address = 127.0.0.1
수정시
^o
저장 엔터
^x
확인) 모든 주소에 대해서 바인딩 되어서 구동되는 mysql 데몬 확인 합니다
netstat -nlp | grep mysql

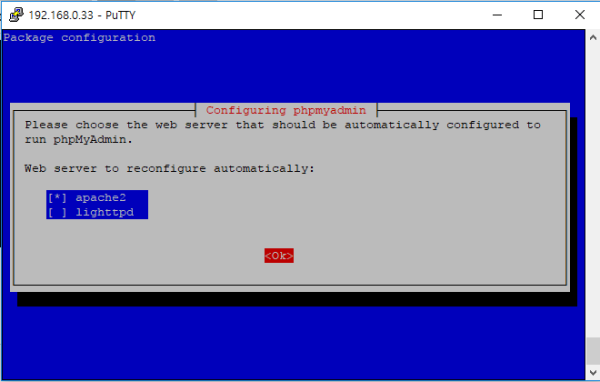
2. apache2 + php5 및 의존성 패키지 설치하기

제거는
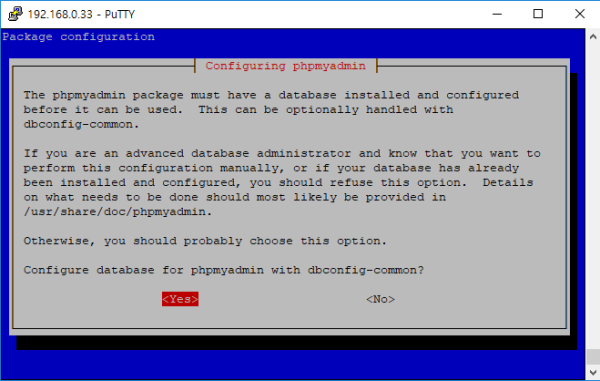
apt-get purge phpmyadmin
apt-get install phpmyadmin

패스워드 : ss78***@
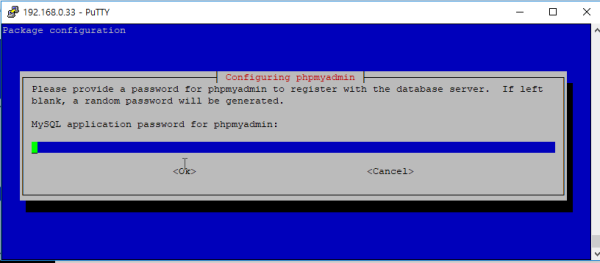
패스워드 : ***
성공
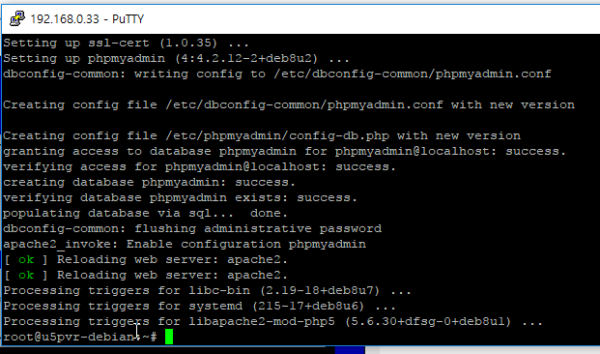
성공


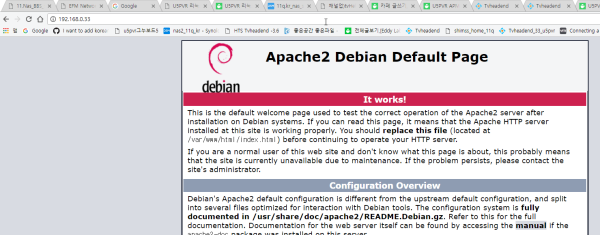
http://192.168.0.33
다음작업

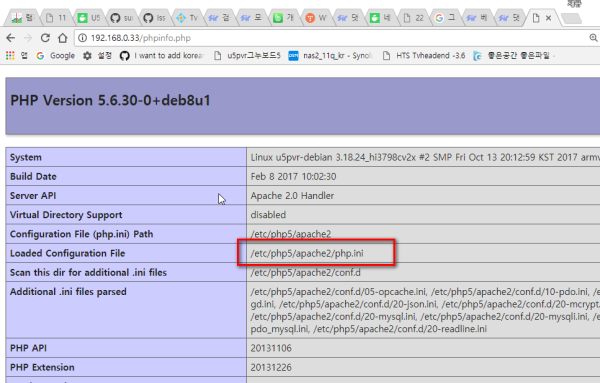
nano /var/www/html/phpinfo.php
추가
<?php phpinfo(); ?>


http://192.168.0.33/phpinfo.php

웹서버 실행 계정 www-data 가 읽어야 함으로 www-data 에게 권한을 줍니다.
chown www-data:www-data /var/www/html/phpinfo.php

http://192.168.0.33/phpinfo.php
3. phpmyadmin 설치하기

nano /etc/apache2/apache2.conf
제일 밑에 추가
ServerName localhost
Include /etc/phpmyadmin/apache.conf
참조 제일 밑에 추가 합니다

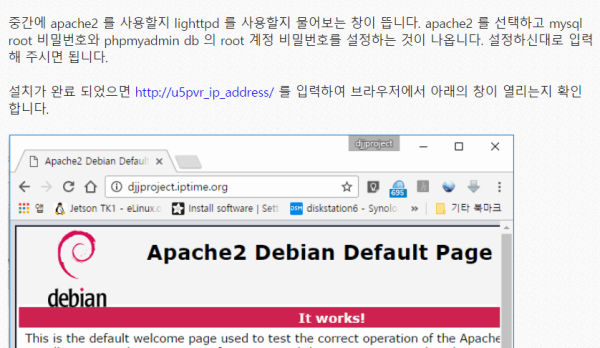
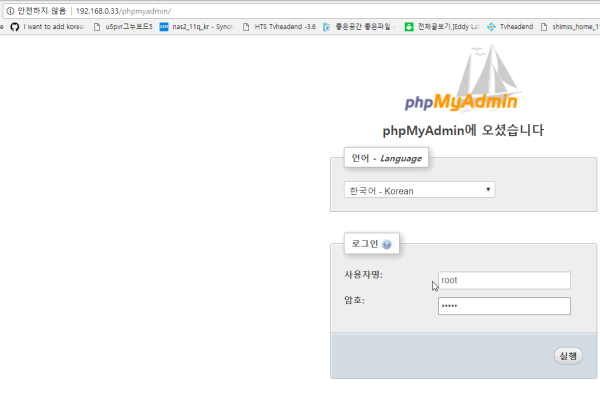
이후 http://u5pvr_ip_address/phpmyadmin 으로 접속하면 아래의 phpmyadmin 페이지가 열립니다.
http://192.168.0.33/phpmyadmin/
root
설치시 password 입력
*******
u5pvr 아파치 서버를 재시작 합니다


service apache2 restart
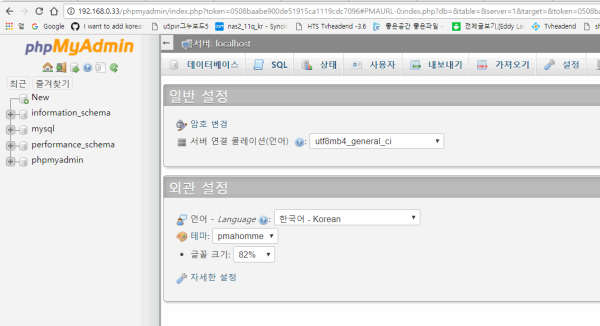
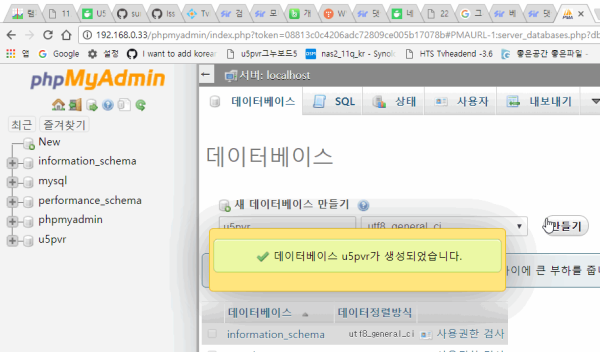
그누보드를 위하여 data 생성 합니다
생성시
utf8_general_ci
설정 바랍니다.
몇개 만들어 놓습니다.


본자료는
http://cafe.naver.com/mk802/20363
의 정보를 참조 설치 사례입니다.
성공 했습니다........축하...
<웹루트 옮기기>
dpkg-reconfigure tzdata
date
하여 날짜 확인 합니다
실제로 기본 웹 루트는 /var/www/html 로 지정되어 있습니다
설치하고자 하는 경로를 만들거나 만들어진 경로를 winscp 로 확인 복사 합니다
mkdir -p /mnt/media_rw/mmcblk1p1/www/html/

/mnt/media_rw/mmcblk1p1/www/html/
mkdir -p /mnt/media_rw/mmcblk1p1/www/html/
nano /etc/apache2/apache2.conf
#<Directory /var/www/>

nano /etc/apache2/sites-enabled/000-default.conf
DocumentRoot /mnt/media_rw/sda5/www/html

/var/www/html

권한설정 필요시 진행 하세요
chown www-data:www-data /mnt/media_rw/mmcblk1p1/www/html/*.*

뷰PDF 1,2
office view
관련자료
-
링크
-
첨부
댓글목록

Chchoi님의 댓글
저도 MySQL 설치가 않되어 애를 많이 먹었습니다... 다운받은 시도해볼게요.
Chchoi님의 댓글
감사합니다. 전부 위의 순서대로 설치 완료 되었습니다.
Thanks....

shimss11q님의 댓글
>>>내장하드 로 폴더 변경 > U5PVR APM 2편 : 활용하기 (apache2 + php5 + mysql)
참조 web 폴더를 내장 하드로 www변경 작업 20180428
업데이트 )hdd 로 변경 설정후 epg 생성 명령 최종 사용기
성공))U5PVR APM 2편): 활용 (apache2 + php5 + mysql) www폴더 변경 epg2xml 폴더 경로 변경 설정 하기
https://11q.kr/g5s/bbs/board.php?bo_table=s11&wr_id=5059
shimss@11q.kr님의 댓글
http://cafe.naver.com/mk802/20251
에서 U5PVR WebDAV 인증 Basic 및 미인증으로 설정하기
후 web 서버 php 가능하게 실행 명령
a2ensite 000-default.conf
a2ensite listing.conf
service apache2 reload
....너무나 감사 합니다....
shimss@11q.kr님의 댓글
새로운 패키지의 설치 방법입니다.
▶ apt-get install xxx ☞ xxx 패키지를 설치
패키지의 재설치 방법입니다.
▶ apt-get reinstall xxx ☞ xxx 패키지를 재설치
패키지의 삭제 방법입니다.
▶ apt-get remove xxx ☞ xxx 패키지를 삭제 (설정 파일 유지)
패키지의 완전 삭제 방법입니다.
▶ apt-get purge xxx ☞ xxx 패키지를 완전 삭제 (설정 파일까지 삭제)
패키지 검색 방법입니다.
▶ apt-cache search xxx ☞ xxx 가 포함된 패키지를 검색
패키지의 정보를 보는 방법입니다.
▶ apt-cache show xxx ☞ xxx 패키지 정보 표시
설치에 사용한 패키지 라이브러리 파일을 삭제하는 명령입니다.
▶ apt-get clean ☞ /var/cache/apt/archives 경로의 패키지 라이브러리 설치파일 삭제
출처: https://cezacx2.tistory.com/1246 [지식검색 귀하신분]
shimss@11q.kr님의 댓글
문제발생
root@AOL-Debian:/# service apache2 reload
[FAIL] Reloading web server: apache2 failed!
[warn] Apache2 is not running ... (warning).
root@AOL-Debian:/#
shimss@11q.kr님의 댓글
apt-get purge apache2
#완전삭제
apt-get install apache2
#설치
a2dissite 000-default
#는 제거
a2ensite 000-default
#기본으로 설정
다음은
<웹루트 옮기기>
nano /etc/apache2/apache2.conf
<Directory /mnt/media_rw/sda5/www/>
nano /etc/apache2/sites-enabled/000-default.conf
DocumentRoot /mnt/media_rw/sda5/www/html
adduser www-data aid_media_rw
adduser www-data aid_sdcard_r
service apache2 restart
 ● Entware 패키지 /opt/etc/profile: Permission denied 재설치 … _조회수_댓글수(
17121
● Entware 패키지 /opt/etc/profile: Permission denied 재설치 … _조회수_댓글수(
17121♥간단_메모글♥
-
등록일 04.15가입 인사드립니다.댓글 7
-
등록일 04.09가입인사.댓글 4
-
등록일 03.03안녕하세여댓글 1
-
등록일 02.13
최근글
-
등록일 02.25
-
등록일 02.24
-
등록일 02.24
새댓글
-
등록자 마린w 등록일 02.27
-
등록자 tarantee 등록일 02.26
-
등록자 으응이잉 등록일 02.26
-
등록자 민예빠 등록일 02.25
-
등록자 태민아빠 등록일 02.25
오늘의 홈 현황
QR코드
☞ QR코드 스캔은 kakao앱 자체 QR코드