11.Nas_1


새창 작성 수정 목록 링크 Edit G카랜다 HDD HDD HDD 게시물 주소 복사


● dsm업데이트 가능)tinycore-redpill.v0.8.0 빌드 작업)Esxi sever xpenology boot loader tinycore-redpill.v0.8.0.0.img 작업

♨ 카랜더 일정 :
  • 링크

  • 첨부

  • 컨텐츠 정보

    본문

    Loading the player...
    ARPl 로더를 사용을 추천 합니다
    ★★★ 시놀로지작업) 새로운 레드필 로더 ARPL(Automated Redpill Loader)로 빌드하기 강력 추천

    https://11q.kr/www/bbs/board.php?bo_table=s11&wr_id=12423


    ● dsm업데이트 가능)tinycore-redpill.v0.8.0 빌드 작업)Esxi sever xpenology boot loader tinycore-redpill.v0.8.0.0.img 작업

    성공모델 : ds918 ds3622 ds920
    사용시스템 : esxi 서버 7.0.2

    정상 빌드 성공 다음내용 업데이트 저장 합니다.

    저장 파일 > 입축 해제 로더를 vm에 추가 사용

    d:\1__redpill_synology_bootloader\1_tinycore-redpill.v0.8.0.0.img\tinycore-redpill.v0.8.0.0_v3\tinycore-redpill-v0800_V3.zip

    정보 

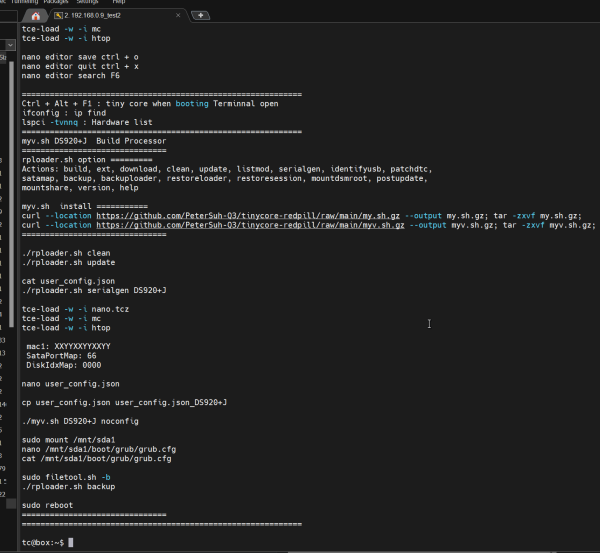
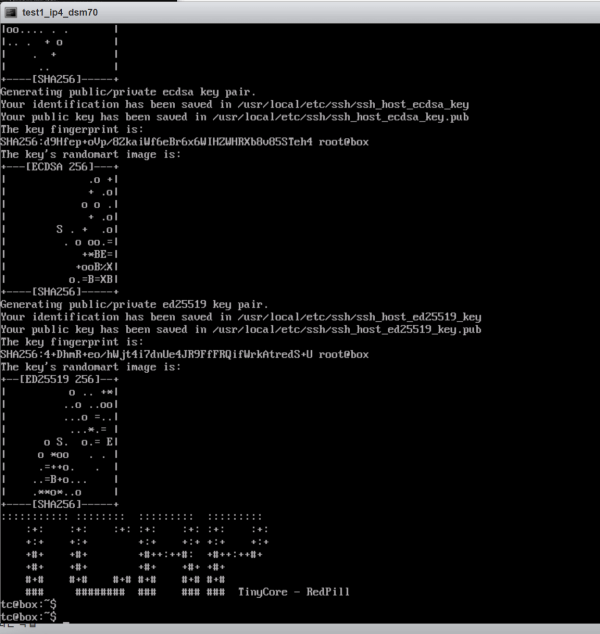
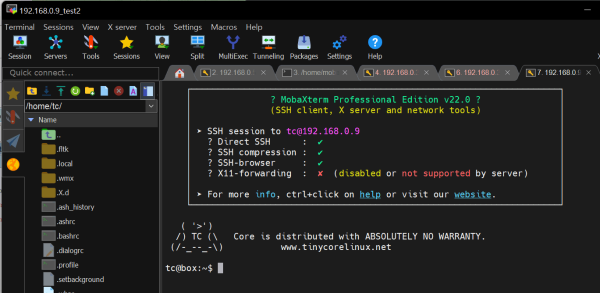
     SSH 터미널 open시 정보 출력 추가

    3232235521_1658075937.8725.png

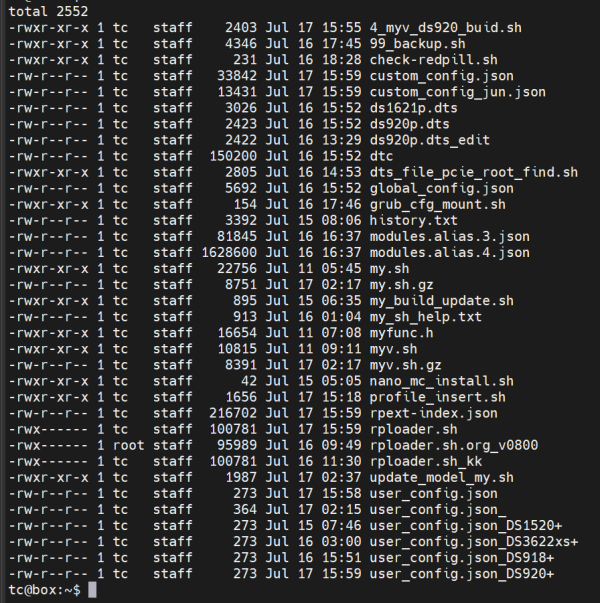
    파일 정보

    3232235521_1658075988.8007.png

    3232235521_1658076029.4805.png

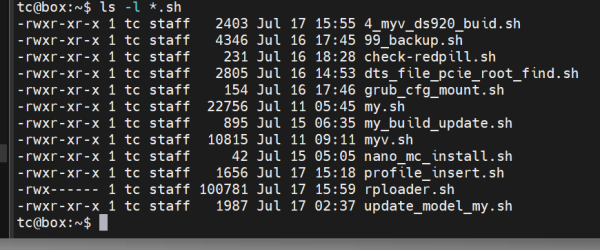
    파일 정보

    SSH 터미널 표시 정보

    tc@box:~$ cat profile_insert.sh
    echo ============================================
    echo nano .profile  information
    echo ================================
    cat /proc/cpuinfo | grep 'model name'
    echo ===============================
    cat /proc/meminfo | grep MemTotal
    echo ===============================
    ./rploader.sh
    ./myv.sh

    echo "
    =====================
    SSH Termianl user / passwd
    tc /  P@ssw0rd 입니다(0은 숫자)
    ===========================
    install nano mc htop,,,,,,,,
    ============================
    tce-load -w -i nano.tcz
    tce-load -w -i mc
    tce-load -w -i htop
    nano editor save ctrl + o
    nano editor quit ctrl + x
    nano editor search F6
    ============================================================
    Ctrl + Alt + F1 : tiny core when booting Terminnal open
    ifconfig : ip find
    lspci -tvnnq : Hardware list
    ============================================================
    myv.sh DS920+J  Build Processor
    ===============================
    Actions: build, ext, download, clean, update, listmod, serialgen, identifyusb, patchdtc,
    satamap, backup, backuploader, restoreloader, restoresession, mountdsmroot, postupdate,
    mountshare, version, help

    ./rploader.sh clean
    ./rploader.sh update
    cat user_config.json
    ./rploader.sh serialgen DS920+J
    tce-load -w -i nano.tcz
    tce-load -w -i mc
    tce-load -w -i htop
     mac1: XXYYXXYYXXYY
     SataPortMap: 66
     DiskIdxMap: 0000
    nano user_config.json
    cp user_config.json user_config.json_DS920+J
    ./myv.sh DS920+J noconfig
    sudo mount /mnt/sda1
    nano /mnt/sda1/boot/grub/grub.cfg
    cat /mnt/sda1/boot/grub/grub.cfg
    sudo filetool.sh -b
    ./rploader.sh backup
    sudo reboot
    ===============================
    ============================================================
    "
    tc@box:~$

    빌드 예) DS920+ 빌드

    tc@box:~$ cat 4_myv_ds920_buid.sh

    ./rploader.sh clean
    ./rploader.sh
    echo =============================================  Enter
    read answer
    ./myv.sh
    echo =============================================  Enter
    read answer
    cp user_config.json_DS920+ user_config.json
    tce-load -w -i nano.tcz
    tce-load -w -i mc
    cat user_config.json

    ./rploader.sh serialgen DS920+
    echo =============================================  Enter
    read answer
    nano user_config.json
    cp user_config.json user_config.json_DS920+
    cat user_config.json
    cat user_config.json_DS920+
    echo =============================================  Enter
    read answer
    cat user_config.json
    echo =============================================
    echo Intel lan drive install No ========= 21 22 64
    echo =============================================
    echo ./myv.sh DS920+J noconfig
    echo =============================================  Enter
    read answer

    echo =============================================  Enter
    echo =============== build start =================
    echo =============================================  Enter
    echo  ./myv.sh DS920+J noconfig
    ./myv.sh DS920+J noconfig
    echo =============================================  Enter
    echo =============== build end ===================
    echo =============================================  Enter
    echo =============================================
    echo nano /mnt/sda1/boot/grub/grub.cfg
    echo =============================================  Enter
    read answer
    sudo mount /mnt/sda1
    cat /mnt/sda1/boot/grub/grub.cfg
    date
    ls -l /mnt/sda1/boot/grub/
    nano /mnt/sda1/boot/grub/grub.cfg
    echo ./99_backup.sh or sudo filetool.sh -b
    echo =============================================
    date
    ls -l /mnt/sda3/mydata.tgz
    echo =============================================  Enter
    read answer
    ./99_backup.sh
    echo =============================================
    date
    ls -l /mnt/sda3/mydata.tgz
    echo =============================================  Enter
    read answer
    echo cat /mnt/sda1/boot/grub/grub.cfg
    echo =============================================  Enter
    read answer
    cat /mnt/sda1/boot/grub/grub.cfg
    echo =============================================
    read answer
    echo exitcheck.sh poweroff or sudo reboot
    echo ========= stop to Ctrl + C  == Enter goto Poweroff
    exitcheck.sh poweroff
    echo =============================================
    echo ================= ▒build check  end ================
    echo =============================================
    tc@box:~$


     간단빌드 스크립트 파일 사용방법

    ./4_myv_ds920_buid.sh


    .================ 작업 준비 내용 ================= 

    전체적인 작업 테스트 내용

    출처 : https://www.2cpu.co.kr/lec/4461

    출처 기준으로 작업 합니다

    최신 코어 로더 코드는 항상 여기에 링크되어 있습니다:

    https://xpenology.com/forum/topic/7848-links-to-loaders/

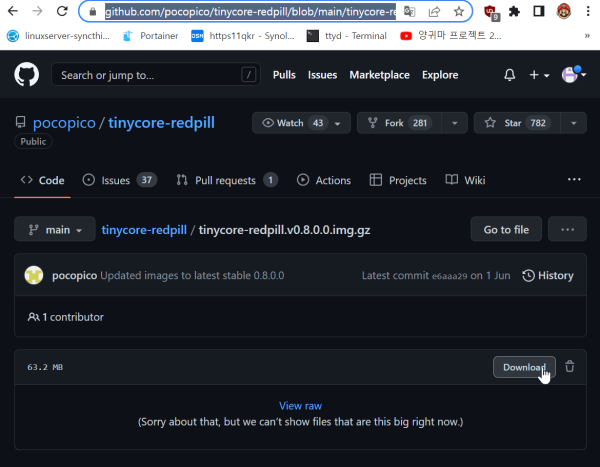
    ▶ tinycore-redpill.v0.8.0.0.img 다운로드

    3232235521_1657859095.3621.png

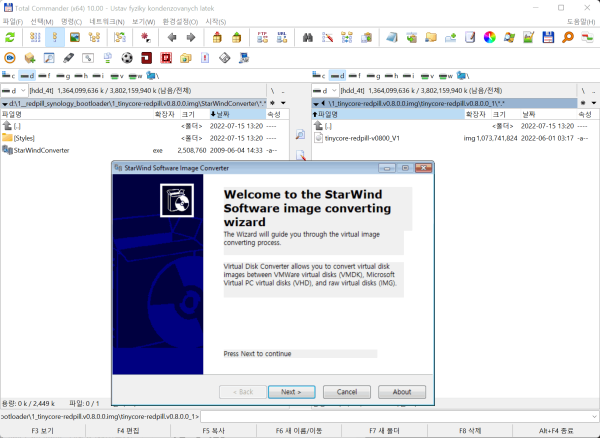
    - 파일 압축 해제 vmdk 파일 변환 작업

    .압축해제후 파일 명 변경

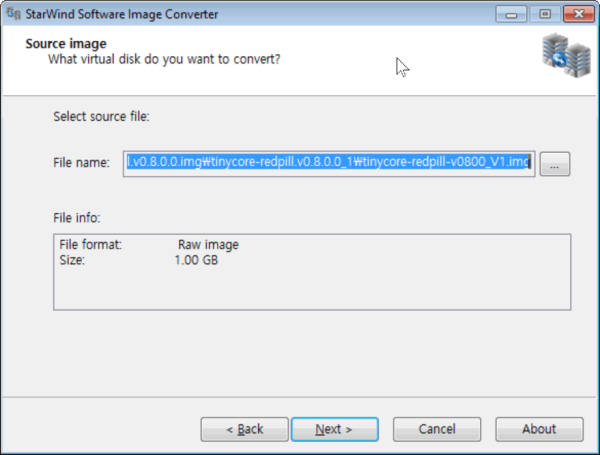
    d:\1__redpill_synology_bootloader\1_tinycore-redpill.v0.8.0.0.img\tinycore-redpill.v0.8.0.0_1\tinycore-redpill-v0800_V1.img


    .변환작업 실행

    d:\1__redpill_synology_bootloader\1_tinycore-redpill.v0.8.0.0.img\StarWindConverter\StarWindConverter.exe

    3232235521_1657859261.5375.png

    파일 추가후

    3232235521_1657859283.3595.png

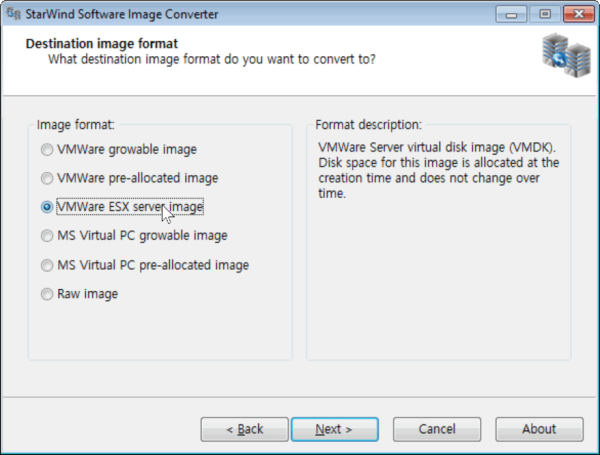
    변환타입 변경

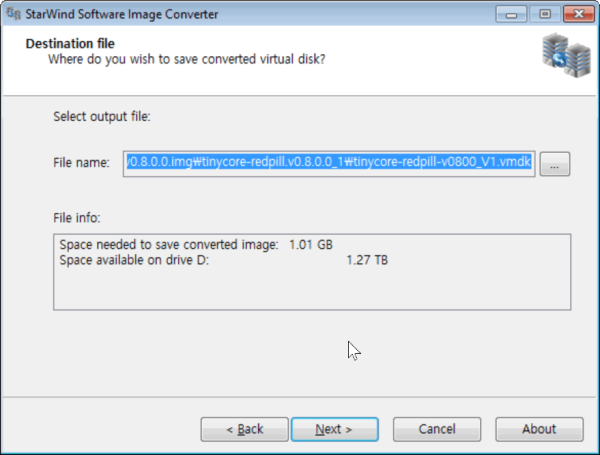
    3232235521_1657859303.3426.png

    저장위치

    3232235521_1657859320.7681.png

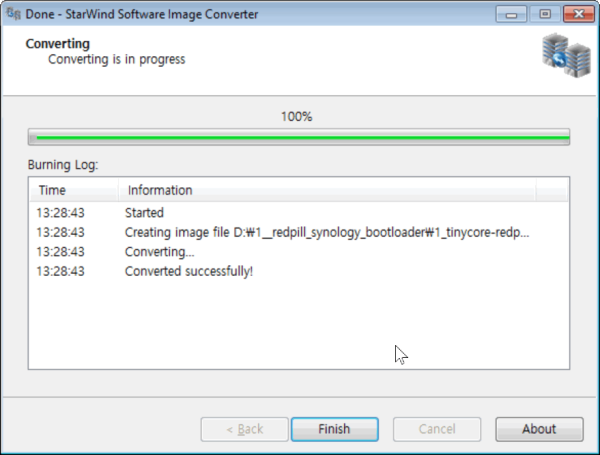
    변환 완료

    3232235521_1657859337.0685.png


    esxi 서버에 필요한 파일 입니다

    3232235521_1657859377.4847.png


    .esxi 서버 부트로더 변경 작업

    3232235521_1657859504.3105.png

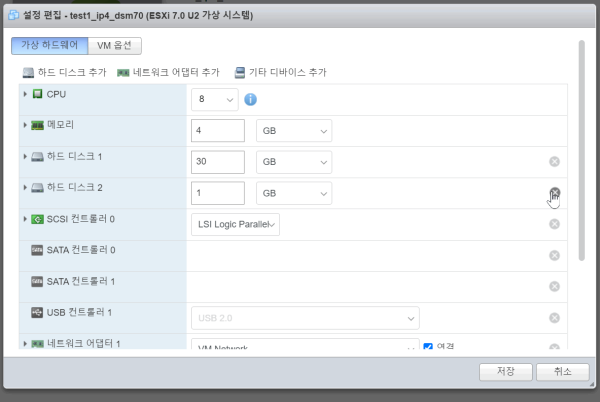
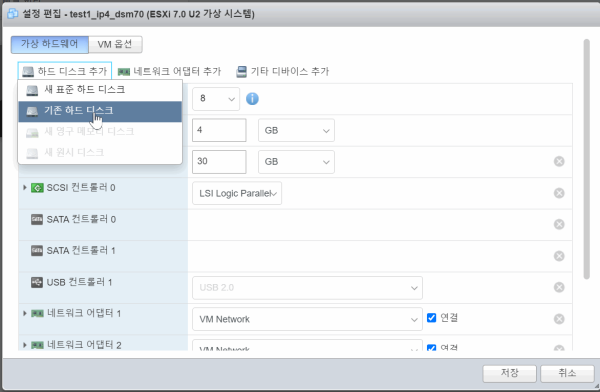
    기존 부트로터  삭제후 추가작업

    3232235521_1657859562.0805.png


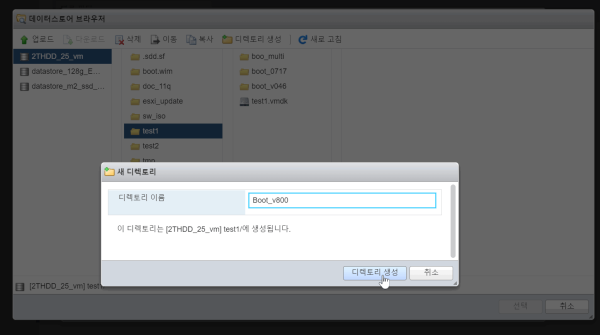
    저장위치에 boot 로더 폴더 생성

    l3232235521_1657859649.6806.png


    저장 위치 만들어  부트로더 업로드 2개의 파일 진행

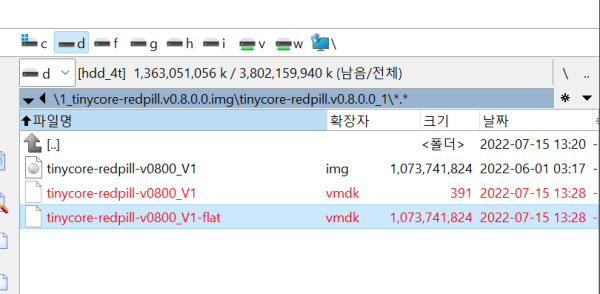
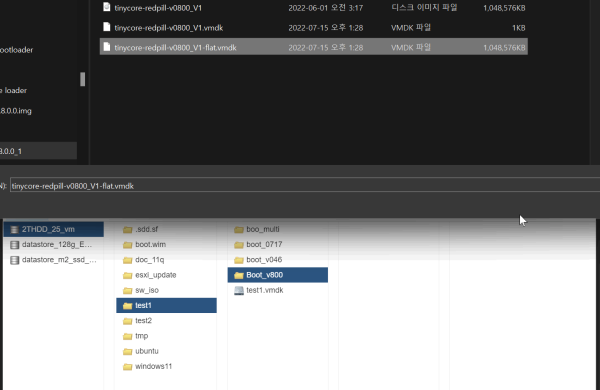
    d:\1__redpill_synology_bootloader\1_tinycore-redpill.v0.8.0.0.img\tinycore-redpill.v0.8.0.0_1\tinycore-redpill-v0800_V1.vmdk

    d:\1__redpill_synology_bootloader\1_tinycore-redpill.v0.8.0.0.img\tinycore-redpill.v0.8.0.0_1\tinycore-redpill-v0800_V1-flat.vmdk

    3232235521_1657859775.2574.png


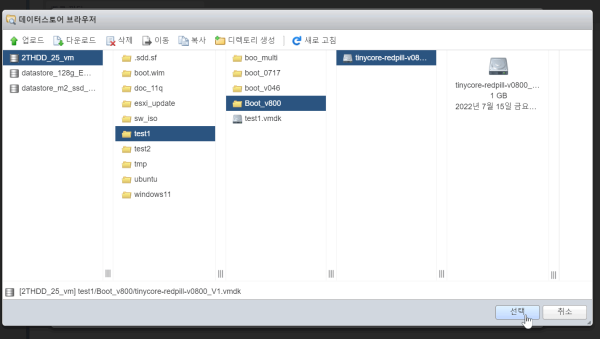
    부트로더 업로드 파일 선택 

    3232235521_1657859862.7388.png


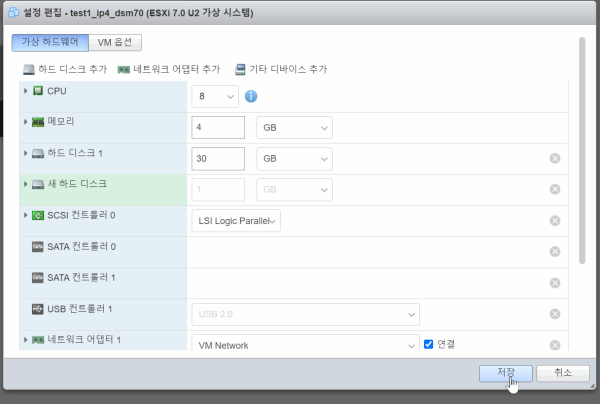
    1차 부트로더 저정후 수정

    3232235521_1657859909.5936.png


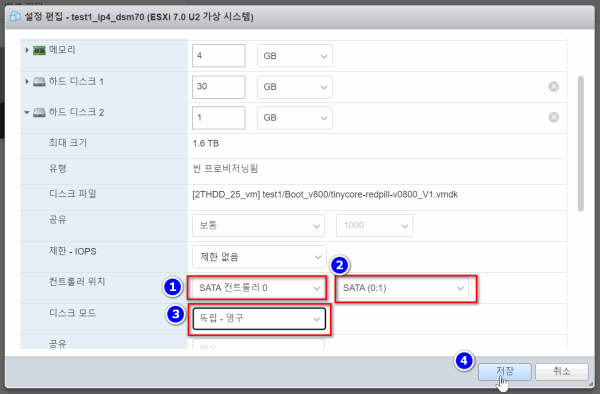
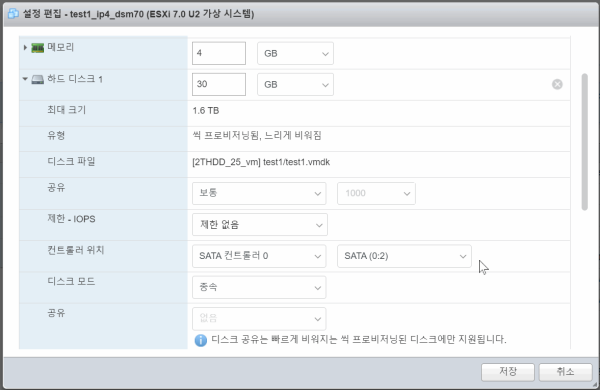
    편집 수정 > sata, 독립으로 변경 저장

    3232235521_1657860019.2063.png


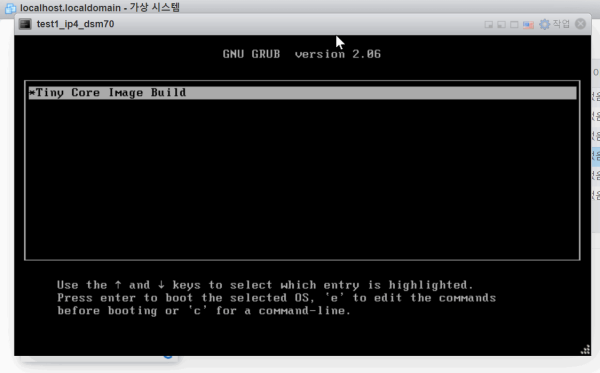
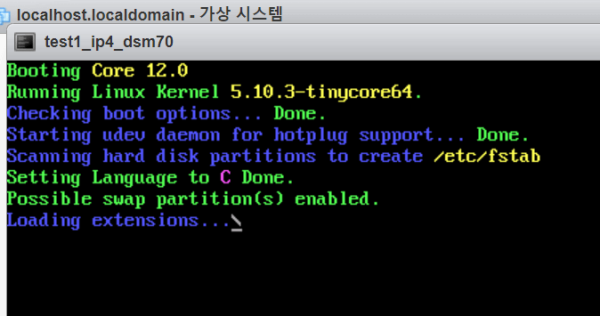
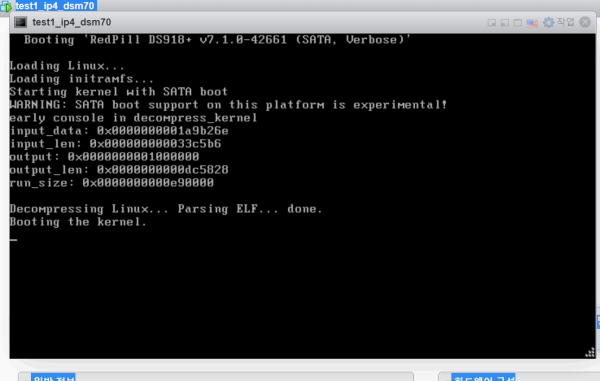
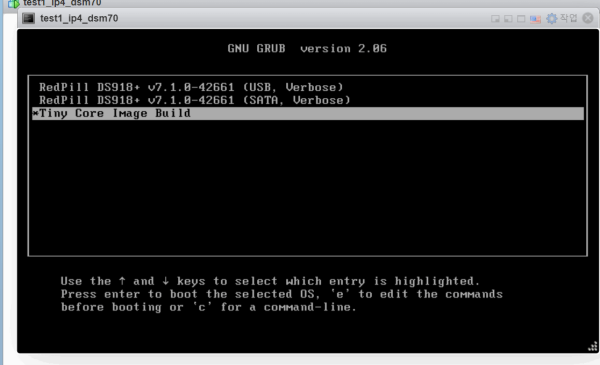
    부팅> 전원 켜기 합니다

    3232235521_1657860060.0837.png

    3232235521_1657860447.58.png


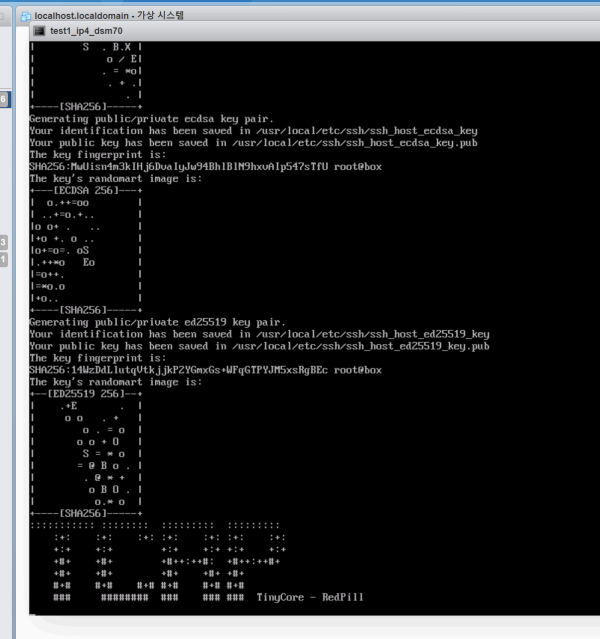
    부팅완료

    3232235521_1657860107.7707.png


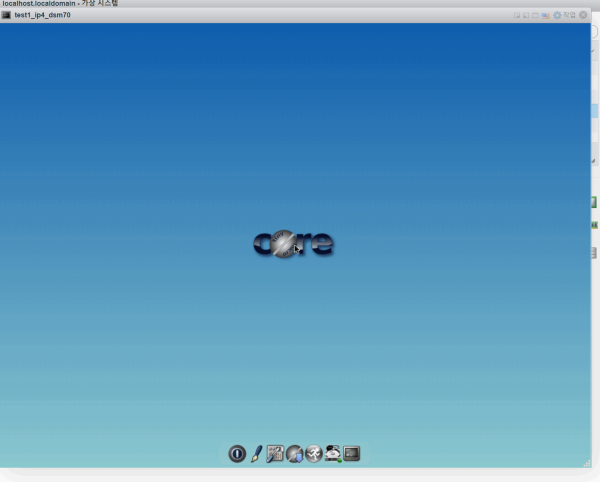
    부팅후 최종 화면

    3232235521_1657860137.6254.png


    ssh 터미널 접속

    3232235521_1657946268.6903.png

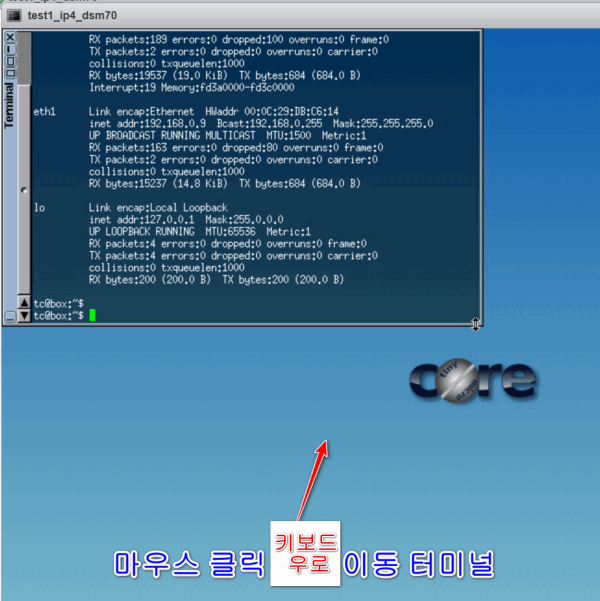
    ● Tiny Core Linux  CTRL-ALT-F1 터미널 진입 open 및  키보드 단축키

    Esxi에서 터미널 오픈이 불편하여 간단한 진입 방법입니다

    CTRL-ALT-F1 
    3232235521_1657948897.45.png

    ssh 터미널 접속후

    ifconfig
    하여 ip 확인

    암호 변경
    sudo su
     외부 pc에서 접속 가능
    tc 암호변경없이 접속은 P@ssw0rd 입니다(0은 숫자)

    passwd tc
    로 변경 작업후  외부 pc에서 접속 가능
    1234
    1234
    ========
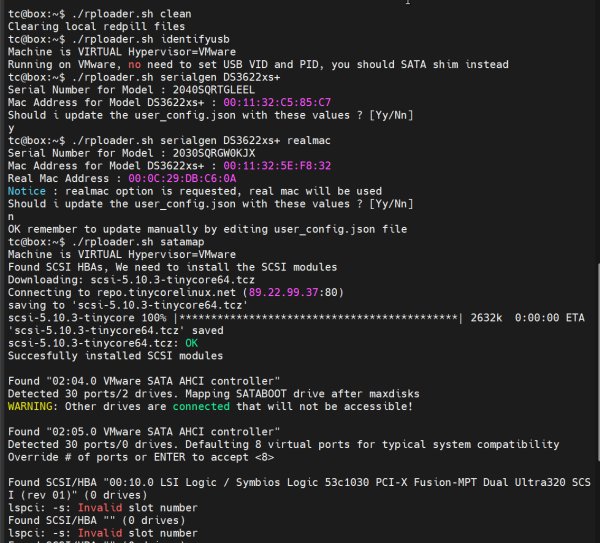
    터미널 접속후 업데이트 작업
    3232235521_1657860872.97.png


    3232235521_1657861204.2675.png

    3232235521_1657861220.1108.png
    tc@box:~$ history
       0 ifconfig
       1 ./rploader.sh update
       2 ./rploader.sh fullupgrade
       3 ./rploader.sh clean
       4 ./rploader.sh identifyusb
       5 ./rploader.sh serialgen DS3622xs+
       6 ./rploader.sh serialgen DS3622xs+ realmac
       7 ./rploader.sh satamap
       8 cat user_config.json
       9 history
    3232235521_1657861276.9909.png


    유틸 설치
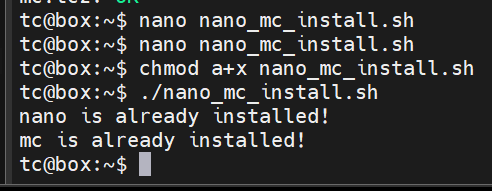
    tc@box:~$ cat nano_mc_install.sh
    tce-load -w -i nano.tcz
    tce-load -w -i mc
    tc@box:~$

    nano nano_mc_install.sh

    3232235521_1657861579.123.png

    chmod a+x nano_mc_install.sh
    권한 변경
    3232235521_1657861641.7704.png

    백업 명령어 추가
    tc@box:~$ nano 99_backup.sh
    tc@box:~$ nano 99_backup.sh
    tc@box:~$ chmod a+x 99_backup.sh
    =============
    echo sudo filetool.sh -b
    echo =========================================================
    rem sudo filetool.sh -b
    ./rploader.sh backup 
    echo =========================================================
    date
    ls -l /mnt/sda3/mydata.tgz
    echo "========================================
    3232235521_1657862543.1799.png

    ==================
    tc@box:~$ history
       0 ifconfig
       1 ./rploader.sh update
       2 ./rploader.sh fullupgrade
       3 ./rploader.sh clean
       4 ./rploader.sh identifyusb
       5 ./rploader.sh serialgen DS3622xs+
       6 ./rploader.sh serialgen DS3622xs+ realmac
       7 ./rploader.sh satamap
       8 cat user_config.json
       9 history
      10 ls -l
      11 history > 1.sh
      12 tce-load -w -i nano.tcz
      13 tce-load -w -i mc
      14 nano nano_mc_install.sh
      15 chmod a+x nano_mc_install.sh
      16 ./nano_mc_install.sh
      17 ls
      18 nano 99_backup.sh
      19 chmod a+x 99_backup.sh
      20 nano 99_backup.sh
      21 ./99_backup.sh
      22 history

    ==================
    동작 테스트 >
     TCRP의 하드웨어 감지 알고리즘에서 권장하는 모든 확장을 나열
    ./rploader.sh listmods apollolake-7.1.0-42661

    특정 확장을 추가하려면 목록에서 선택하고 1단계의 아키텍처를 참조하십시오.
    ./rploader.sh ext -- 

    ./rploader.sh ext apollolake-7.1.0-42661 add https://raw.githubusercontent.com/pocopico/rp-ext/master/redpill-acpid/rpext-index.json
    ./rploader.sh ext denverton-7.1.0-42661 add https://raw.githubusercontent.com/pocopico/rp-ext/master/v9fs/rpext-index.json
    예제는 ACPI 및 VIRTIO 지원을 추가하는 방법을 보여줍니다. 이는 기본 설치에 대한 향상된 기능으로 선택되는 경우가 많습니다.
    =============
     DS918+, 사전 선택된 드라이버 사용

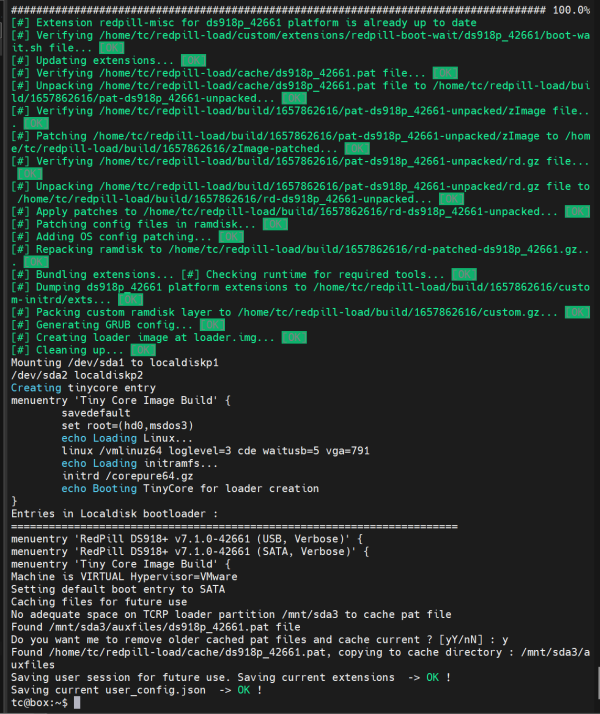
    ./rploader.sh build apollolake-7.1.0-42661 manual 
    3232235521_1657862660.6594.png

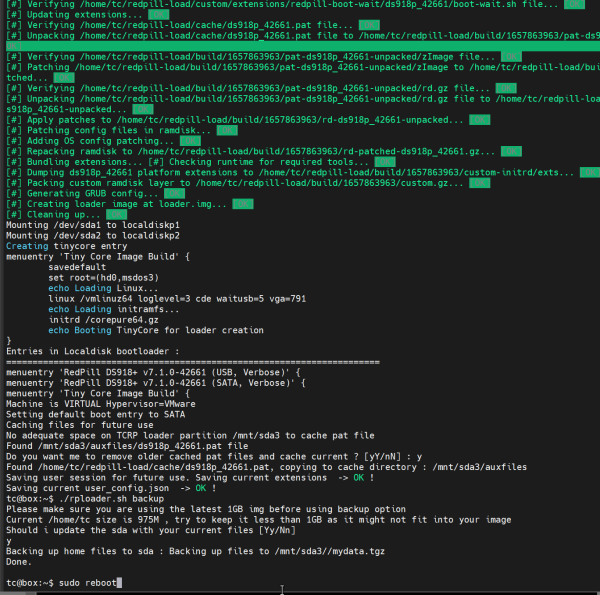
    백업
    sudo filetool.sh -b
    ./rploader.sh backup

    3232235521_1657862782.5331.png

    리부팅
    sudo reboot
    3232235521_1657862964.7481.png

    esxi 서버에서   랜인식이 되지 않는다

    3232235521_1657863103.285.png

    중지  전원 끄기후  재부팅
    3232235521_1657863159.6508.png


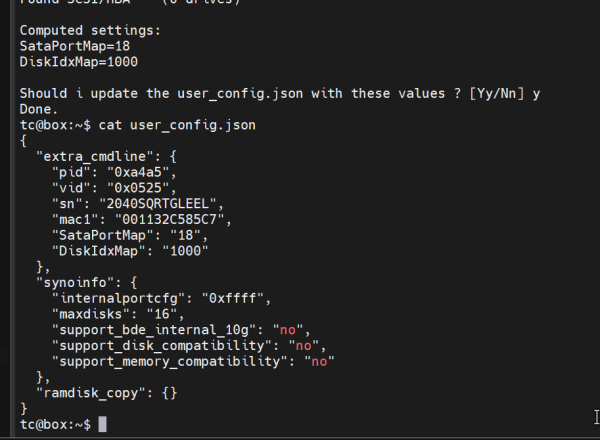
     tc@box:~$ cat user_config.json
    {
      "extra_cmdline": {
        "pid": "0xa4a5",
        "vid": "0x0525",
        "sn": "2040SQRTGLEEL",
        "mac1": "001132C585C7",
        "SataPortMap": "18",
        "DiskIdxMap": "1000"
      },
      "synoinfo": {
        "internalportcfg": "0xffff",
        "maxdisks": "16",
        "support_bde_internal_10g": "no",
        "support_disk_compatibility": "no",
        "support_memory_compatibility": "no"
      },
      "ramdisk_copy": {}
    }

    랜 mac 을 "mac1": "XXYYXXYYXXYY",
    로 변경 재빌드

    tc@box:~$ nano user_config.json
    tc@box:~$ cat user_config.json
    {
      "extra_cmdline": {
        "pid": "0xa4a5",
        "vid": "0x0525",
        "sn": "2040SQRTGLEEL",
        "mac1": "XXYYXXYYXXYY",
        "SataPortMap": "18",
        "DiskIdxMap": "1000"
      },
      "synoinfo": {
        "internalportcfg": "0xffff",
        "maxdisks": "16",
        "support_bde_internal_10g": "no",
        "support_disk_compatibility": "no",
        "support_memory_compatibility": "no"
      },
      "ramdisk_copy": {}
    }
    tc@box:~$

    랜 mac 을 "mac1": "XXYYXXYYXXYY",
    로 변경 재빌드
    ======
    명령어 도움말
    ./rploader.sh help

    오토 빌드
     tce-load -w -i nano.tcz
    nano user_config.json

    ./rploader.sh listmods apollolake-7.1.0-42661
    ./rploader.sh ext apollolake-7.1.0-42661 auto
    ./rploader.sh build apollolake-7.1.0-42661
    ./rploader.sh backup

    리부트
    3232235521_1657864061.2535.png
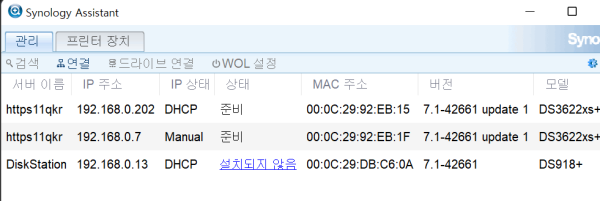
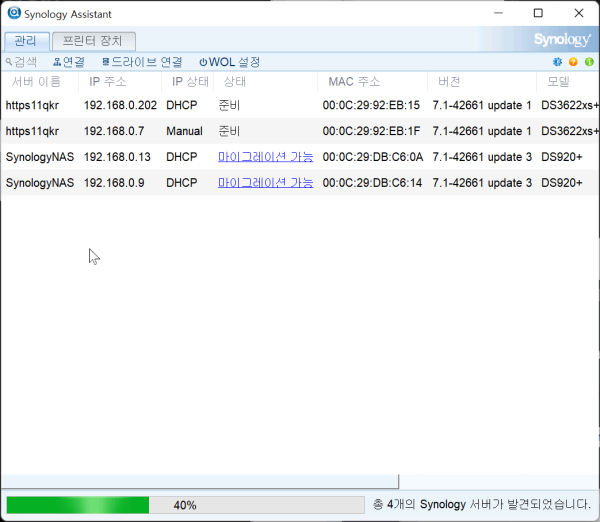
    시놀로지 어시스턴트로 확인  랜연결 성공
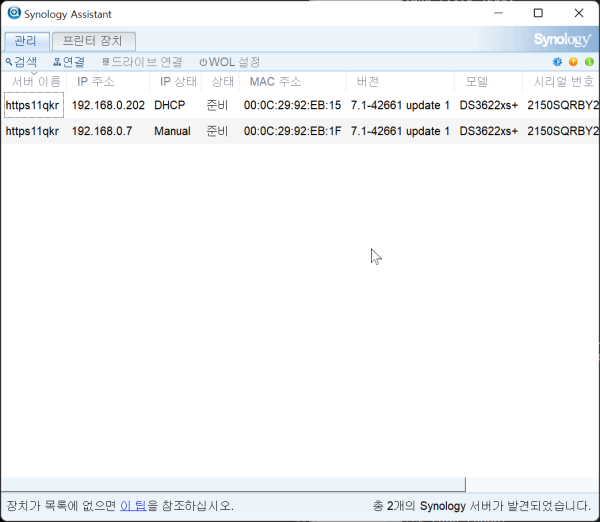
    3232235521_1657864167.3083.png

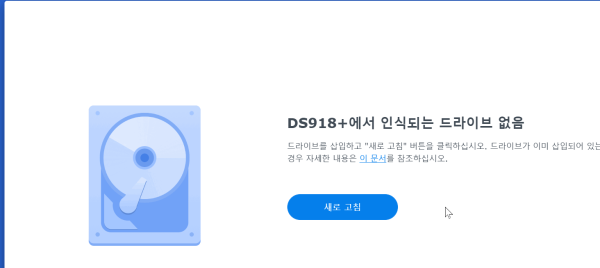
    드라이브 인식이 되지 않는다 (실패)
    3232235521_1657864201.4726.png
    재부팅 재빌드 수정작업
     tc@box:~$ nano 1_ds918-build.sh
    tc@box:~$ chmod a+x 1_ds918-build.sh
    tc@box:~$ cat 1_ds918-build.sh
    tce-load -w -i nano.tcz
    nano user_config.json
    ./rploader.sh listmods apollolake-7.1.0-42661
    ./rploader.sh ext apollolake-7.1.0-42661 auto
    ./rploader.sh build apollolake-7.1.0-42661
    ./rploader.sh backup
    tc@box:~$


    3232235521_1657866267.5664.png

    다음 조건에  esxi  서버에 sata 인식을 위한 구성이 중요합니다

    tc@box:~$ cat user_config.json
    {
      "extra_cmdline": {
        "pid": "0xa4a5",
        "vid": "0x0525",
        "sn": "2040SQRTGLEEL",
        "mac1": "XXYYXXYYXXYY",
        "SataPortMap": "66",
        "DiskIdxMap": "0000"
      },
      "synoinfo": {
        "internalportcfg": "0xffff",
        "maxdisks": "16"
      },
      "ramdisk_copy": {}
    }
    ===========
    정상 조건을 백업 합니다

    tc@box:~$ cp user_config.json user_config.json_DS918+
    cp: overwrite 'user_config.json_DS918+'? y
    tc@box:~$ cat user_config.json_DS918+
    {
      "extra_cmdline": {
        "pid": "0xa4a5",
        "vid": "0x0525",
        "sn": "2040SQRTGLEEL",
        "mac1": "XXYYXXYYXXYY",
        "SataPortMap": "66",
        "DiskIdxMap": "0000"
      },
      "synoinfo": {
        "internalportcfg": "0xffff",
        "maxdisks": "16"
      },
      "ramdisk_copy": {}
    }
    tc@box:~$


    3232235521_1657866154.9346.png


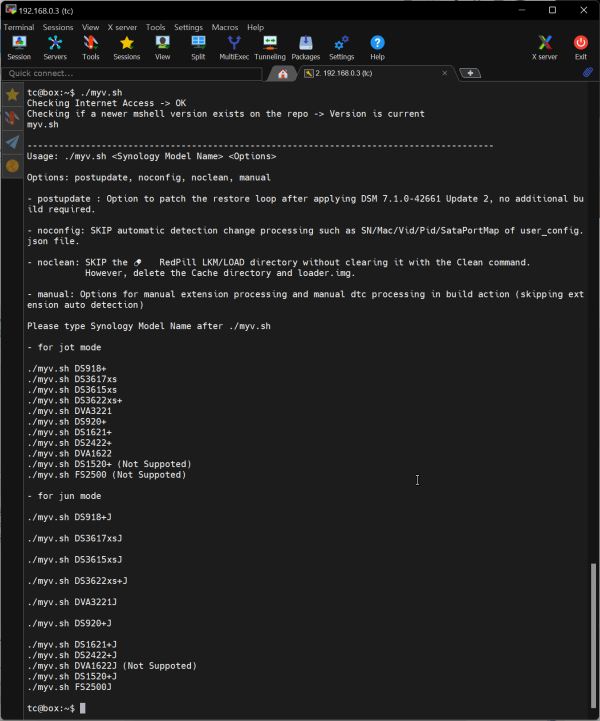
    2번째 단계작업 > my.sh 사용방법
    3232235521_1658100489.1554.png
    Usage: ./myv.sh <Synology Model Name> <Options>
    Options: postupdate, noconfig, noclean, manual
    - postupdate : Option to patch the restore loop after applying DSM 7.1.0-42661 Update 2, no additional build required.
    - noconfig: SKIP automatic detection change processing such as SN/Mac/Vid/Pid/SataPortMap of user_config.json file.
    - noclean: SKIP the ????   RedPill LKM/LOAD directory without clearing it with the Clean command.
               However, delete the Cache directory and loader.img.
    - manual: Options for manual extension processing and manual dtc processing in build action (skipping extension auto detection)
    Please type Synology Model Name after ./myv.sh
    - for jot mode
    ./myv.sh DS918+
    ./myv.sh DS3617xs
    ./myv.sh DS3615xs
    ./myv.sh DS3622xs+
    ./myv.sh DVA3221
    ./myv.sh DS920+
    ./myv.sh DS1621+
    ./myv.sh DS2422+
    ./myv.sh DVA1622
    ./myv.sh DS1520+ (Not Suppoted)
    ./myv.sh FS2500 (Not Suppoted)
    - for jun mode
    ./myv.sh DS918+J                                                                                         
    ./myv.sh DS3617xsJ                                                                                       
    ./myv.sh DS3615xsJ                                                                                       
    ./myv.sh DS3622xs+J                                                                                      
    ./myv.sh DVA3221J                                                                                        
    ./myv.sh DS920+J                                                                                         
    ./myv.sh DS1621+J
    ./myv.sh DS2422+J
    ./myv.sh DVA1622J (Not Suppoted)
    ./myv.sh DS1520+J
    ./myv.sh FS2500J
    tc@box:~$

    ./myv.sh 로 user_config.json  수정 빌드 noconfig방법


    ./myv.sh DS918+ noconfig
    입니다 

    다운로드 설치


     my_build_update.sh
    ============================
    echo " =============================
    Posted Saturday at 09:37 PM
    Release DS1520+ jun mode m shell.
    With @jumkey's help, it's done.
    DS1520+ is a 5-bay product with one more disk bay than DS920+.
    You can think of it as a similar model to the DS920+.
    Like the DS920+, it supports transcoding and is a DTC-based model.
    It is a model that can be built only in the M shell.

    You can use the build command as below.
    ./my.sh DS1520+J

    For VMs that require additional ext , etc., it is as follows.
    ./myv.sh DS1520+J
    For first-time users, please download and install it in advance as shown below.
    ======================================== "
    curl --location "https://github.com/PeterSuh-Q3/tinycore-redpill/raw/main/my.sh.gz" --output my.sh.gz; tar -zxvf my.sh.gz;
    curl --location "https://github.com/PeterSuh-Q3/tinycore-redpill/raw/main/myv.sh.gz" --output myv.sh.gz; tar -zxvf myv.sh.gz;

    ls -lrt m*.sh
    ==============
    <빌드 방법>

    ==============
    esxi 서버적용 시스템
    DS920+J 빌드 준비 진행 입니다

    cat user_config.json
    사전 준비 
    {
      "extra_cmdline": {
        "pid": "0xa4a5",
        "vid": "0x0525",
        "sn": "2150SBRP1QJLA",
        "mac1": "XXYYXXYYXXYY",
        "SataPortMap": "66",
        "DiskIdxMap": "0000"
      },
      "synoinfo": {
        "internalportcfg": "0xffff",
        "maxdisks": "16"
      },
      "ramdisk_copy": {}
    }
    tc@box:~$
    =============
    빌드 진행 방법 ( dsm 자체 업데이트 가능한 버전)
    빌드는  for jun mode 로 빌드 추천 드립니다
    ./myv.sh DS920+J  noconfig

    또는 
    4_myv_ds920_buid.sh
    로 빌드 합니다
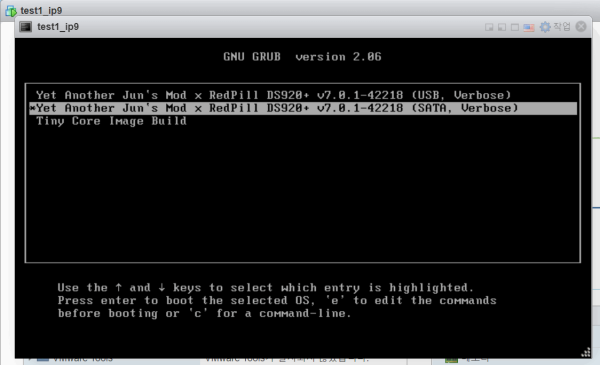
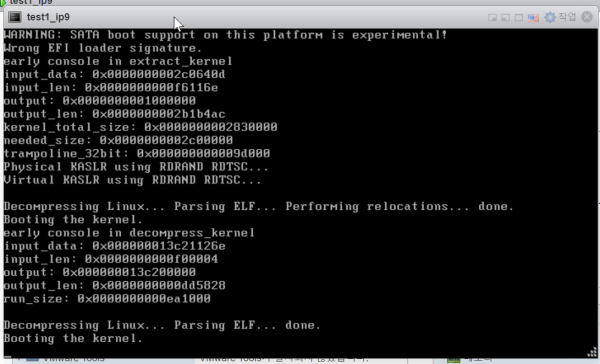
    3232235521_1658077543.7368.png

    3232235521_1658077626.8637.png

    3232235521_1658077643.4354.png

    3232235521_1658077667.6082.png
    3232235521_1658077788.8079.png

    3232235521_1658077805.3629.png

    3232235521_1658100757.3963.png
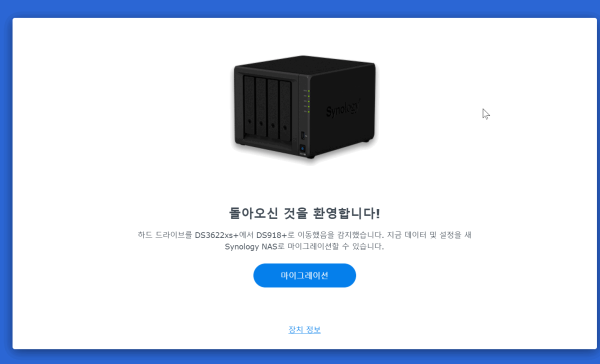
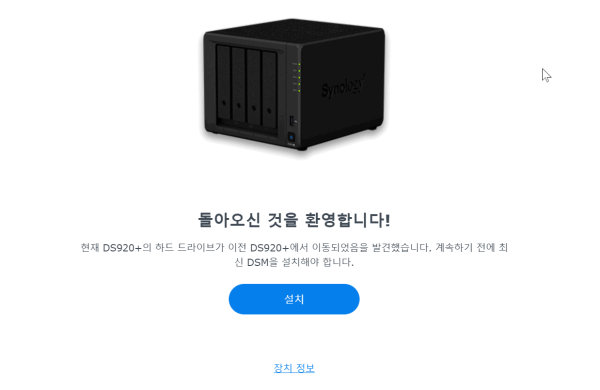
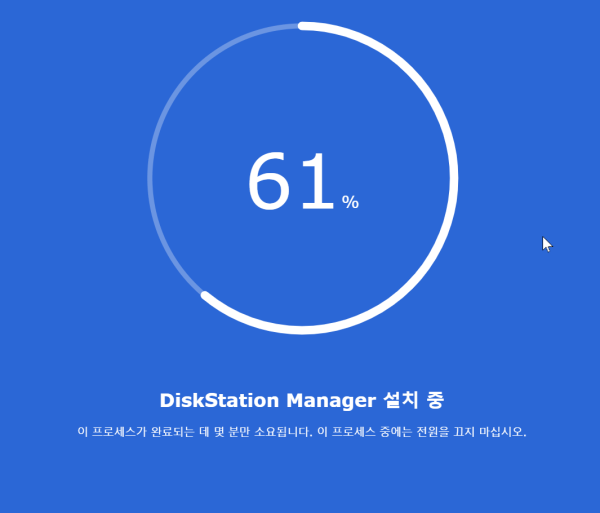
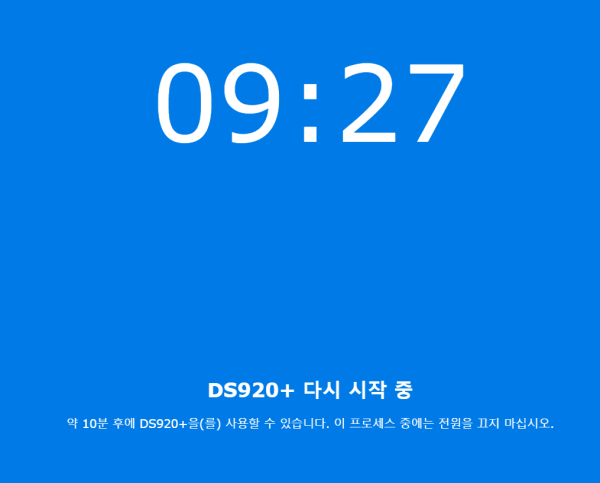
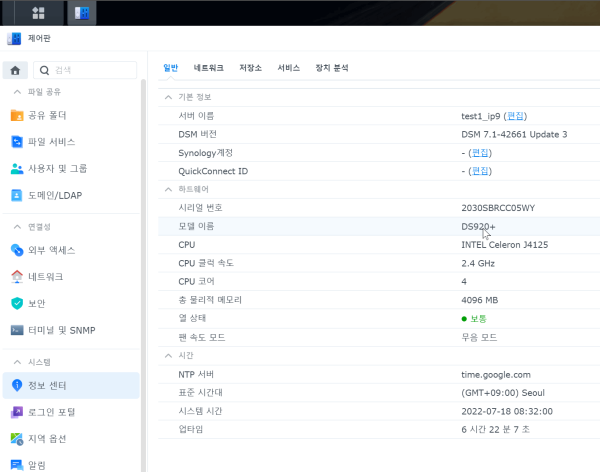
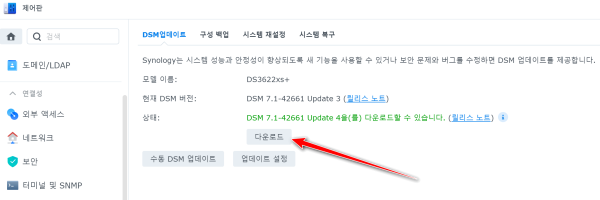
    최신버전 DSM 업데이트 동작 가능 확인 합니다
    3232235521_1658100802.6397.pngmyv.sh는 최고의 안정된 빌드  및 편리한 방법 입니다
    사용주의) 항시 최신버전으로 업데이트 사용하세요
    dsm 자체 업데이트 가능한 버전 입니다
    빌드는  for jun mode 로 빌드 추천 드립니다
    ./myv.sh DS920+J  noconfig
    빌드하면  자체 업데이트 가능 합니다.
    3232235521_1659502475.6465.png
    3232235521_1659495437.6267.png
     https://11q.kr 에 등록된 자료 입니다. ♠ 정보찾아 공유 드리며 출처는 링크 참조 바랍니다♠1.png
    [ 추가 정보 ... 더보기) ]
    뷰PDF 1,2


    office view

    관련자료

    댓글목록

    profile_image

    11qkr님의 댓글

    11qkr 쪽지보내기 메일보내기 홈페이지 자기소개 아이디로 검색 전체게시물 아이피 (192.♡.0.1) 작성일

    echo ============================================
    echo nano .profile  information
    echo ================================
    cat /proc/cpuinfo | grep 'model name'
    echo ===============================
    cat /proc/meminfo | grep MemTotal
    echo ===============================
    ./rploader.sh
    ./myv.sh


    echo "
    =====================
    SSH Termianl user / passwd
    tc /  P@ssw0rd 입니다(0은 숫자)
    ===========================
    install nano mc htop,,,,,,,,
    ============================
    tce-load -w -i nano.tcz
    tce-load -w -i mc
    tce-load -w -i htop

    nano editor save ctrl + o
    nano editor quit ctrl + x
    nano editor search F6

    ============================================================
    Ctrl + Alt + F1 : tiny core when booting Terminnal open
    ifconfig : ip find
    lspci -tvnnq : Hardware list
    ============================================================
    myv.sh DS920+J  Build Processor
    ===============================
    rploader.sh option =========
    Actions: build, ext, download, clean, update, listmod, serialgen, identifyusb, patchdtc,
    satamap, backup, backuploader, restoreloader, restoresession, mountdsmroot, postupdate,
    mountshare, version, help

    myv.sh  install ===========
    curl --location "https://github.com/PeterSuh-Q3/tinycore-redpill/raw/main/my.sh.gz" --output my.sh.gz; tar -zxvf my.sh.gz;
    curl --location "https://github.com/PeterSuh-Q3/tinycore-redpill/raw/main/myv.sh.gz" --output myv.sh.gz; tar -zxvf myv.sh.gz;
    ===============================

    ./rploader.sh clean
    ./rploader.sh update

    cat user_config.json
    ./rploader.sh serialgen DS920+J

    tce-load -w -i nano.tcz
    tce-load -w -i mc
    tce-load -w -i htop

     mac1: XXYYXXYYXXYY
     SataPortMap: 66
     DiskIdxMap: 0000

    nano user_config.json

    cp user_config.json user_config.json_DS920+J

    ./myv.sh DS920+J noconfig

    sudo mount /mnt/sda1
    nano /mnt/sda1/boot/grub/grub.cfg
    cat /mnt/sda1/boot/grub/grub.cfg

    sudo filetool.sh -b
    ./rploader.sh backup

    sudo reboot
    ===============================
    ============================================================
    "

    profile_image

    서비지님의 댓글의 댓글

    no_profile 서비지 쪽지보내기 메일보내기 자기소개 아이디로 검색 전체게시물 아이피 (211.♡.63.220) 작성일

    감사합니다

    profile_image

    업붕어님의 댓글

    no_profile 업붕어 쪽지보내기 메일보내기 자기소개 아이디로 검색 전체게시물 아이피 (124.♡.255.113) 작성일

    감사합니다.

    profile_image

    11qkr님의 댓글

    11qkr 쪽지보내기 메일보내기 홈페이지 자기소개 아이디로 검색 전체게시물 아이피 (192.♡.0.1) 작성일

    사용주의) 항시 최신버전으로 업데이트 사용하세요
    dsm 자체 업데이트 가능한 버전 입니다
    빌드는  for jun mode 로 빌드 추천 드립니다
    ./myv.sh DS920+J  noconfig
    빌드하면  자체 업데이트 가능 합니다.

    profile_image

    11qkr님의 댓글

    11qkr 쪽지보내기 메일보내기 홈페이지 자기소개 아이디로 검색 전체게시물 아이피 (192.♡.0.1) 작성일

    ARPL는 리부팅 하면 자동 업데이트 됩니다

    profile_image

    Hattory님의 댓글

    no_profile Hattory 쪽지보내기 메일보내기 자기소개 아이디로 검색 전체게시물 아이피 (189.♡.82.63) 작성일

    Okay

    profile_image

    Hattory님의 댓글

    no_profile Hattory 쪽지보내기 메일보내기 자기소개 아이디로 검색 전체게시물 아이피 (189.♡.82.63) 작성일

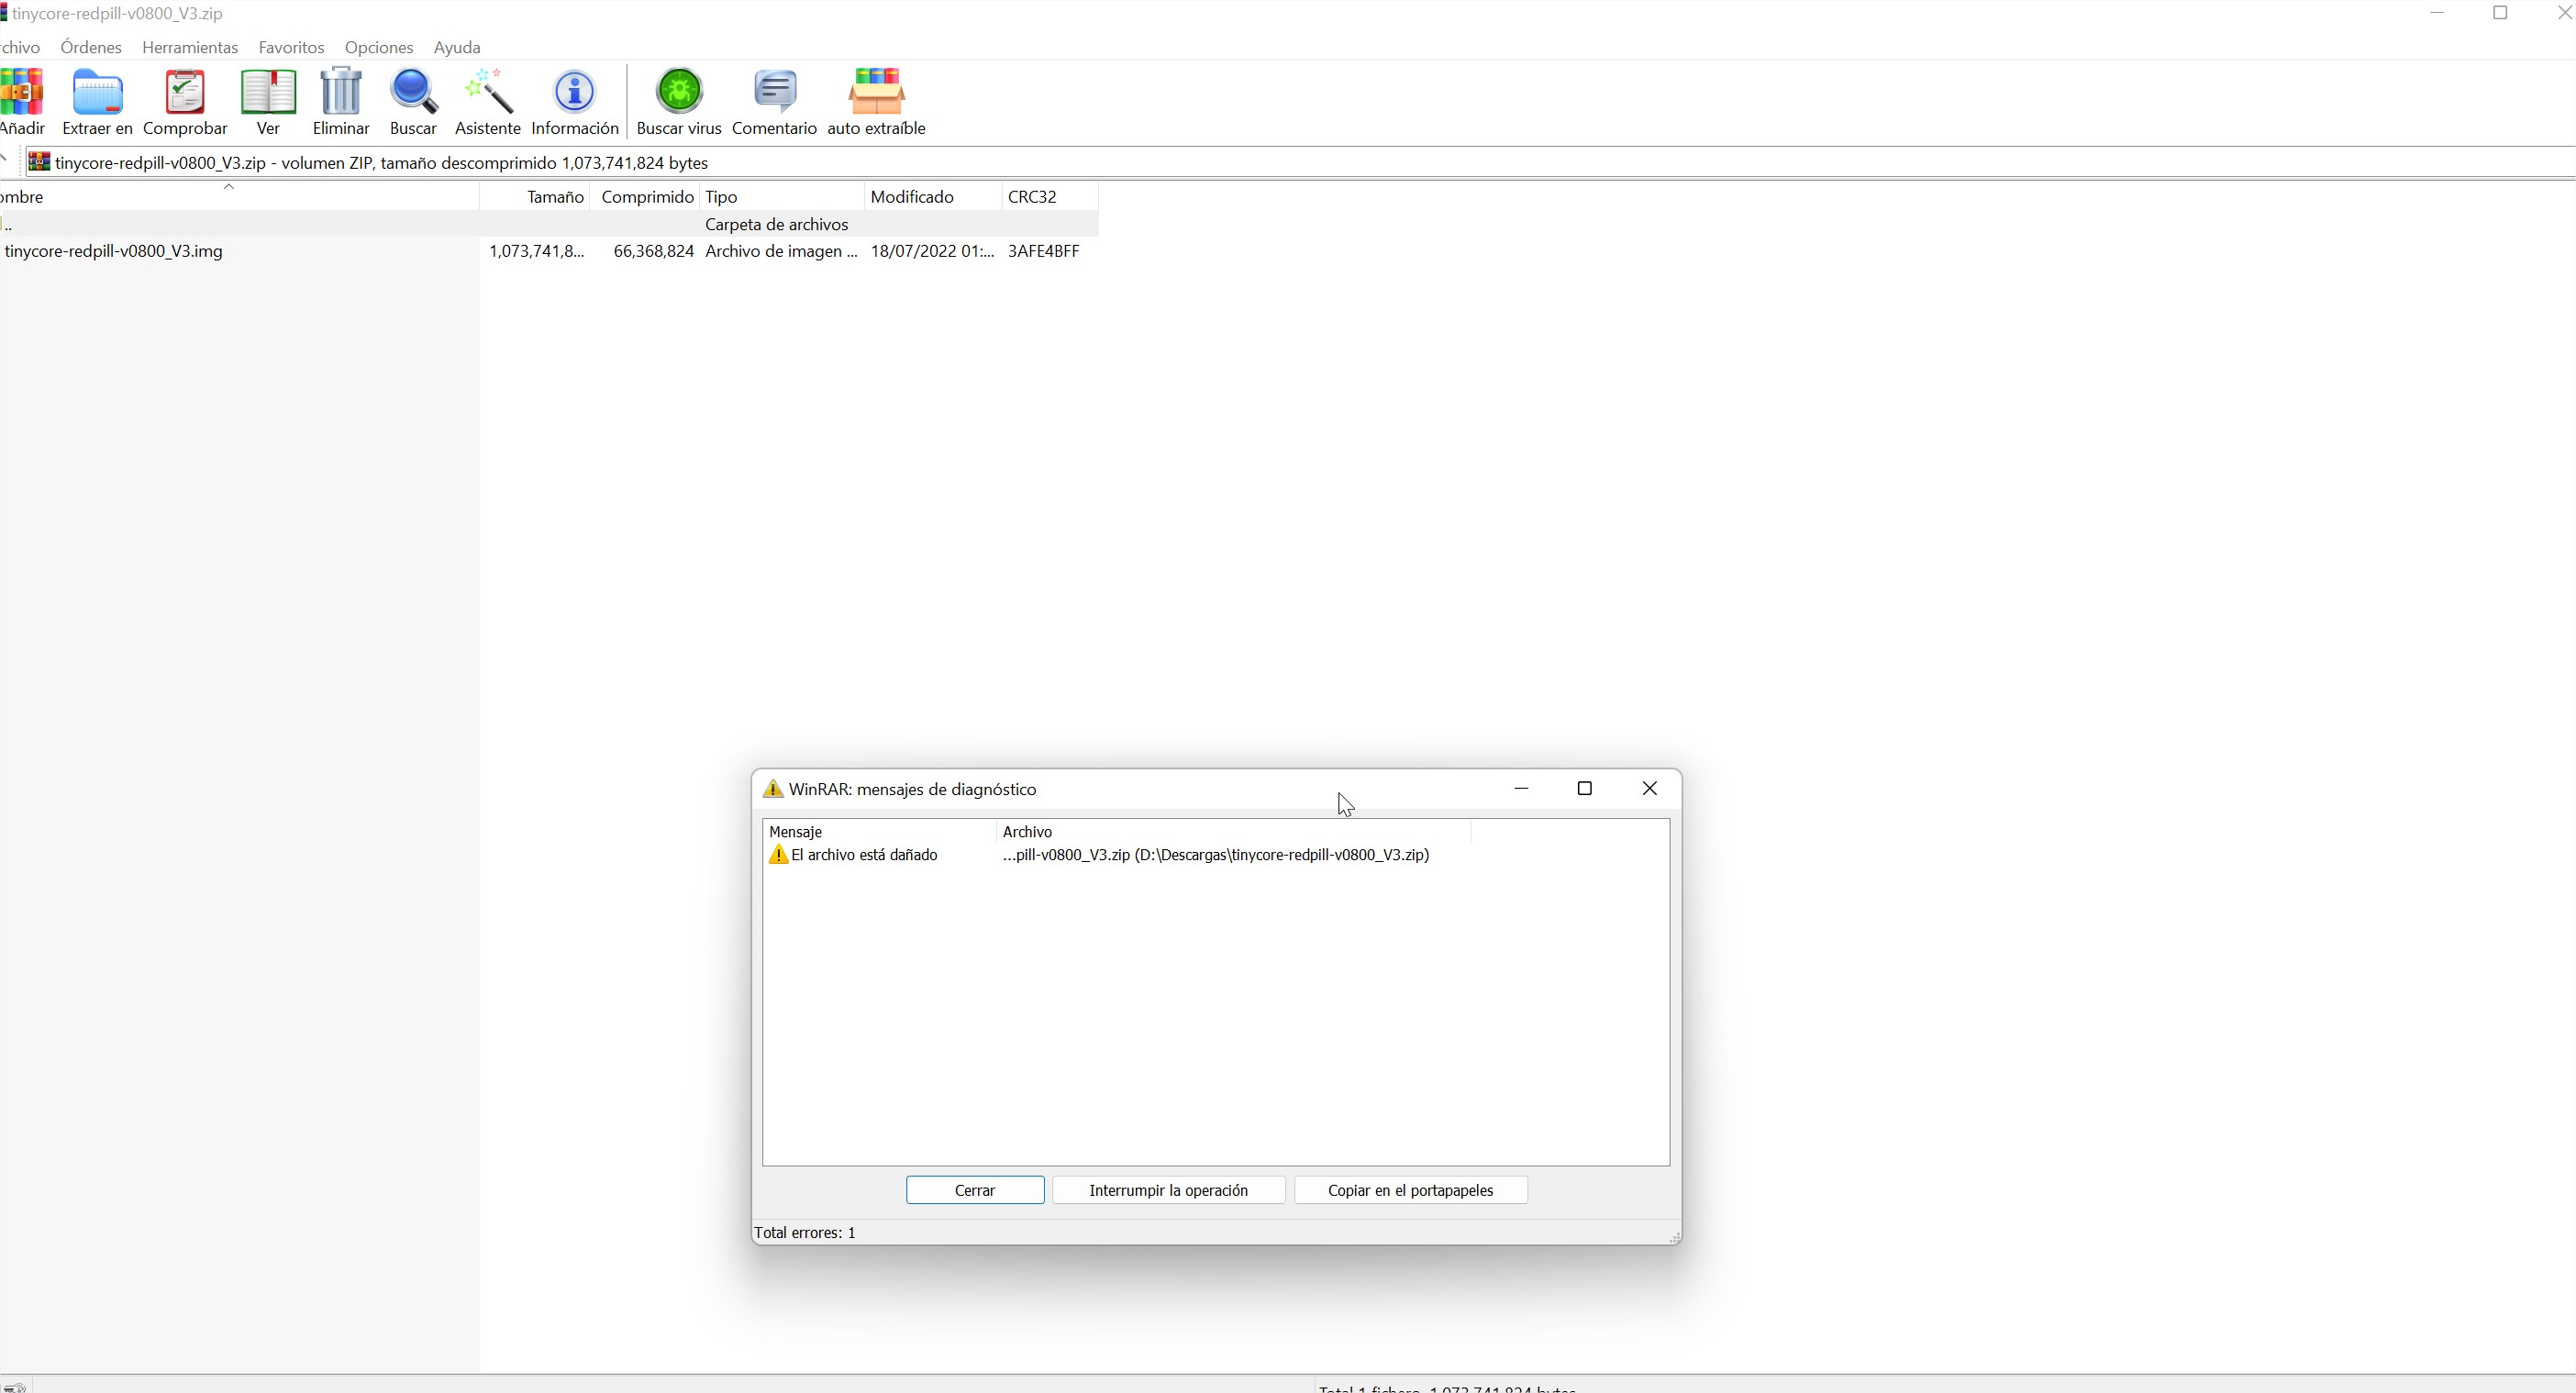
    Tinycore-redpill-v0800_V3 파일이 손상되었습니다.

    profile_image

    11qkr님의 댓글의 댓글

    11qkr 쪽지보내기 메일보내기 홈페이지 자기소개 아이디로 검색 전체게시물 아이피 (192.♡.0.1) 작성일

    7zip으로 재압축  저장 합니다
    tinycore-redpill.v0.8.0.0_v3\tinycore-redpill-v0800_V31.7z

    profile_image

    theb1ue님의 댓글

    no_profile theb1ue 쪽지보내기 메일보내기 자기소개 아이디로 검색 전체게시물 아이피 (14.♡.66.150) 작성일

    감사합니다

    profile_image

    갱이갱이님의 댓글

    no_profile 갱이갱이 쪽지보내기 메일보내기 자기소개 아이디로 검색 전체게시물 아이피 (1.♡.129.110) 작성일

    감사합니다~

    profile_image

    명란명란님의 댓글

    no_profile 명란명란 쪽지보내기 메일보내기 자기소개 아이디로 검색 전체게시물 아이피 (118.♡.141.32) 작성일

    감사합니다~

    profile_image

    고하토님의 댓글

    no_profile 고하토 쪽지보내기 메일보내기 자기소개 아이디로 검색 전체게시물 아이피 (115.♡.245.30) 작성일

    감사합니다!

    profile_image

    최팀장님의 댓글

    no_profile 최팀장 쪽지보내기 메일보내기 자기소개 아이디로 검색 전체게시물 아이피 (112.♡.197.19) 작성일

    찾던 정보네요 감사합니다

    profile_image

    다할진님의 댓글

    no_profile 다할진 쪽지보내기 메일보내기 자기소개 아이디로 검색 전체게시물 아이피 (222.♡.172.150) 작성일

    감사합니다

    profile_image

    길길기리릭님의 댓글

    no_profile 길길기리릭 쪽지보내기 메일보내기 자기소개 아이디로 검색 전체게시물 아이피 (119.♡.213.12) 작성일

    감사합니다

    profile_image

    sdryu님의 댓글

    no_profile sdryu 쪽지보내기 메일보내기 자기소개 아이디로 검색 전체게시물 아이피 (175.♡.163.211) 작성일

    감사합니다

    profile_image

    그라비티님의 댓글

    no_profile 그라비티 쪽지보내기 메일보내기 자기소개 아이디로 검색 전체게시물 아이피 (1.♡.15.197) 작성일

    감사합니다~~~~~~~~~~!

    profile_image

    홍길동123211님의 댓글

    no_profile 홍길동123211 쪽지보내기 메일보내기 자기소개 아이디로 검색 전체게시물 아이피 (211.♡.5.186) 작성일

    감사합니다.

    profile_image

    홍길동123211님의 댓글

    no_profile 홍길동123211 쪽지보내기 메일보내기 자기소개 아이디로 검색 전체게시물 아이피 (211.♡.5.186) 작성일

    감사합니당.

    profile_image

    서비지님의 댓글

    no_profile 서비지 쪽지보내기 메일보내기 자기소개 아이디로 검색 전체게시물 아이피 (211.♡.63.220) 작성일

    감사합니다.

    profile_image

    Teran님의 댓글

    no_profile Teran 쪽지보내기 메일보내기 홈페이지 자기소개 아이디로 검색 전체게시물 아이피 (152.♡.114.50) 작성일

    Muchas gracias.

    profile_image

    Teran님의 댓글

    no_profile Teran 쪽지보내기 메일보내기 홈페이지 자기소개 아이디로 검색 전체게시물 아이피 (152.♡.114.50) 작성일

    Gracias

    profile_image

    Hinz님의 댓글

    no_profile Hinz 쪽지보내기 메일보내기 자기소개 아이디로 검색 전체게시물 아이피 (82.♡.166.33) 작성일

    Verry thanks for that.

    profile_image

    hannury님의 댓글

    no_profile hannury 쪽지보내기 메일보내기 자기소개 아이디로 검색 전체게시물 아이피 (121.♡.249.27) 작성일

    감사합니다

    profile_image

    울산강님의 댓글

    no_profile 울산강 쪽지보내기 메일보내기 자기소개 아이디로 검색 전체게시물 아이피 (211.♡.209.198) 작성일

    감사합니다

    profile_image

    항상스마일님의 댓글

    no_profile 항상스마일 쪽지보내기 메일보내기 자기소개 아이디로 검색 전체게시물 아이피 (58.♡.112.67) 작성일

    감사합니다^^

    profile_image

    NSoo님의 댓글

    no_profile NSoo 쪽지보내기 메일보내기 자기소개 아이디로 검색 전체게시물 아이피 (180.♡.162.43) 작성일

    감사합니다 천천히 따라하는중입니다

    profile_image

    무지무지선님의 댓글

    no_profile 무지무지선 쪽지보내기 메일보내기 자기소개 아이디로 검색 전체게시물 아이피 (121.♡.195.33) 작성일

    감사합니다.

    profile_image

    골춘삼님의 댓글

    no_profile 골춘삼 쪽지보내기 메일보내기 자기소개 아이디로 검색 전체게시물 아이피 (14.♡.198.96) 작성일

    감사합니다. !!

    profile_image

    Anonim님의 댓글

    no_profile Anonim 쪽지보내기 메일보내기 자기소개 아이디로 검색 전체게시물 아이피 (83.♡.203.91) 작성일

    Thx

    profile_image

    p3nt4l님의 댓글

    no_profile p3nt4l 쪽지보내기 메일보내기 자기소개 아이디로 검색 전체게시물 아이피 (175.♡.66.212) 작성일

    감사합니다.

    profile_image

    jjyun님의 댓글

    no_profile jjyun 쪽지보내기 메일보내기 자기소개 아이디로 검색 전체게시물 아이피 (110.♡.129.188) 작성일

    감사합니다.

    profile_image

    화난행성님의 댓글

    no_profile 화난행성 쪽지보내기 메일보내기 자기소개 아이디로 검색 전체게시물 아이피 (14.♡.219.14) 작성일

    감사합니다.

    profile_image

    꼬렛님의 댓글

    no_profile 꼬렛 쪽지보내기 메일보내기 자기소개 아이디로 검색 전체게시물 아이피 (119.♡.154.172) 작성일

    가입 후 첫 시도네요.. 감사합니다

    profile_image

    11qkr님의 댓글

    11qkr 쪽지보내기 메일보내기 홈페이지 자기소개 아이디로 검색 전체게시물 아이피 (192.♡.0.1) 작성일

    ARPl 로더를 사용을 추천 합니다
    ★★★ 시놀로지작업) 새로운 레드필 로더 ARPL(Automated Redpill Loader)로 빌드하기 강력 추천
    https://11q.kr/www/bbs/board.php?bo_table=s11&wr_id=12423

    profile_image

    yusellee님의 댓글

    no_profile yusellee 쪽지보내기 메일보내기 자기소개 아이디로 검색 전체게시물 아이피 (182.♡.106.97) 작성일

    감사합니다.

    profile_image

    naem님의 댓글

    no_profile naem 쪽지보내기 메일보내기 자기소개 아이디로 검색 전체게시물 아이피 (118.♡.74.26) 작성일

    감사합니다

    profile_image

    뚜리리님의 댓글

    no_profile 뚜리리 쪽지보내기 메일보내기 자기소개 아이디로 검색 전체게시물 아이피 (175.♡.99.117) 작성일

    안그래도 8 버전 tinycore 파일이 필요했는데 공유 감사합니다.

    profile_image

    바나클대장님의 댓글

    no_profile 바나클대장 쪽지보내기 메일보내기 자기소개 아이디로 검색 전체게시물 아이피 (1.♡.212.231) 작성일

    감사합니다

    profile_image

    파랑민트님의 댓글

    no_profile 파랑민트 쪽지보내기 메일보내기 자기소개 아이디로 검색 전체게시물 아이피 (119.♡.129.226) 작성일

    감사합니다 찾고있던 자료였네요

    profile_image

    파랑민트님의 댓글

    no_profile 파랑민트 쪽지보내기 메일보내기 자기소개 아이디로 검색 전체게시물 아이피 (119.♡.129.226) 작성일

    감사합니다 찾고있던 자료였네요

    profile_image

    최병준님의 댓글

    no_profile 최병준 쪽지보내기 메일보내기 자기소개 아이디로 검색 전체게시물 아이피 (221.♡.69.175) 작성일

    찾고있던 자료였는데 덕분에 사용하게 되네요. 감사합니다.

    profile_image

    ksb0083님의 댓글

    no_profile ksb0083 쪽지보내기 메일보내기 자기소개 아이디로 검색 전체게시물 아이피 (221.♡.21.61) 작성일

    찾고 있던 자료였는데 발견했네요. 감사합니다.


    새창 작성 수정 목록 링크 Edit G카랜다 HDD HDD HDD 게시물 주소 복사


    Total 1,767 / 7 Page
    [ ● DSM 7.1 Active Backup for Business 패키지설치 activated 활성화 작… ] 댓글 3

    ● DSM 7.1 Active Backup for Business 패키지설치 activated 활성화1) 패키지 설치 2) 실행열기히면 시놀로지…

    [ ●VMware Workstation 16 Player 무료 다운로드 가상화 프로그램 사용가능 ] 댓글 3

    ●VMware Workstation 16 Player 무료 다운로드 가상화 프로그램 사용가능https://www.vmware.com/kr/pro…

    [ ●●● dsm 7.1빌드작업 esxi 서버의 tinycore 에 myv.sh 적용하여 랜인식을 위한 수… ] 댓글 20

    ● dsm 7.1빌드작업 esxi 서버의 tinycore 에 myv.sh 적용하여 랜인식을 위한 수정작업 boot loader updated:\…

    [ ● 최적의 Esxi 7.0.2 서버에서 redpill tinycore boot loader 생성 설치 방법 … ] 댓글 1

    ● 최적의 Esxi 7.0.2 서버에서 redpill tinycore boot loader 생성 방법 정리 기존 사용주인 서버에 Test 서버 …

    [ ● dsm7.1 변경후 텔레그램 안되는것 및 web station 설정 조건 ]

    ● dsm7.1 변경후 텔레그램 안되는것 및 web station 설정 조건 - 7.0에서 마이그레션 진행 1) 인증서 자동 갱신 설정 - ro…

    [ ● docker 의 Synology/GitLab 설치작업 ]

    ● docker 의Synology/GitLab 설치작업- 도커이미지 검색작업후 설치 :synology/gitlab 검색 다운로드 다운 docke…

    [ ● Esxi 서버 부트로더 변환 작업이 필요 없는 img 파일 올리기 ] 댓글 1

    ● Esxi 서버 부트로더변환 작업이 필요 없는img 파일 올리기 저는 Esxi 서버에서 img을 그대로 사용합니다방법은vmdk 변환을 1회만 …

    [ ● 저의 Esxi서버 7.0.2 메인서버 DS3615xs dsm7.1 서버전환 완료 ]

    ● 저의 Esxi서버 7.0.2 메인서버 DS3615xs dsm7.1 서버전환 완료기존 dsm7.0 에서 tinycore bootloader 0…

    [ ● 시놀로지 usb/esata 저장소 내부저장소로 인식시키기 작업 ] 댓글 2

    ●시놀로지 usb/esata 저장소 내부저장소로 인식시키기 작업,,,,,정보 ,,,,,,,,,,,,https://www.2cpu.co.kr/na…

    [ ● xpenology cpu information 정상적인 정보로 수정하기 및 cpu 사용량 정보 ] 댓글 1

    ● xpenology cpu information 정상적인 정보로 수정하기 및저의 11q.kr 시놀로지 서버 cpu 사용량 입니다.https:/…

    [ ● phpmyadmin data검사 인덱스 ??? 는 동일한 것으로, 두 가지 중 하나는 제거해도 상관없습… ]

    ● phpmyadmin data검사인덱스 ??? 는 동일한 것으로, 두 가지 중 하나는 제거해도 상관없습니다. - mysql data의 문제 검…


    ♥간단_메모글♥


    최근글


    새댓글


    PHP 안에 HTML ☞ 홈페이지 화면갱신 시간은 ♨
    ▶ 2024-11-24 06:10:51

    오늘의 홈 현황


    • 현재 접속자♨ 472 명
    • 오늘 가입자※ 0 명
    • 어제 가입자※ 2 명
    • 주간 가입자※ 8 명
    • 오늘 방문자 2,161 명
    • 어제 방문자 3,212 명
    • 최대 방문자 13,042 명
    • 전체 방문자 4,807,990 명
    • 전체 게시물※ 8,857 개
    • 전체 댓글수※ 25,234 개
    • 전체 회원수 11,326 명

    QR코드


    ☞ QR코드 스캔은 kakao앱 자체 QR코드
    알림 0


    최신글↑