●● 우분투의 pc에서 sftp로 연결 하기 Raidrive + totalcmd 작업
컨텐츠 정보
- 71,314 조회
- 2 댓글
- 0 추천
- 목록
본문
● 우분투의 pc에서 ssh연결 및 sftp로 연결 하기 Raidrive + totalcmd 작업
https://blog.lael.be/post/9536
아래의 자신의 아이디만 변경 작업 합니다
설정 방법
1. SFTP 로그인 계정 생성
# adduser laeltest03
2. sftp_root 폴더 생성, 업로드 폴더 생성
SFTP 로그인시 처음에 표시될 root 폴더를 생성한다.
# su -l laeltest03
sudo -i
mkdir sftp_root
cd sftp_root
mkdir uploads
# exit
3. 해당 사용자에 대해 SFTP 접속만 허용하도록 변경
nano /etc/ssh/sshd_config
가장 하단에 다음의 내용 입력
Match User shimss
ForceCommand internal-sftp
PasswordAuthentication yes
ChrootDirectory /home/shimss/sftp_root
두번째 줄에 의해 ssh 접근이 막히고,
세번째 줄에 의해 비밀번호 입력이 허용되고,
네번째 줄에 의해 루트 디렉토리가 바뀐다.
변경 사항 적용
service ssh reload
해당 사용자 쉘로그인 못하도록 설정
#
usermod --shell /usr/sbin/nologin shimss
4. Filezilla 같은 SFTP 접속 프로그램에서 접속해 본다.
접속이 안되면 정상이다.
디버그 하는 방법을 설명하기 위해 접속이 안되는 상황을 만들었다.
접속 로그 살피기 (나가기 명령어, control C)
# tail -f /var/log/auth.log
오류 내용을 설명하자면,
chroot 의 조건은 1) 모든 경로의 owner 가 root 이어야 함. 2) 모든 경로의 group 및 other 에게 write 권한이 없어야 함.
5. 권한 설정
shimss은 자신의 id임
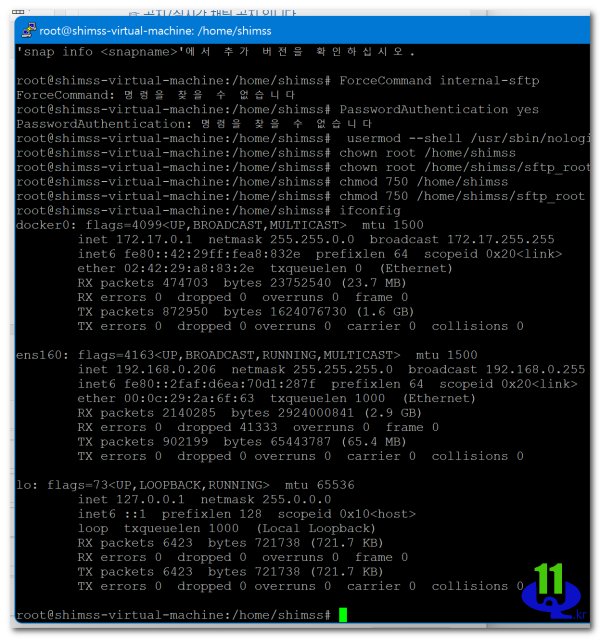
chown root /home/shimss
chown root /home/shimss/sftp_root
chmod 750 /home/shimss
chmod 750 /home/shimss/sftp_root
6. 다시 접속 테스트
ssh 명령어로 접속 시도해서 This service allows sftp connections only. 라고 나오면 정상이다.
sftp 로 정상적으로 잘 접속되면 정상이다.
끝.
▶ 접속 ip 확인
ifconfig
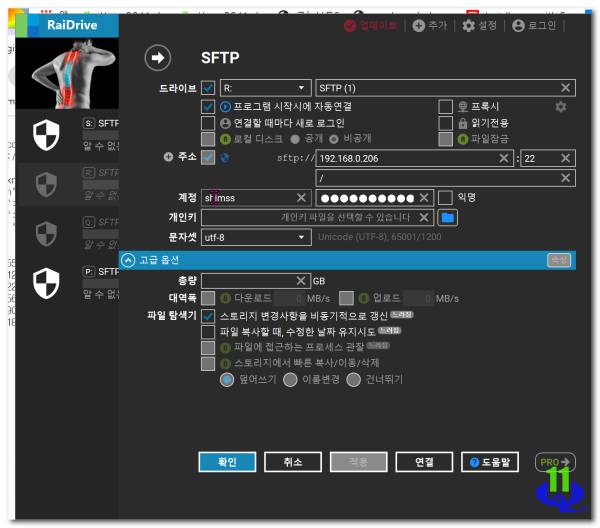
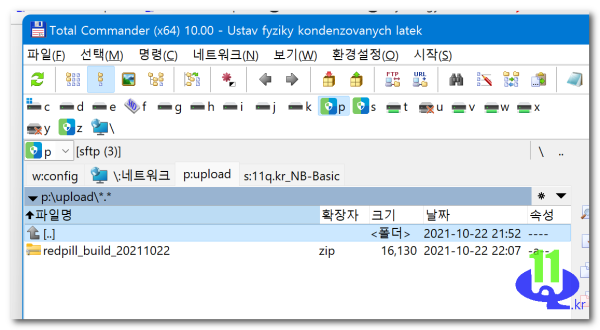
- RaiDrive 연결
전체 진행 명령어 history
252 su -i shimss
253 su -l shimss
254 nano /etc/ssh/sshd_config
255 cd /home/shimss/
256 ls
257 service ssh reload
258 Match User laeltest03
259 ForceCommand internal-sftp
260 PasswordAuthentication yes
261 chown root /home/shimss
262 chown root /home/shimss/sftp_root
263 chmod 750 /home/shimss
264 chmod 750 /home/shimss/sftp_root
265 ifconfig
266 ls
267 mc
268 history
☞ https://11q.kr 에 등록된 자료 입니다. ♠ 정보찾아 공유 드리며 출처는 링크 참조 바랍니다♠
관련자료
-
링크
11qkr님의 댓글
https://codechacha.com/ko/ubuntu-install-openssh/
ifconfig
로 ip확인
# Ubuntu 20.04 - SSH 설치와 접속 방법
# Open SSH Sever를 설치하면, 다른 PC의 SSH Client에서 접속할 수 있습니다.
# 설치 과정을 소개합니다.
# Open SSH Server 설치
# Terminal에서 다음과 같은 명령어로 Open SSH Server를 설치합니다.
# sudo -i 로
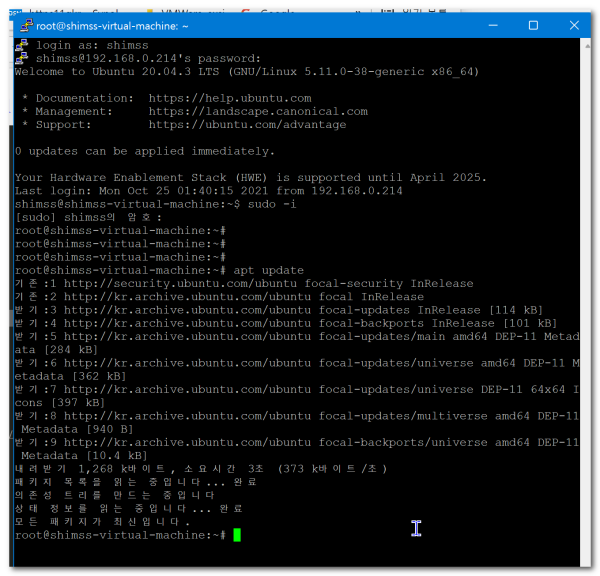
apt update
apt install openssh-server
SSH Server
# 실행 SSH를 설치하면 자동으로 실행됩니다. 다음 명령어로 SSH가 실행 중인지 확인할 수 있습니다. 로그에서 active (running)가 보이면, 실행 중인 상태입니다.
systemctl status ssh
systemctl enable ssh
systemctl start ssh
Firewall
# 만약 방화벽을 사용하고 있다면, ssh를 허용하도록 합니다. 방화벽이 비활성화되어있다면 무시해도 됩니다.
ufw allow ssh
# 방화벽은 기본적으로 비활성화되어있으며, 다음 명령어로 상태를 확인할 수 있습니다.
ufw status
Status: inactive
# Client에서 접속
# Ubuntu는 기본적으로 SSH Client가 설치되어있습니다.
# 만약 설치되어있지 않다면 다음 명령어로 설치합니다.
apt-get install openssh-client
# SSH Client가 설치되어있다면, 다음과 같이 username과 IP 주소를 입력하여 접속할 수 있습니다.
$ ssh username@ip_address
# <!-- IP주소는 다음과 같이 ip a 명령어로 확인할 수 있습니다. -->
ip a
# ssh mjs@192.168.0.14
...
11qkr님의 댓글
2 aduser shimss
3 adduser shimss
4 cd sftp_root
5 mkdir uploads
6 nano /etc/ssh/sshd_config
7 service ssh reload
8 chown root /home/shimss
9 chown root /home/shimss/sftp_root
10 chmod 750 /home/shimss/sftp_root
11 pwd
12 ip -a
13 ifconfig
14 exit
15 cd ~
16 pwd
17 usermod --shell /usr/sbin/nologin shimss
18 Match User shimss
19 snap info (0.0.27-0)
20 chown root /home/shimss
21 chmod 750 /home/shimss
22 ls
23 pwd
24 nano /etc/ssh/sshd_config
25 cd sftp_root/
26 ls
27 pwd
28 nano /etc/ssh/sshd_config
29 pwd
30 cd /home/shimss/
31 ls
32 cd /root/
33 ls
34 nano /etc/ssh/sshd_config
35 service ssh reload
36 chown root /home/shimss
37 chown root /home/shimss/sftp_root
38 chown root /root/sftp_root
39 chmod 750 /root/sftp_root
40 history
root@shimss-virtual-machine:~#


