추천)시놀로지 docker에서 파일공유 편한 droppy 설치 하기
♨ 카랜더 일정 :
2024년05월18일
본문
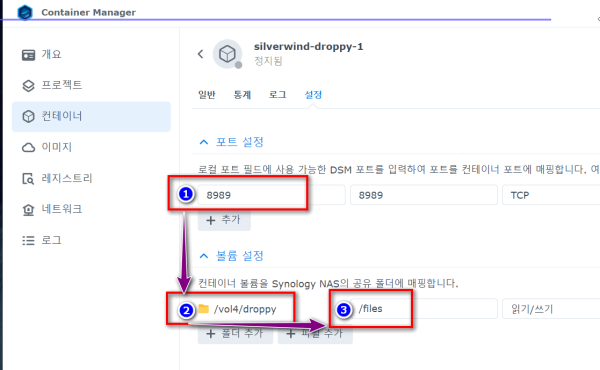
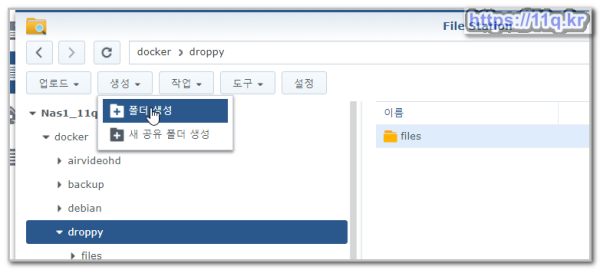
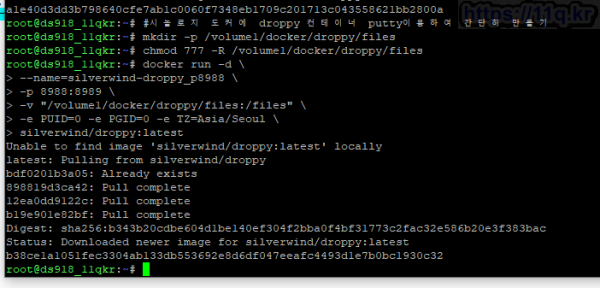
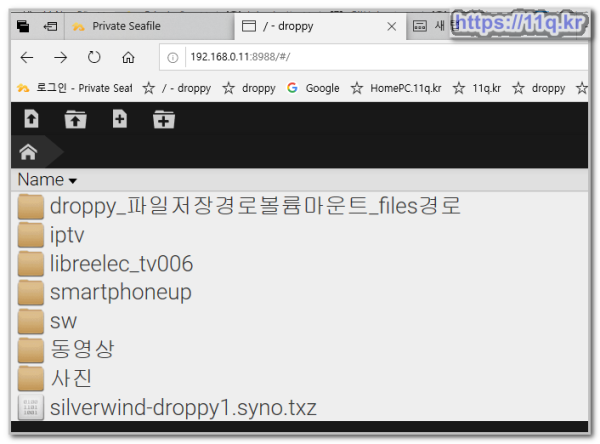
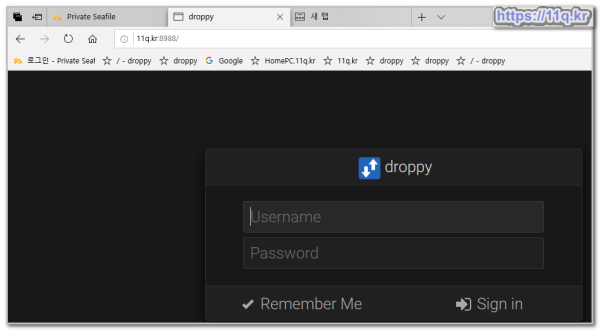
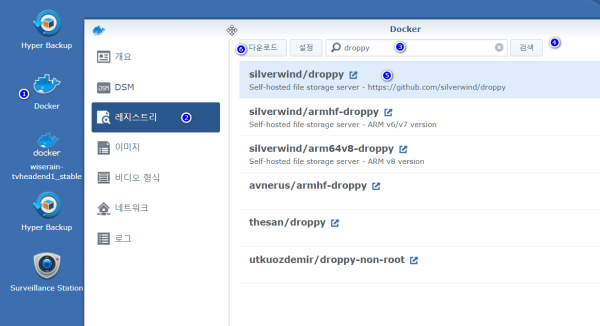
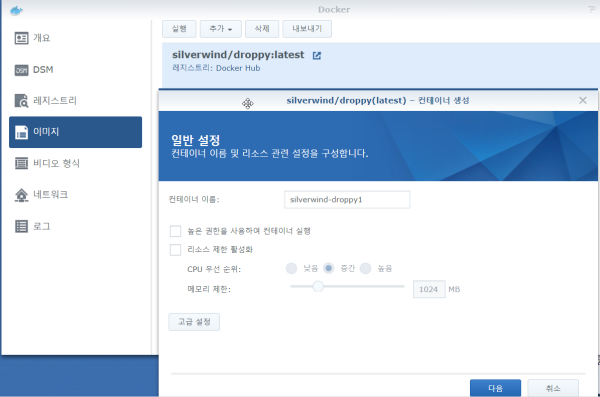
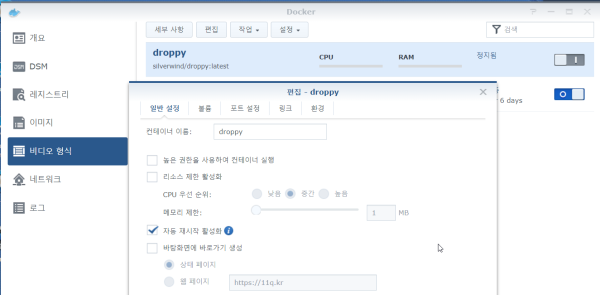
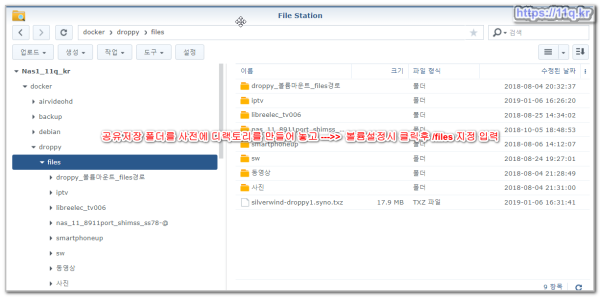
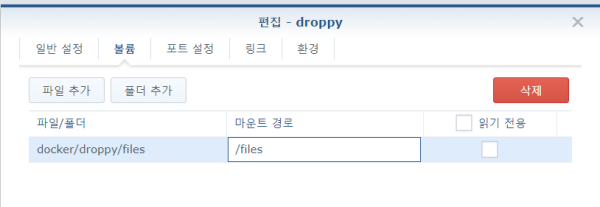
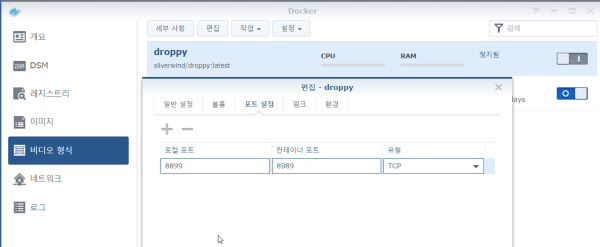
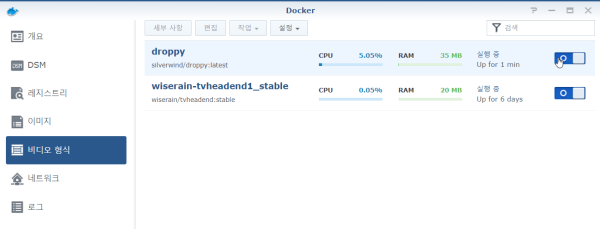
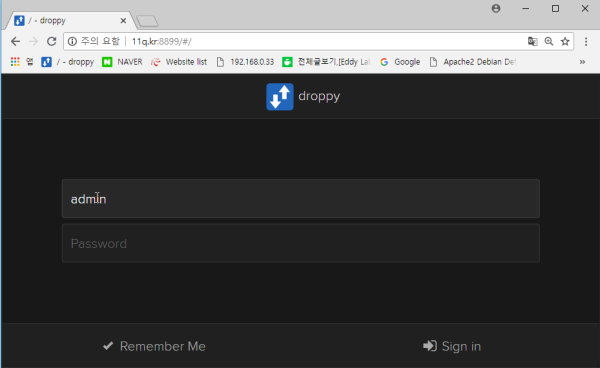
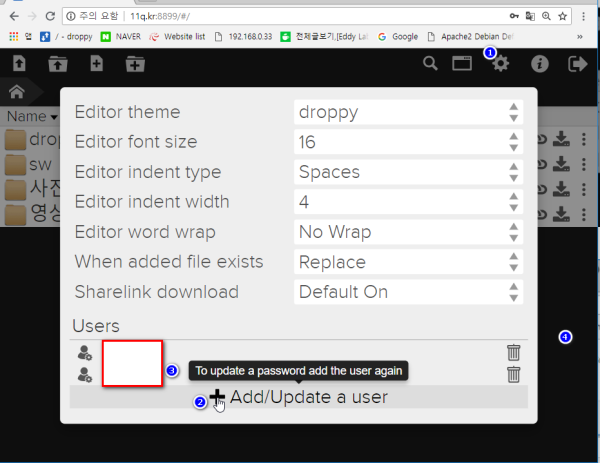
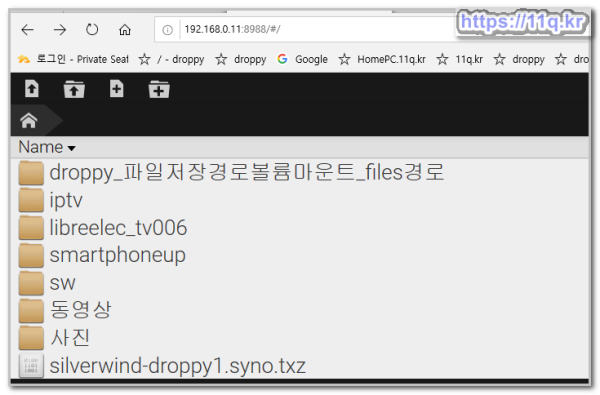
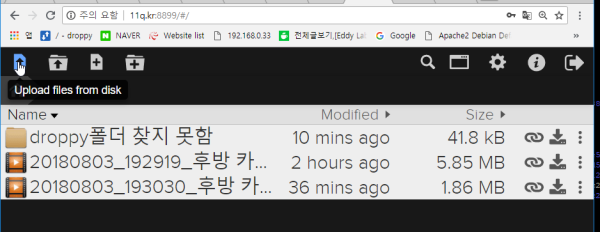
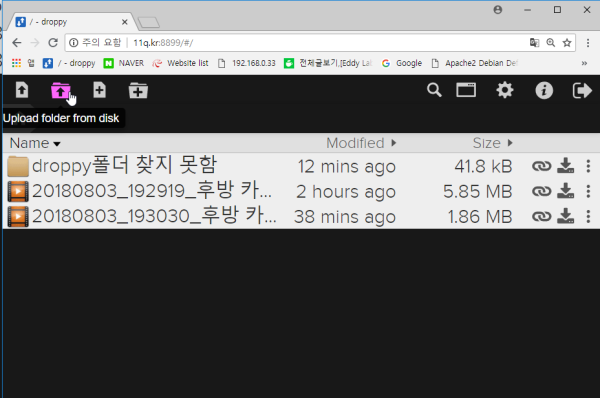
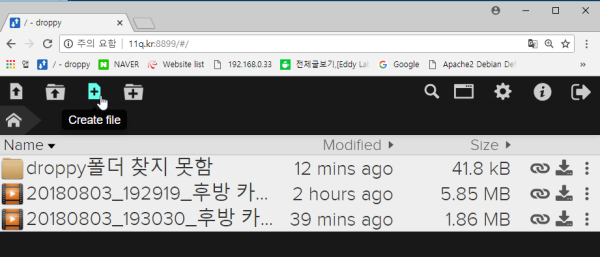
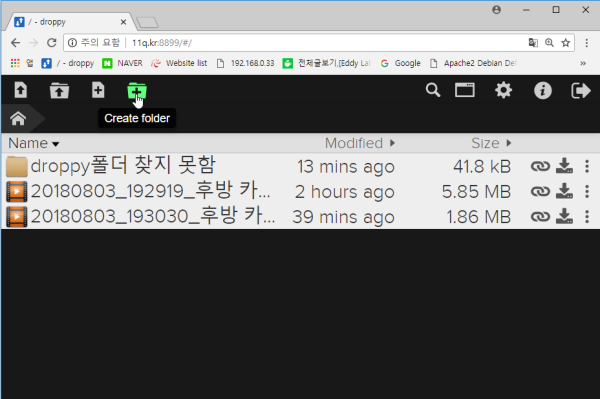
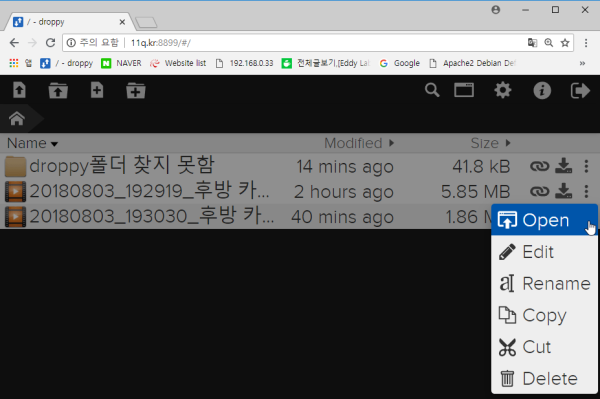
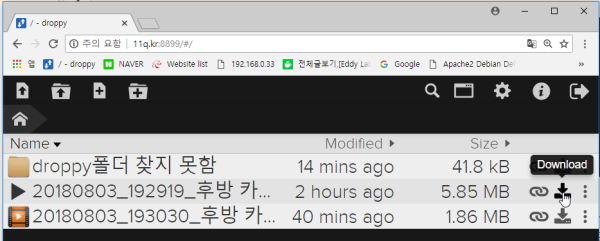
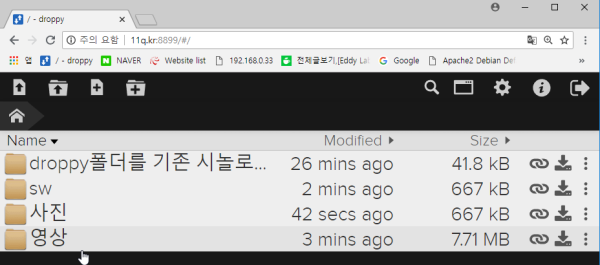
시놀로지 docker에서 파일 공유 편한 droppy 설치 하기 -10초면 설치 완료 demo link https://droppy.silverwind.io/#/ 간단 도커 설치후 중지후 폴더 연결작업 > 포트 설정 및 공유폴더 지장후 /files 만 수정 추가 설치 방법 1> docker 설치후 putty 터미널 cmd로 간단 설치 (1-1) putty 접속 root로 재접속 sudo -i (1-2) 파일 저장 경로 생성 /volume1/docker/droppy/files 방법은 파일 스테이션에서 생성하거나 putty로 디랙토리 만들고 간단 설치 합니다. (1-3) putty에 명령어를 복사 붙이기 --> 이미지 없으면 다운로드 하여 자동으로 10초면 설치 합니다 #시놀로지 도커에 droppy 컨테이너 putty이용하여 간단히 만들기mkdir -p /volume1/docker/droppy/fileschmod 777 -R /volume1/docker/droppy/filesdocker run -d \--name=silverwind-droppy_p8989 \-p 8989:8989 \-v "/volume1/docker/droppy/files:/files" \-e PUID=0 -e PGID=0 -e TZ=Asia/Seoul \silverwind/droppy:latest10초면 도커 생성 로컬 접속 확인 << 외부 접속 공유 하기위한 공유기 포트포워딩>> 공유 파일 만들때는 공유기 포트포워딩하여 접속 생성 공유 가능합니다 접속은 dsm 의 접속 root 로 접속 합니다...admin passwd 입니다 ** 장점은 저장한 공유 file을 dsm 파일스테이션 또는 smb webdav로 업로드 가능 합니다. 2> 간단히 docker에서 droppy 검색 다운로드 설치 합니다. 고급 설정에서 볼륨 설정은 dsm / 파일 스테이션 의 폴더 공유 파일 경로 설정 > 경로를 먼저 만들어 놓고 폴더 추가로 지정 /files 로 마운트 경로로 설정 저는 /docker/droppy/files 지정 합니다. 폴더 추가로 경로 지정 후 마운트 경로를 /files 로 지정 포트설정은 사용하고자 하는 웹상에서 사용하는 로컬 포드 입력 포트 변경은 컨테이너 포트 8989로 기본설정하고 ddns 공유기 포트포워딩 접속 포트의 로컬포트 ???? 임의로 설정 했습니다. https://11q.kr:8899으로 사용 ( 공유기 ddns 설정 기존 설정 상태) 공유기 포트 포워딩 설정으로 외부 접속 허용 실행 중 상태에서 droopy 하여 로그인은 dsm root 로 접속 _ admin 의 passwd으로 바로 접속 됩니다. 추가 사용자 등록은 파일 접근자 생성 할 수 있습니다 메뉴 사용 방법은 간단한 사진으로 참조 포트스테이션/photostation 을 대치하고 웹 하드로 대치 사용하세요
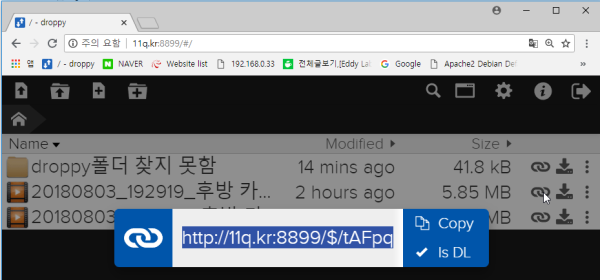
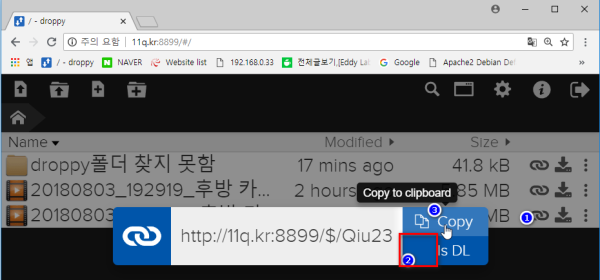
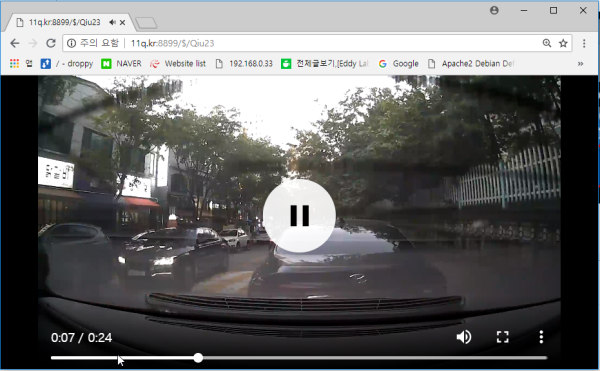
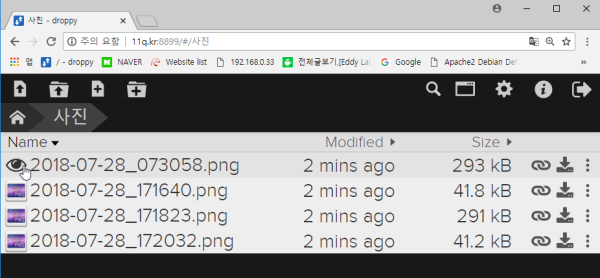
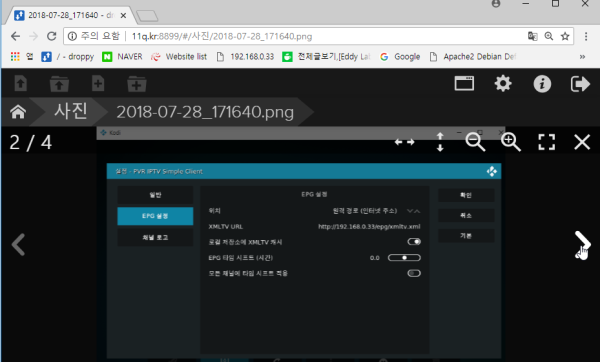
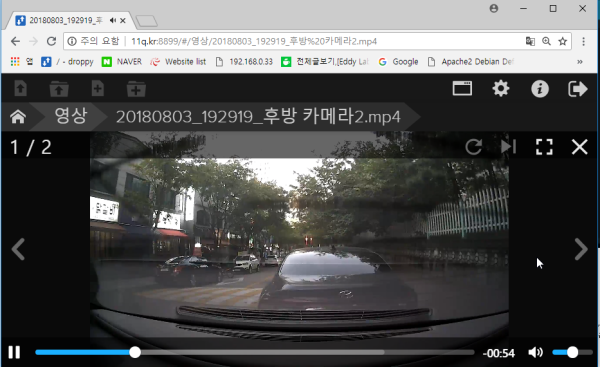
우측메뉴는 바로 다운로드 웹상에서 링크 공유 가능 합니다. 다운로드 링크 공유 바로 주소창에 입력하면 다운로드 동영상/사진 등 웹 상에서 바로 실행 공유 check 해제 하고 카피 합니다 사진 업로드 후 보기 << 사진 보기>> 좌우로 이동 <<영상 보기>> <<< 간단 docker 설치후 droppy 를 putty에서 cmd명령으로 간단 설치하거나 최신 버전 다운 재설치 복구 >>> <<<< droppy 드롭피 관련 정보 >>>> https://hub.docker.com/r/silverwind/droppy/#Configuration ** droppy **는 웹 인터페이스와 파일을 편집하고 브라우저에서 직접 미디어를 볼 수있는 자체 호스팅 파일 저장 서버입니다. 특히 라스베리 파이 (Raspberry Pi)와 같은 로우 엔드 하드웨어에서 실행하기에 적합합니다. ## 기능 (<a target="_blank" href="https://droppy.silverwind.io"> 데모 </a> 시도) * 응답 성이 뛰어난 확장 가능한 HTML5 인터페이스 * 파일 시스템 변경 사항의 실시간 업데이트 * 디렉토리 및 다중 파일 업로드 * 드래그 앤 드롭 지원 이미지 / 텍스트 파일을 만들기위한 클립 보드 지원 * Side-by-Side 모드 * 간단하고 빠른 검색 * 공유 가능한 공개 다운로드 링크 * 우편 번호 다운로드 디렉토리 테마 및 광범위한 언어 지원이 포함 된 강력한 텍스트 편집기 * 터치 지원 기능이있는 이미지 및 비디오 갤러리 * 탐색 지원 기능이있는 오디오 플레이어 에디터와 갤러리를위한 전체 화면 지원 * 홈 화면에 설치 지원 * x86-64, ARMv6, ARMv7 및 ARMv8에서 사용할 수있는 고정 이미지 ## 일반 정보 구성 및 실제 파일 용으로 두 개의 디렉토리가 사용됩니다. -`config` : 기본값은`~ / .droppy / config`이며,`-c / some / dir`으로 대체됩니다. -`files` : 디폴트`~ / .droppy / files`는`-f / some / dir`으로 오버라이드됩니다. droppy는`files` 디렉토리의 메모리 내 표현을 유지합니다. 느린 저장 용량 및 / 또는 100,000 개 이상의 파일을 제공하는 경우 시작시 초기 색인 생성에 다소 시간이 걸릴 수 있습니다. droppy is a self-hosted file storage server with a web interface and capabilites to edit files and view media directly in the browser. It is particularly well-suited to be run on low-end hardware like the Raspberry Pi. Features (try the demo)
General InformationTwo directories will be used. droppy is a well-behaved app and will not write anywhere else:
droppy maintains a in-memory representation of the Installation◎ ■ ▶ ☞ ♠ 정보찾아 공유 드리며 출처는 링크 참조 바랍니다. https://11q.kr ♠ |
뷰PDF 1,2
office view
관련자료
-
링크
댓글목록

shimss11q님의 댓글
사용기_질문)시놀로지 docker에서 파일 공유 편한 droppy 설치 설정 하기
공유
https://www.clien.net/service/board/cm_nas/12437164

shimss11q님의 댓글
<p align="center">
<img src="https://cdn.rawgit.com/silverwind/droppy/master/client/images/readme-logo.svg"/>
</p>
<p align="center">
<a href="https://www.npmjs.org/package/droppy"><img src="https://img.shields.io/npm/v/droppy.svg"></a>
<a href="https://raw.githubusercontent.com/silverwind/droppy/master/LICENSE"><img src="https://img.shields.io/badge/licence-bsd-blue.svg"></a>
<a href="https://www.npmjs.org/package/droppy"><img src="https://img.shields.io/npm/dm/droppy.svg"></a>
<a href="https://travis-ci.org/silverwind/droppy"><img src="https://api.travis-ci.org/silverwind/droppy.svg?style=flat"></a>
</p>
**droppy** is a self-hosted file storage server with a web interface and capabilities to edit files and view media directly in the browser. It is particularly well-suited to be run on low-end hardware like the Raspberry Pi.
## Features (try the <a target="_blank" href="https://droppy.silverwind.io">demo</a>)
* Responsive, scalable HTML5 interface
* Realtime updates of file system changes
* Directory and Multi-File upload
* Drag-and-Drop support
* Clipboard support to create image/text files
* Side-by-Side mode
* Simple and fast Search
* Shareable public download links
* Zip download of directories
* Powerful text editor with themes and broad language support
* Image and video gallery with touch support
* Audio player with seek support
* Fullscreen support for editor and gallery
* Supports installing to the homescreen
* Docker images available for x86-64, ARMv6, ARMv7 and ARMv8
## General Information
Two directories will be used, one for configuration and one for the actual files:
- `config`: defaults to `~/.droppy/config`, override with `-c /some/dir`
- `files`: default `~/.droppy/files` override with `-f /some/dir`
droppy maintains a in-memory representation of the `files` directory. If you're on slow storage and/or serving 100k or more files, the initial indexing on startup will likely take some time.
## Installation
### Local Installation :package:
With [`Node.js`](https://nodejs.org) >= 6.0.0 installed, run:
```sh
$ sudo npm install -g --production droppy
$ droppy start -c /srv/droppy/config -f /srv/droppy/files
```
To update, run
```sh
$ sudo npm update -g --production droppy
```
To make droppy run in the background, you can use the `--daemon` option, thought it is adviced that you install it as a persistent service in you system. For Linux, see these guides:
- [Systemd-based distributions](https://github.com/silverwind/droppy/wiki/Systemd-Installation)
- [Debian (Pre-Jessie)](https://github.com/silverwind/droppy/wiki/Debian-Installation-(Pre-Jessie))
- [Nginx reverse proxy](https://github.com/silverwind/droppy/wiki/Nginx-reverse-proxy)
- [Apache reverse proxy](https://github.com/silverwind/droppy/wiki/Apache-reverse-proxy)
### Docker installation :whale:
The following images are available:
- [`silverwind/droppy`](https://hub.docker.com/r/silverwind/droppy/) for x86-64
- [`silverwind/armhf-droppy`](https://hub.docker.com/r/silverwind/armhf-droppy/) for ARMv6 and ARMv7
- [`silverwind/arm64v8-droppy`](https://hub.docker.com/r/silverwind/arm64v8-droppy/) for ARMv8
To pull and run, use:
```sh
$ docker run --name droppy -p 127.0.0.1:8989:8989 silverwind/droppy
```
This method uses automatic volumes for `/config` and `/files` which can be overridden through `-v /srv/droppy/config:/config` and `-v /srv/droppy/files:/files`. If you're using existing files, it's advisable to use `-e UID=1000 -e GID=1000` to get new files written with correct ownership.
To update a docker installation, run
```sh
$ docker pull silverwind/droppy
$ docker stop droppy && docker rm droppy
$ docker run --name droppy -p 127.0.0.1:8989:8989 silverwind/droppy
```
### docker-compose
Alternatively, you can use the example [`docker-compose.yml`](https://github.com/silverwind/droppy/blob/master/examples/docker-compose.yml):
```sh
$ curl -O https://raw.githubusercontent.com/silverwind/droppy/master/examples/docker-compose.yml
$ docker-compose up
```
This example `docker-compose.yml` uses the subdirectories `config` and `files` of the current working directory for storing data.
## Configuration
By default, the server listens on all IPv4 and IPv6 interfaces on port 8989. On first startup, a prompt to create login data for the first account will appear. Once it's created, login credentials are enforced. Additional accounts can be created in the options interface or the command line. Configuration is done in `config/config.json`, which is created with these defaults:
```javascript
{
"listeners" : [
{
"host": ["0.0.0.0", "::"],
"port": 8989,
"protocol": "http"
}
],
"public": false,
"timestamps": true,
"linkLength": 5,
"linkExtensions": false,
"logLevel": 2,
"maxFileSize": 0,
"updateInterval": 1000,
"pollingInterval": 0,
"keepAlive": 20000,
"allowFrame": false,
"readOnly": false,
"ignorePatterns": [],
"watch": true
}
```
## Options
- `listeners` *Array* - Defines on which network interfaces, port and protocols the server will listen. See [listener options](#listener-options) below. `listeners` has no effect when droppy is used as a module. The default listens on HTTP port 8989 on all interfaces and protocols.
- `public` *boolean* - When enabled, no user authentication is performed. Default: `false`.
- `timestamps` *boolean* - When enabled, adds timestamps to log output. Default: `true`.
- `linkLength` *number* - The amount of characters in a shared link. Default: `5`.
- `linkExtensions` *boolean* - Whether shared links should include the file extension. This can used to allow other software to make a guess on the content of the file without actually retrieving it.
- `logLevel` *number* - Logging amount. `0` is no logging, `1` is errors, `2` is info (HTTP requests), `3` is debug (Websocket communication). Default: `2`.
- `maxFileSize` *number* - The maximum file size in bytes a user can upload in a single file.
- `updateInterval` *number* - Interval in milliseconds in which a single client can receive update messages through changes in the file system. Default: `1000`.
- `pollingInterval` *number* - Interval in milliseconds in which the file system is polled for changes, which is likely **necessary for files on external or network-mapped drives**. This is CPU-intensive! Corresponds to chokidar's [usePolling](https://github.com/paulmillr/chokidar#performance) option. `0` disables polling. Default: `0`.
- `keepAlive` *number* - Interval in milliseconds in which the server sends keepalive message over the websocket, which may be necessary with proxies. `0` disables keepalive messages. . Default: `20000`.
- `allowFrame` *boolean* - Allow the page to be loaded into a `<frame>` or `<iframe>`. Default: `false`.
- `readOnly` *boolean* - All served files will be treated as being read-only. Default: `false`.
- `compression` *boolean* - Whether to serve brotli/gzip compressed static content. Default: `true`. Note that compression incurs no performance penalty because pre-compressed artifacts are included in the distribution. Default: `true`.
- `dev` *boolean* - Enable developer mode, skipping resource minification and enabling live reload. Default: `false`.
- `ignorePatterns` *Array* - Array of file name glob patterns to ignore when indexing files. Default: `[]`.
- `watch` *boolean* - Whether to watch the local file system for changes. Can improve performance when dealing with a large number of files. If `watch` is set to `false`, file system changed not done through droppy won't be detected. Default: `true`.
<a name="listener-options"></a>
### Listener Options
`listeners` defines on which network interfaces, ports and protocol(s) the server will listen. For example:
```javascript
"listeners": [
{
"host": "::",
"port": 80,
"socket": "/tmp/droppy",
"protocol": "http"
},
{
"host": "0.0.0.0",
"port": 443,
"protocol": "https",
"key": "~/certs/example.com.key",
"cert": "~/certs/example.com.crt",
"dhparam": "~/certs/example.com.dh",
"hsts": 31536000
}
]
```
The above configuration will result in:
- HTTP listening on all IPv4 and IPv6 interfaces, port 80 and on the unix domain socket `/tmp/droppy`.
- HTTPS listening on all IPv4 interfaces, port 443, with 1 year of HSTS duration, using the provided TLS files.
A listener object accepts these options:
- `host` *string/Array* - Network interface(s) addresses to listen on. Required when `port` is given. Note that "::" will typically bind to both IPv4 and IPv6 on all addresses but a "0.0.0.0" address might be required if IPv6 is disabled.
- `port` *number/string/Array* - Network port(s) to listen on. Required when `host` is given.
- `socket` *string/Array* - Unix domain socket(s) to listen on.
- `protocol` *string* - Protocol to use, `http` or `https`. Required.
For TLS the following additional options are available. Paths can be given relative to the configuration directory and `~` is resolved as expected.
- `cert` *string* - Path to PEM-encoded TLS certificate file, which can include additional intermediate certificates concatenated after the main certificate. Required.
- `key` *string* - Path to PEM-encoded TLS private key file. Required.
- `dhparam` *string* - Path to PEM-encoded TLS Diffie-Hellman parameters file. If not provided, new 2048 bit parameters will generated on launch and saved for future use.
- `passphrase` *string* - Passphrase for the TLS private key in case it is encrypted.
- `hsts` *number* - Length of the [HSTS](http://en.wikipedia.org/wiki/HTTP_Strict_Transport_Security) header in seconds. Set to `0` to disable HSTS.
## API
droppy can be used with express, see the [express example](./examples/express.js).
### droppy([options])
- `options` *Object*: [Options](#Options). Extends [config.json](#Configuration). In addition to above listed options, `configdir`, `filesdir` and `log` are present on the API.
Returns a object `{onRequest, setupWebSocket}`.
## Downloading from the command line
To download shared links with `curl` and `wget` to the correct filename:
````sh
$ curl -OJ url
$ wget --content-disposition url
````
# Development
To start a live-reloading dev server:
````sh
$ git clone https://github.com/silverwind/droppy && cd droppy
$ npm i
$ node droppy start --dev
````
The [Makefile](https://github.com/silverwind/droppy/blob/master/Makefile) has a few tasks for updating dependencies, pushing docker images, see the comment above for dependencies of those tasks.
짤 [silverwind](https://github.com/silverwind), distributed under BSD licence.

shimss11q님의 댓글
droppy 실행에 문제제로 다시 추가 설치후 정상 가동
1) 로컬 포트 **** 수정
2) 파일경로 /files 추가
기존 안되는것 삭제....

배움이님의 댓글
정말 간편하고 좋은 파일공유 프로그램이네요. 예전에 링크하드 잘 쓰다가 그 이후에는 마땅한 공유 웹하드 플랫폼이 없었거든요. 다만, 사용자별 권한 설정을 못하는 것이 아쉽습니다. 혹시 Droppy 이외에 추천해주실 만한 이런 파일 공유 웹하드가 있을까요? 왠만한 것은 써봤는데 한글이 제대로 안 지원되거나 안정성이 없어 지금은 그냥 DSM에 아이디 만들어 공유하고 있습니다.

shimss@11q.kr님의 댓글의 댓글
seafile 성공 했습니다...참조하세요

배움이님의 댓글의 댓글
고맙습니다. 정말 유용한 정보를 많이 얻어갈 수 있는 곳이네요. ^^

shimss@11q.kr님의 댓글
#시놀로지 도커에 droppy 컨테이너 putty이용하여 간단히 만들기
# sudo -i
# 에디터에 복사후 뒷자리 공백제거 복사 붙이기 putty에 하세요
mkdir -p /volume1/docker/droppy/files
chmod 777 -R /volume1/docker/droppy/files
docker run -d \
--name=silverwind-droppy_p8988 \
-p 8988:8989 \
-v "/volume1/docker/droppy/files:/files" \
-e PUID=0 -e PGID=0 -e TZ=Asia/Seoul \
silverwind/droppy:latest
♥간단_메모글♥
-
등록일 06.18
-
등록일 05.20
-
등록일 03.12가입인사 드립니다댓글 3
-
등록일 04.15가입 인사드립니다.댓글 8
-
등록일 04.09가입인사.댓글 4
최근글
-
등록일 01:30
-
등록일 06.30
새댓글
-
등록자 박박박 등록일 06.29
-
등록자 박박박 등록일 06.29
-
등록자 박박박 등록일 06.29
-
등록자 하이에나 등록일 06.29
-
등록자 요리왕쿠킹 등록일 06.29
오늘의 홈 현황
QR코드
☞ QR코드 스캔은 kakao앱 자체 QR코드

